Getting started
Why Orrery
Orrery is for people who love the freedom of a modular host like AUM — any synth, any effect, routed and mixed exactly the way they like — but who have found it frustrating to take an idea all the way to a finished song there. The sounds were never the problem; holding a whole arrangement together across a handful of separate sequencers, loopers and recorders was.
Orrery lets you build a song from the first idea to the last bar without compromise and without complication, and without giving up the mixer you like or the sounds you have already shaped. It takes the place of the many clever tools that each do one part of the job well but are hard to orchestrate together: one song, shared by every plugin, from the arrangement to the live grid to the recordings.
Because the song lives apart from the audio mix, Orrery also opens up ways of working a traditional DAW can't offer. The set of instruments in your session can play an entirely new song with a few taps; the same song can be played by a different set of instruments. Your session becomes an orchestra, and songs become scores you put in front of it.
How it fits together
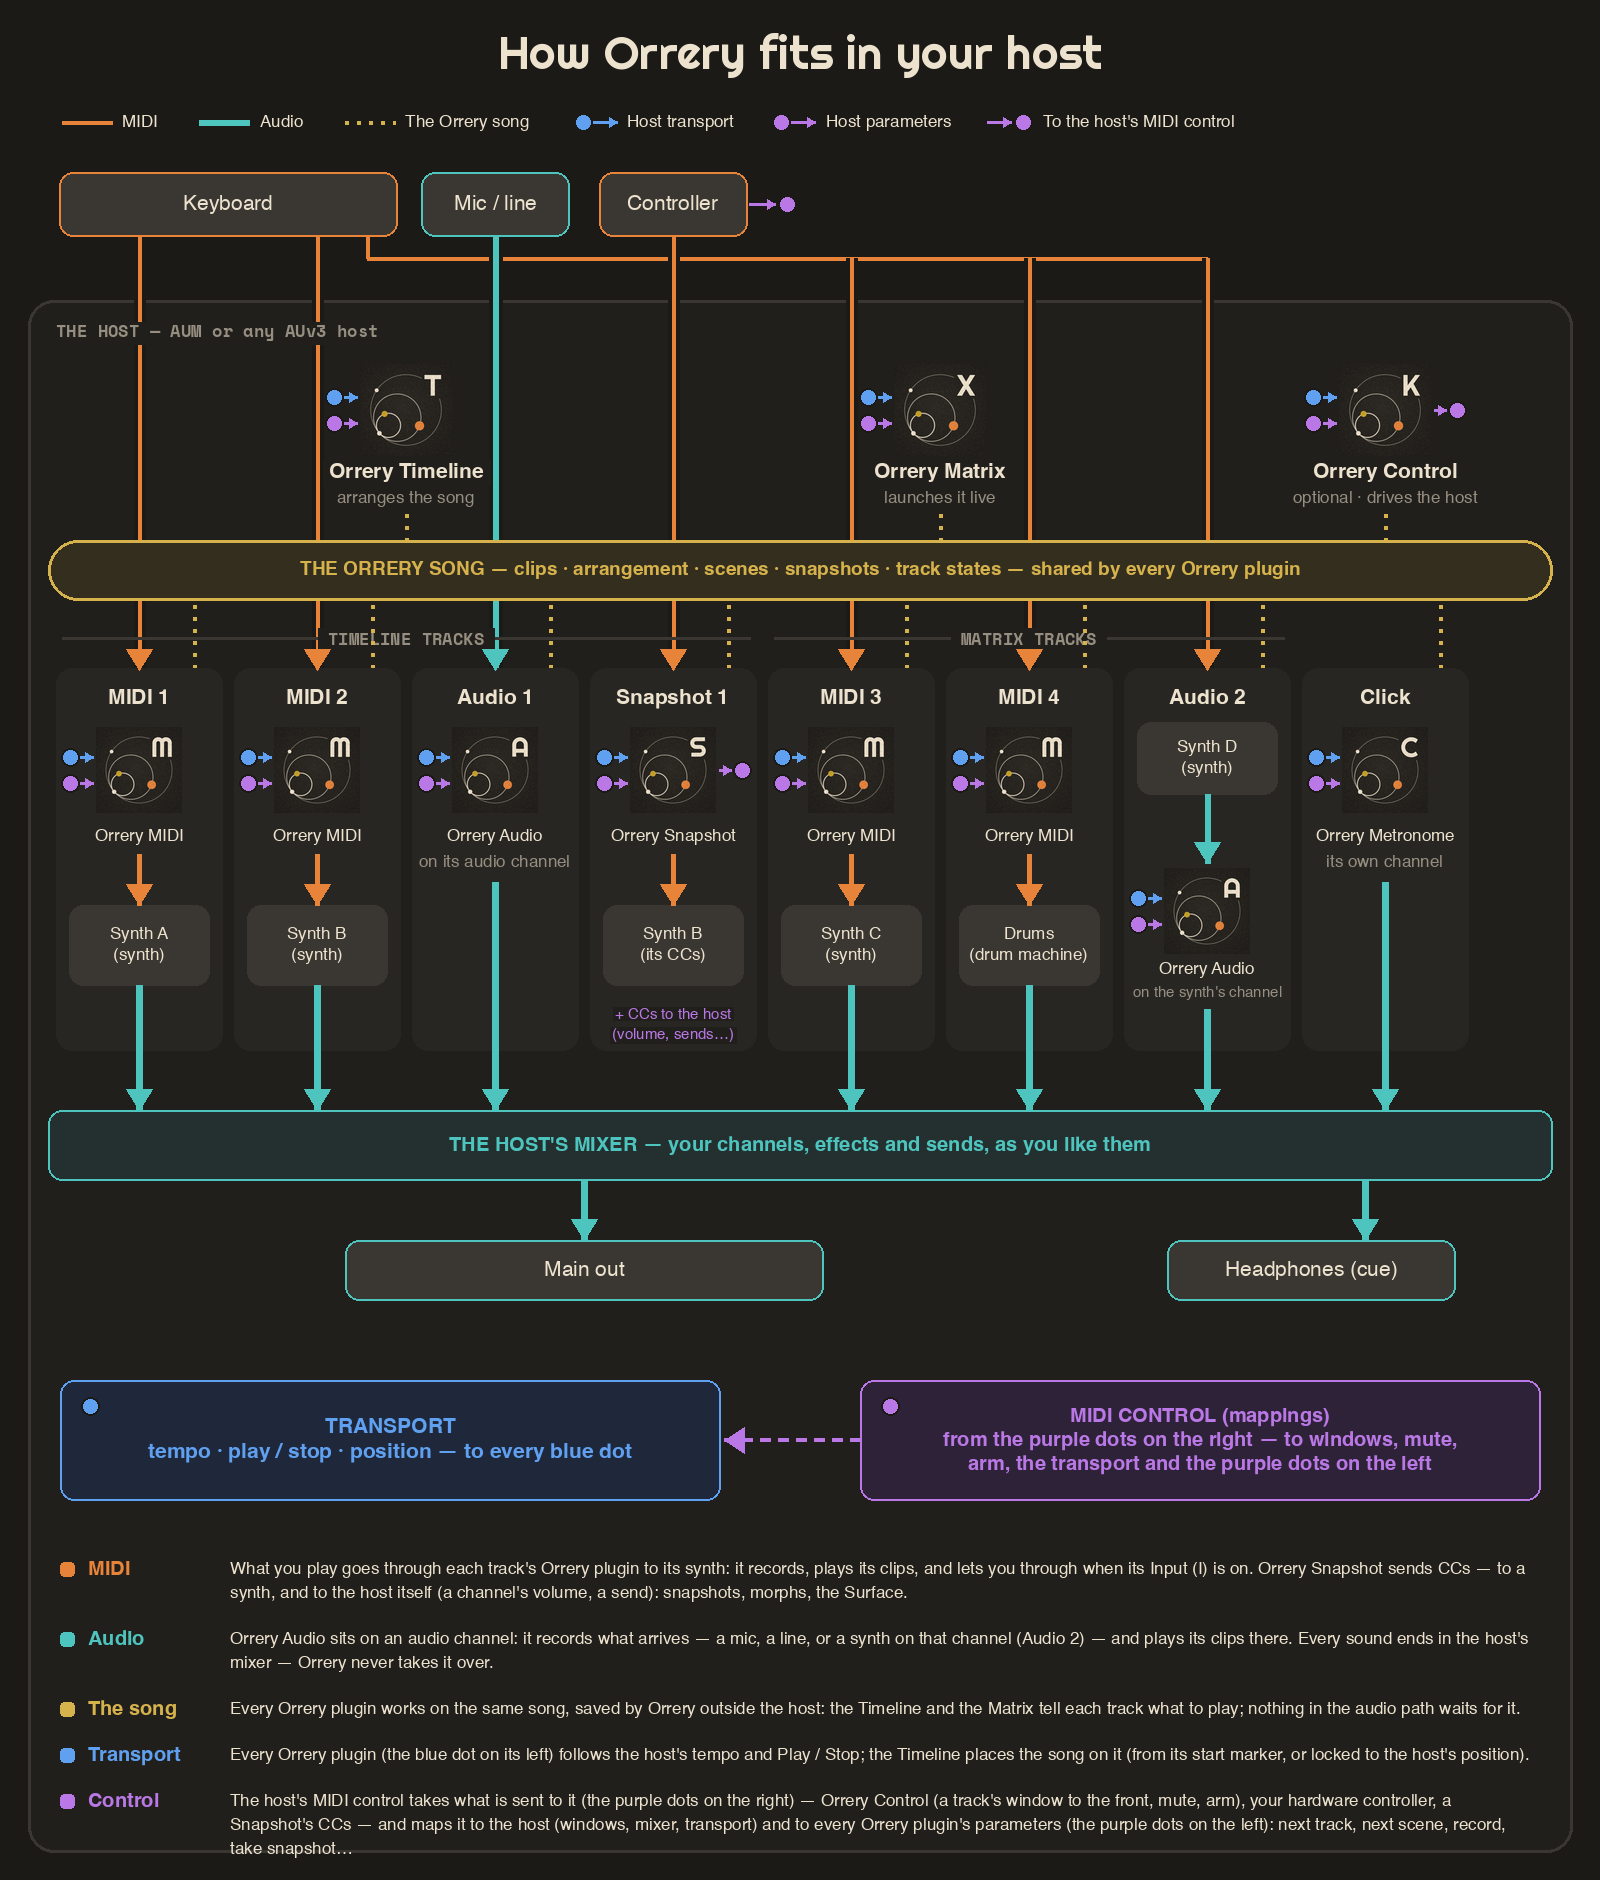
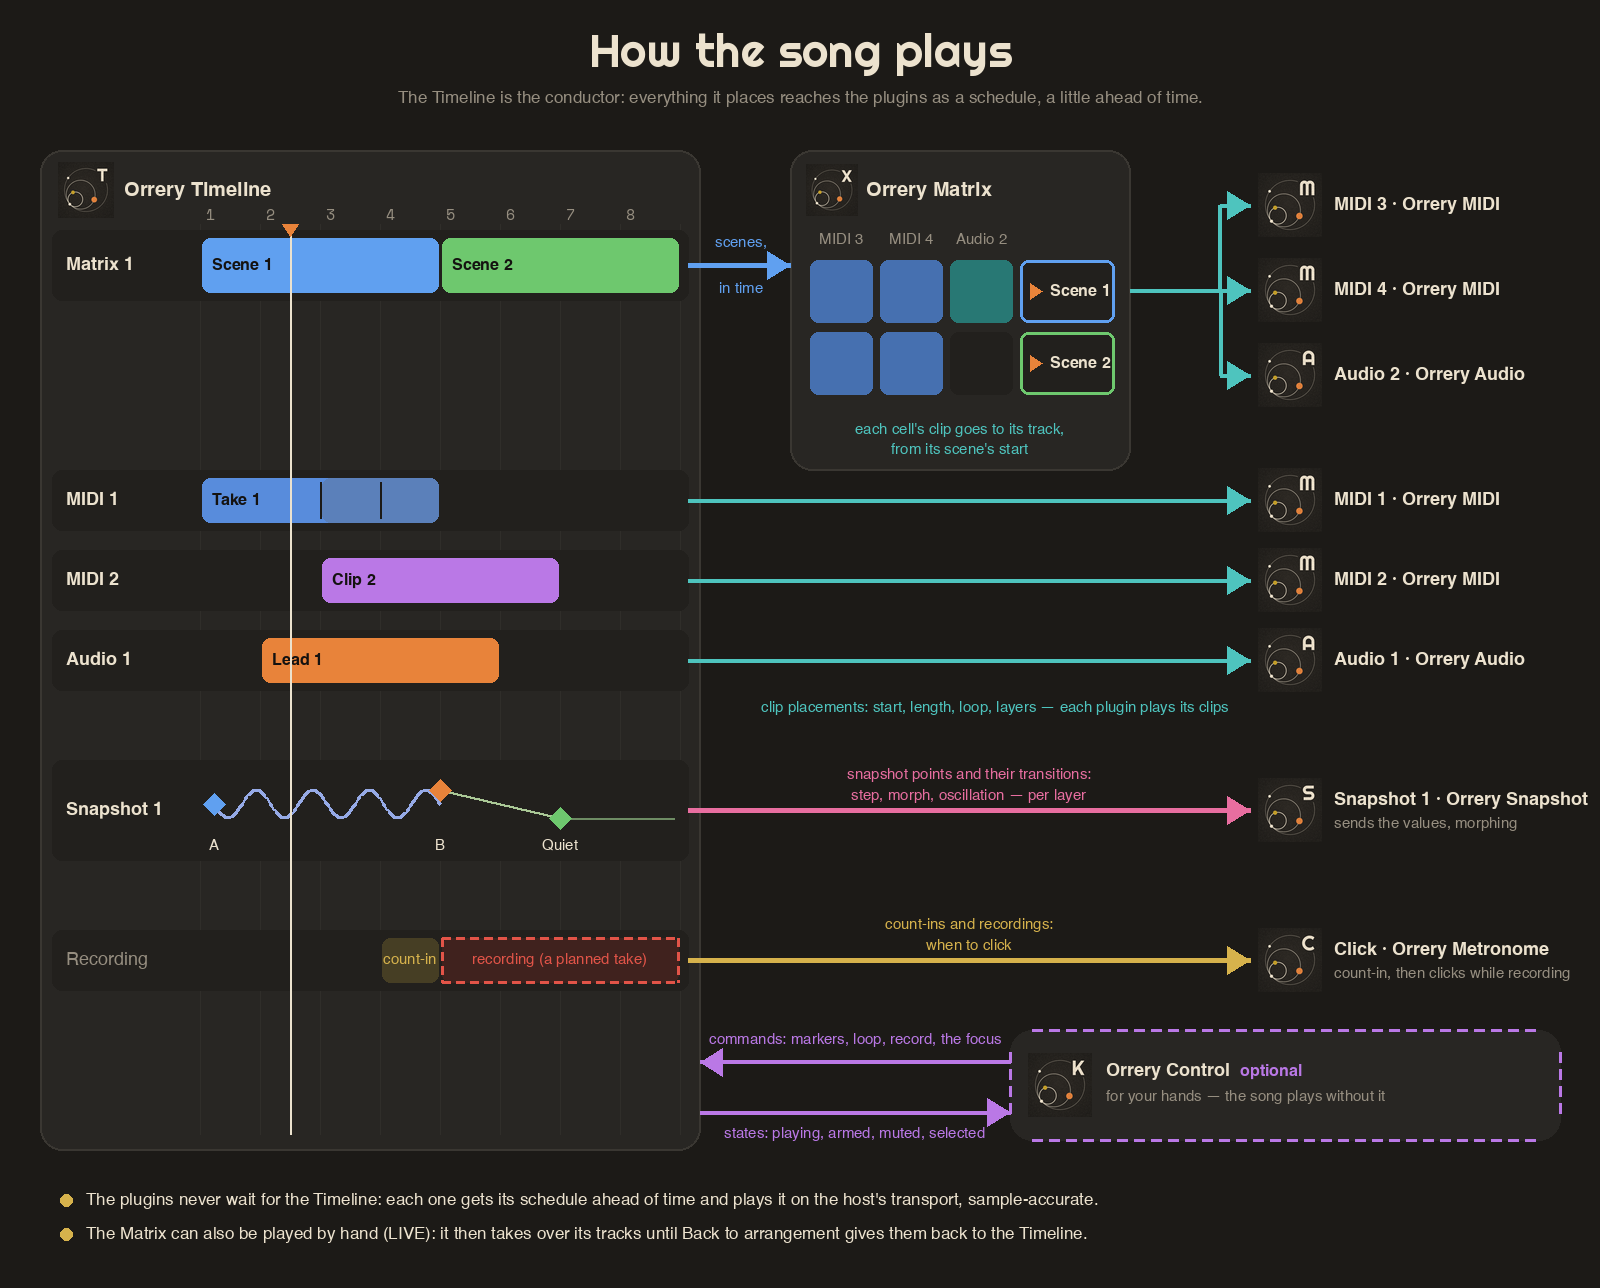
Orrery is a set of Audio Unit (AUv3) plugins that work together on one song. Every Orrery plugin you load in your host's session joins the same song: the Timeline arranges it, the Matrix launches it live, one plugin per track records and plays that track, and Orrery Control drives the host.
Click a picture to see it full size.
The plugins
- Orrery Timeline (MIDI processor): the arrangement — lanes, clips, loops, markers, recordings.
- Orrery Matrix (MIDI processor): a grid of clips and scenes to launch live.
- Orrery MIDI (MIDI processor, in front of a synth): records and plays the MIDI clips of one track.
- Orrery Audio (effect, on an audio channel): records and plays the audio clips of one track.
- Orrery Snapshot (MIDI processor, between a controller and a synth): stores controller states and morphs between them.
- Orrery Metronome (instrument): a click that knows about count-ins and recordings.
- Orrery Control (MIDI processor) — optional: the session's controller — transport, track states and windows, for the host. The song plays without it; it's there to shape how you interact with the session.
Quickest start
With AUM: in the app's Templates tab, export a ready-made session to AUM and open it there. Then open the Timeline and create a song.
By hand, in any host
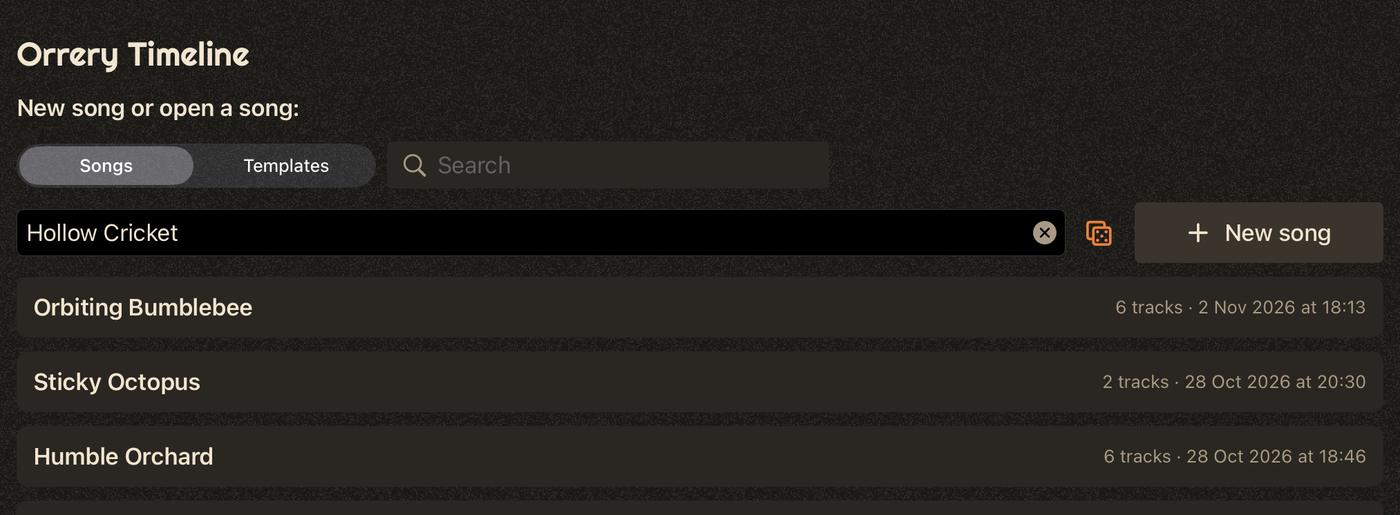
- Load an Orrery Timeline as a MIDI processor. It asks for a song: type a name (the dice proposes one) and New song, or pick one — Songs / Templates switches the list, the search field filters it.
- Add tracks with the + in the Timeline's top-left corner (Audio, MIDI or Snapshot).
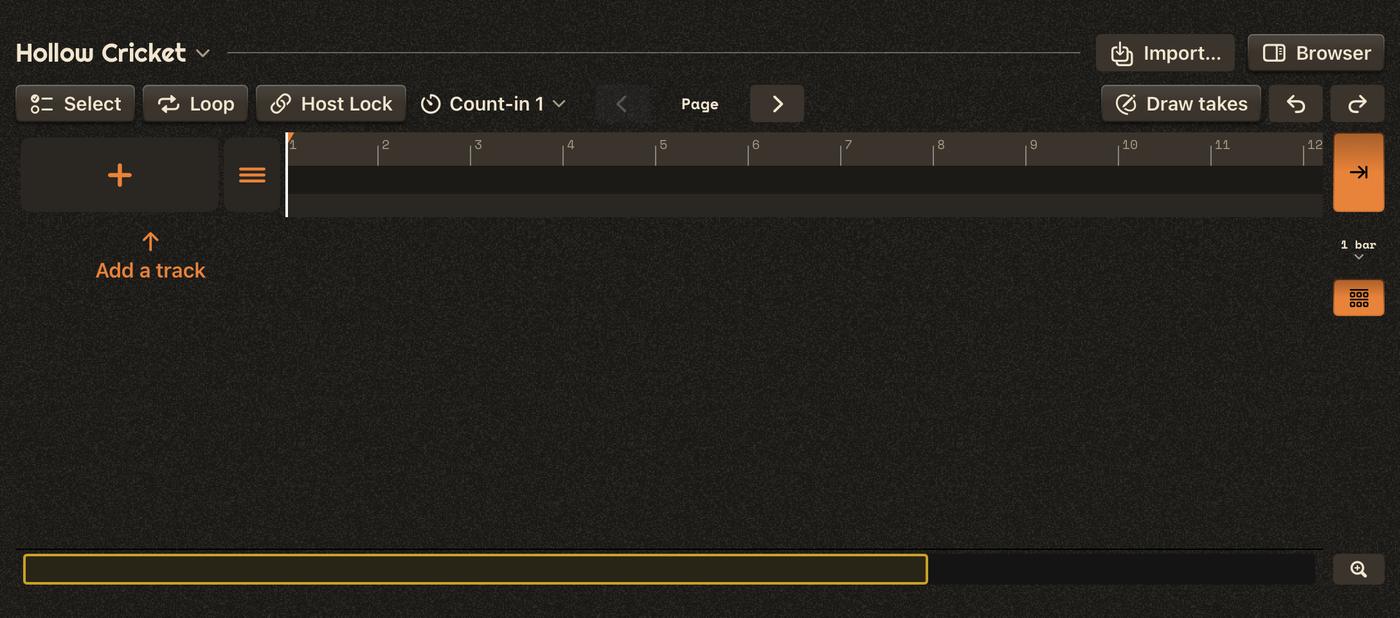
- For each track, load the plugin it asks for: an Orrery MIDI in front of a synth, an Orrery Audio on an audio channel, an Orrery Snapshot between a controller and a synth. Each one joins its track by itself.
- Until everything is loaded, the rebuild helper at the top of the Timeline lists what is still missing, in the order to load it.
Press Play in the host: the Timeline follows its transport and tempo.
Every plugin's header
Each track plugin shows the same header: the track (tap its name for its menu: rename, Track settings…, change track, change song, templates…), the views (Now Playing, Clips or Snapshots, Editor…), the link status (green: linked to the Timeline or a Matrix) and the MIDI / audio activity lights.


Keys everywhere
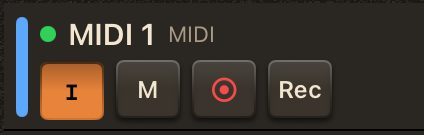
Every track shows the same keys in the same order — I (Input), M (mute), ● (arm), Rec — on its lane, its Matrix channel, its Control card and in its plugin.
- I — Input: orange when what you play reaches the track's synth (MIDI) or is heard (audio). An armed track always hears its input. One keyboard, many synths: turn the others' Input off.
- ● arms the track for recording; Rec records freely, from the next step of the Timeline's grid.
 Timeline
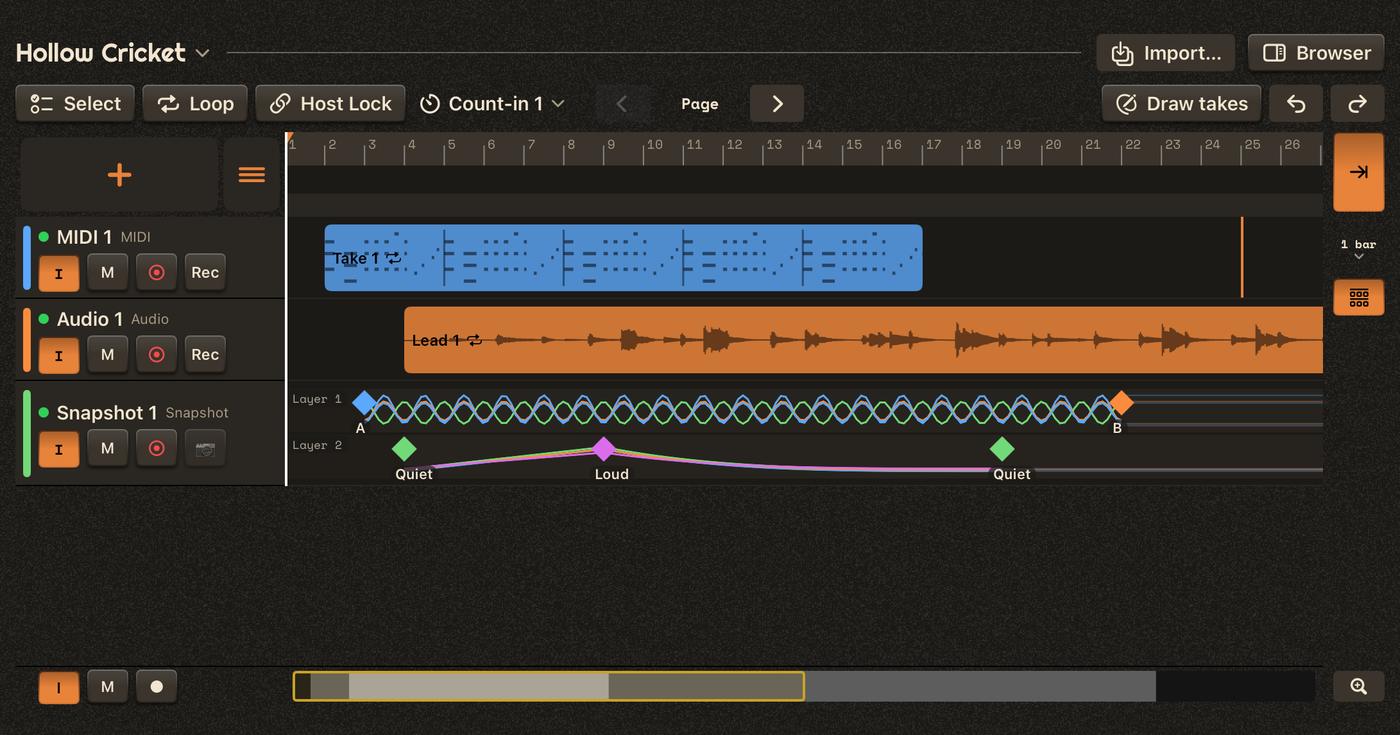
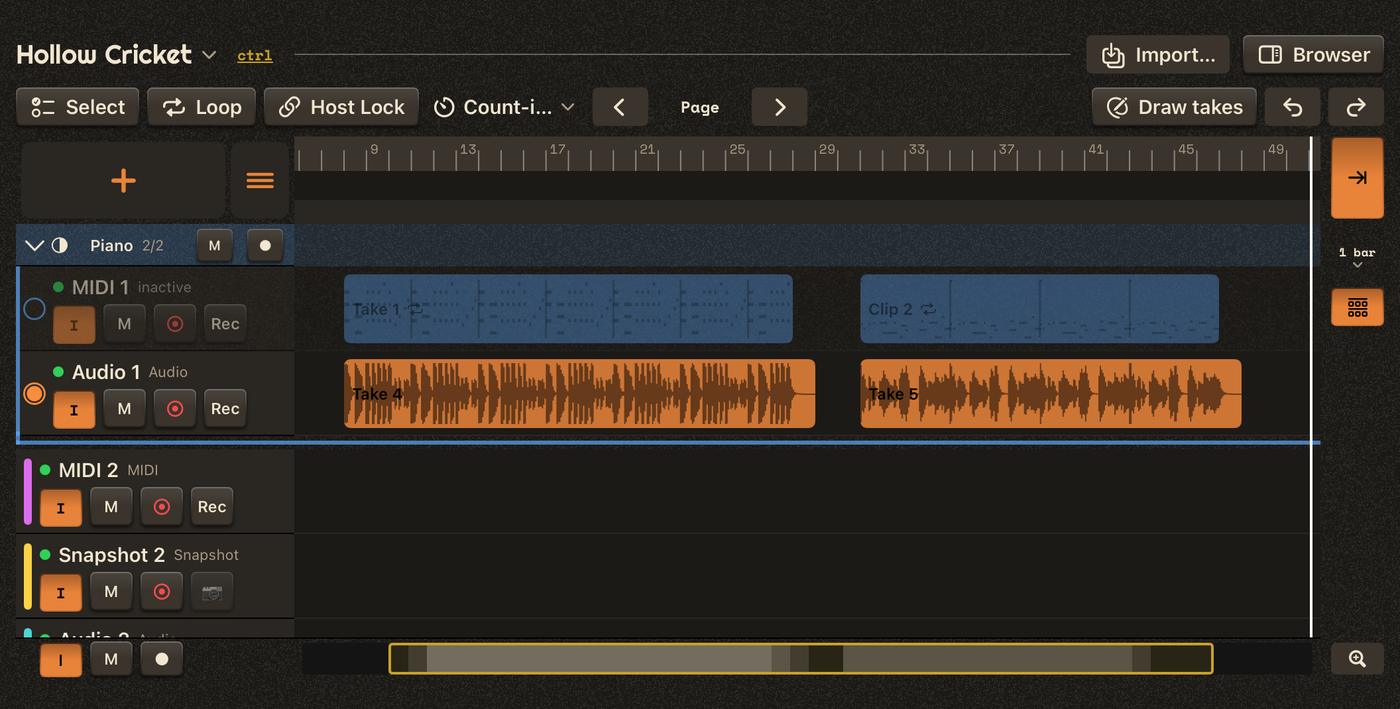
The Timeline is the song's arrangement: one lane per track (and per Matrix), the clips placed along it in bars.
The header and tools
The song's name opens the song panel (settings, change song, templates, export, Trash, versions). With an Orrery Control on the song, a small ctrl asks it to show itself. On the right: Import… (material from another song) and Browser (clips, snapshots, scenes and tracks to drag onto the lanes).

The tool row holds Select, Loop (on / off), the sync mode (Host Lock), the Count-in, the fast scroller ◀ Page ▶, Draw takes (planned recordings) and Undo / Redo.

- Fast scroller: ◀ and ▶ move the view by a page, a bar, a marker, a clip or to the loop's ends — tap the mode in the middle to change it. It moves the view only, not the song.
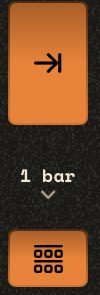
- On the right of the lanes: Follow (the view follows the playhead), the grid (1 bar, 1 beat…) and Snap.
Lanes and tracks
The + in the top-left corner adds a track (Audio, MIDI or Snapshot) or a group; ≡ next to it arranges the lanes — drag a lane by its grip to move it, in or out of a group.
Each lane header shows the track's name, color and kind, whether its plugin is loaded (green dot), then I, M, ● and Rec. A snapshot lane has a camera key instead of Rec: it takes a snapshot at the playhead.
- Tap a track's name: with Orrery Control, its plugin's window comes to the front (the name flashes).
- Long-press a lane header for the track menu: rename, color, Track settings…, duplicate as a reference, print to another track, remove.
- Long-press an empty spot of a lane for its menu: place a clip there, plan a recording, take a snapshot there.
The bottom bar
Under the lanes: I · M · ● for every track at once (lit while any is on — a tap turns it off everywhere, or, when none is, on everywhere), then the song navigator: the whole song, its busy parts shaded, the marker sticks, and the part on screen framed in gold. Drag the frame to scroll; tap to glide there; pinch it, or hold Zoom and swipe, to zoom.

Placements
A clip on a lane is a placement. The clip itself belongs to its track; a placement says where and how it plays.
- Tap to select it; drag it to move it; drag its edges to trim its start or change its length — past the clip's end, a looped clip repeats.
- Long-press for its menu: loop, gain and crossfade (audio), play mode (exclusive or layer), split, duplicate, Remove from the lane (the clip stays in the track) or Delete the clip.
- Drag clips from the Browser onto their track's lane.
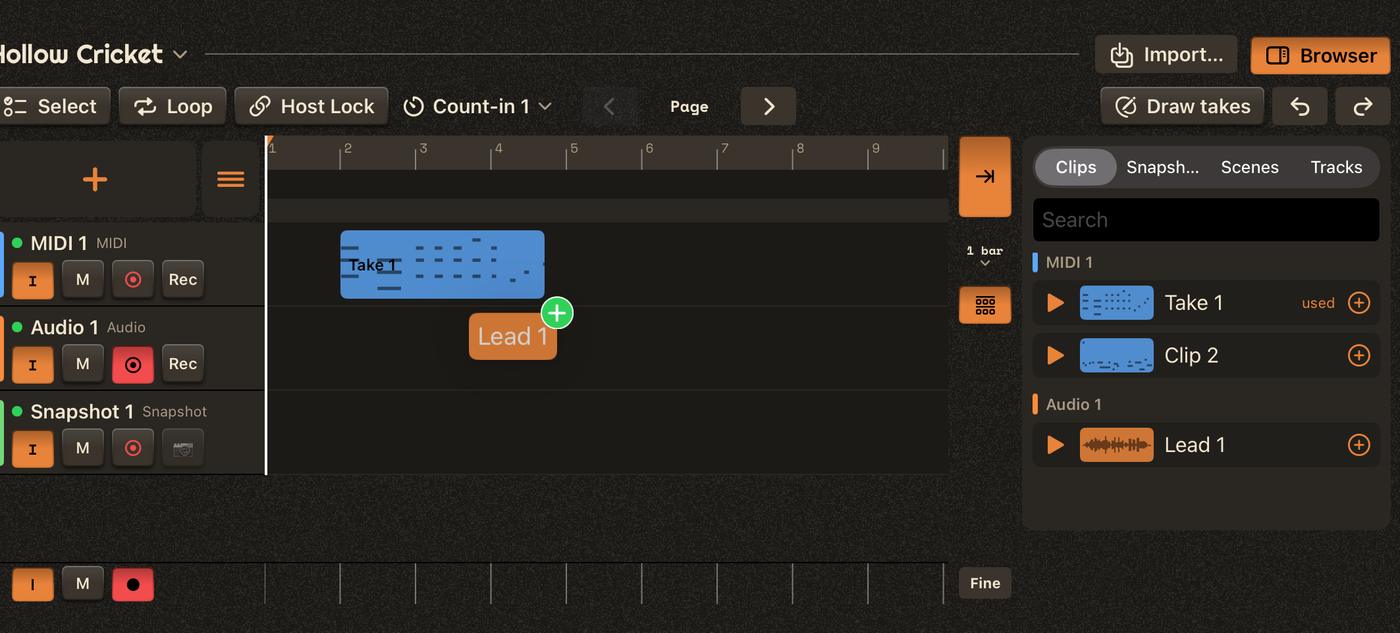
Selecting and moving
Select turns the tool row into the selection's tools: Copy, Paste (at the start marker), Duplicate, Delete, Rename… and Set ▸ (loop, play mode).
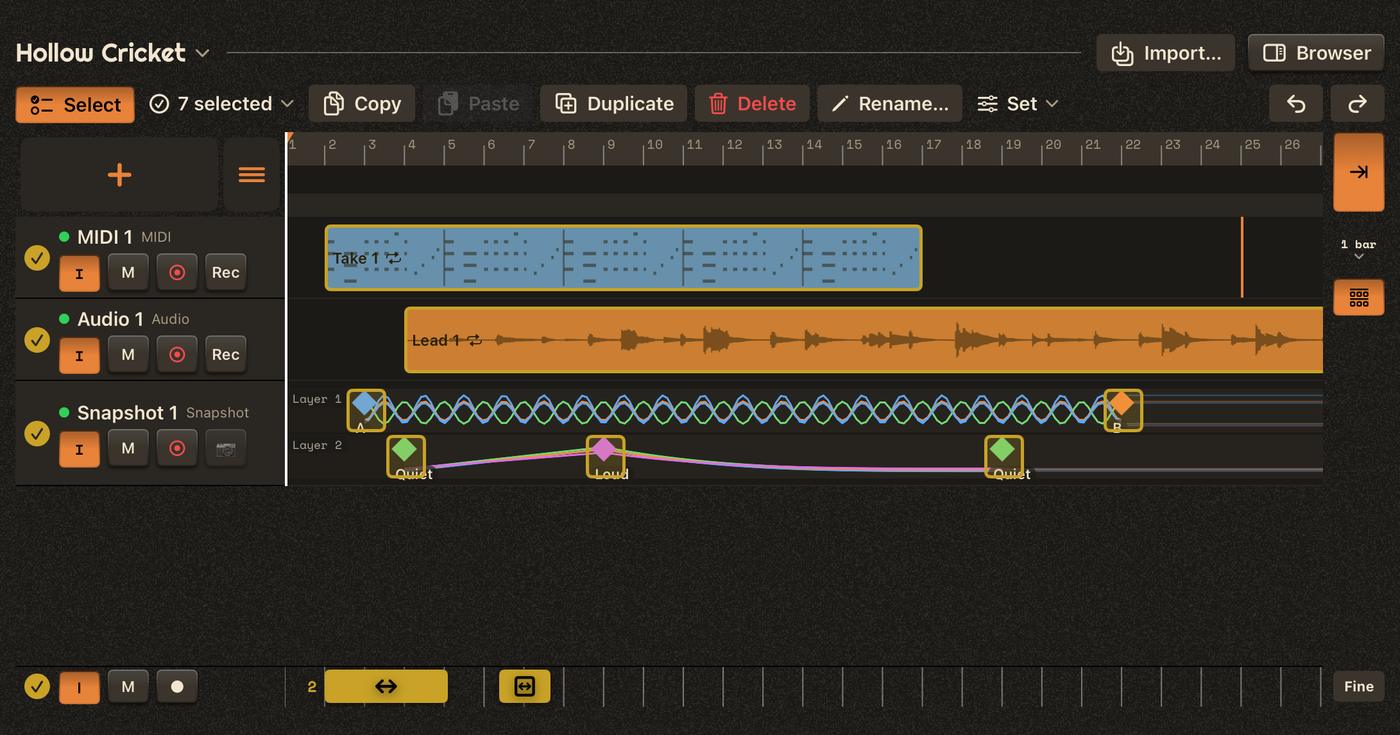

- Tap placements (clips, snapshots, scenes, planned takes) to add or remove them; long-press then drag a rectangle over lanes and bars — a whole verse at once. A lane's check circle takes all of it; the one in the bottom bar takes everything, or nothing.
- A tap on a snapshot transition selects its two snapshots.
- At the bottom, the gold handle moves the selection in time — it snaps to the grid; hold Fine for free moves. Drag it to an edge of the lanes and hold: the page scrolls, faster the further you go. Tap the handle for Type a bar…, To the start marker or To a marker…; the bar number on its left shows where it lands.
- The length key next to it stretches or shrinks the selection (the starts stay). Tap it for Set…, Add… or Multiply… (a number pad with quick values), or Until the start marker, a marker or the next clip.

- Snapshots selected with clips (or two and more on their own) spread with the length key: their places scale from the selection's start — a morph follows its clip's length.
- A snapshot moved onto another one of the same lane and layer replaces it (Undo brings it back). Clips may overlap: they become layers.
Editing a clip
Double-tap a placement: its editor opens under the lane — the piano roll, the waveform or the snapshot. A single tap on another placement moves the editor there. Drag the grip under the editor to resize it; double-tap the grip to fit it.
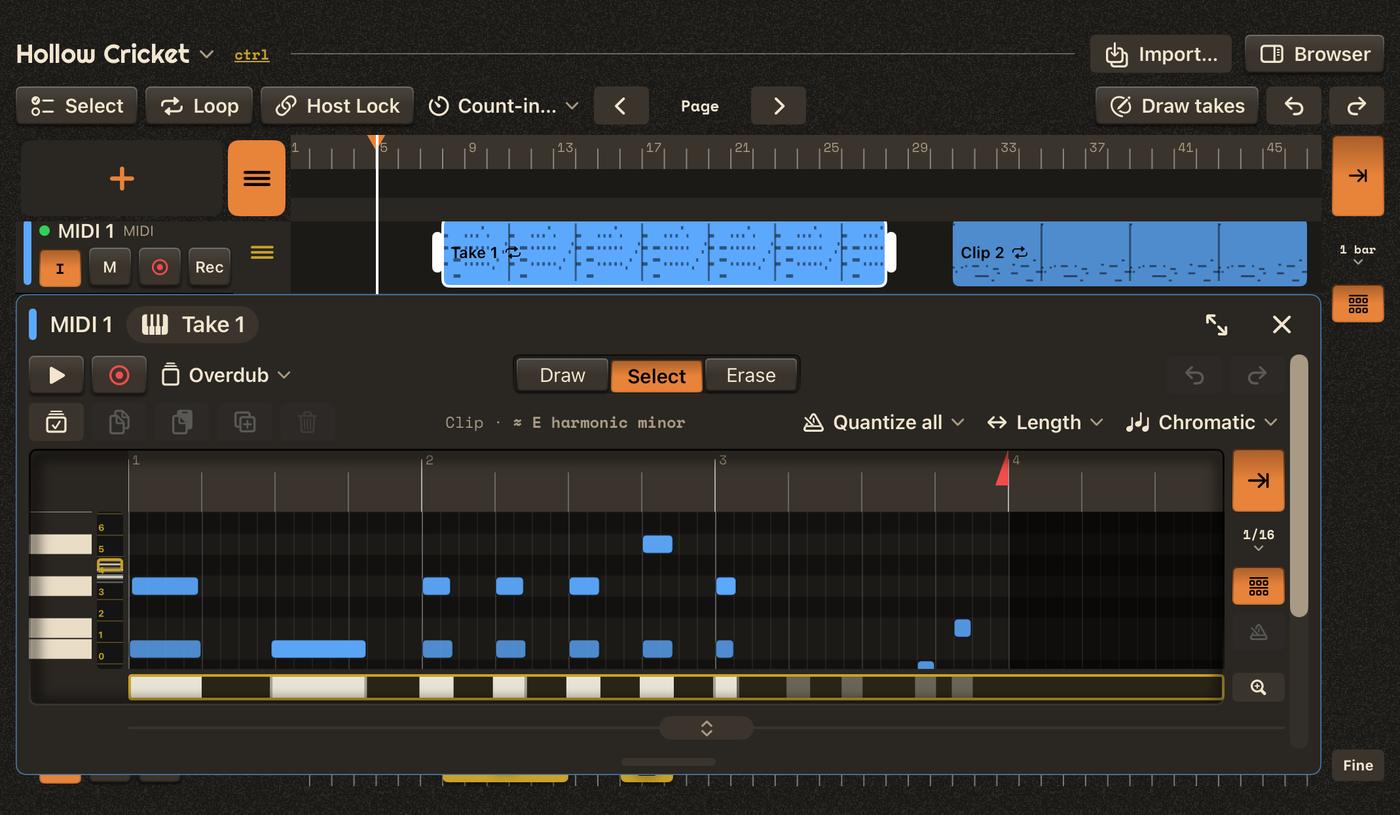
The Maximize key (next to ✕) gives the editor the whole window; the same key brings the lanes back. The editor reopens the way you left it, maximized or not.
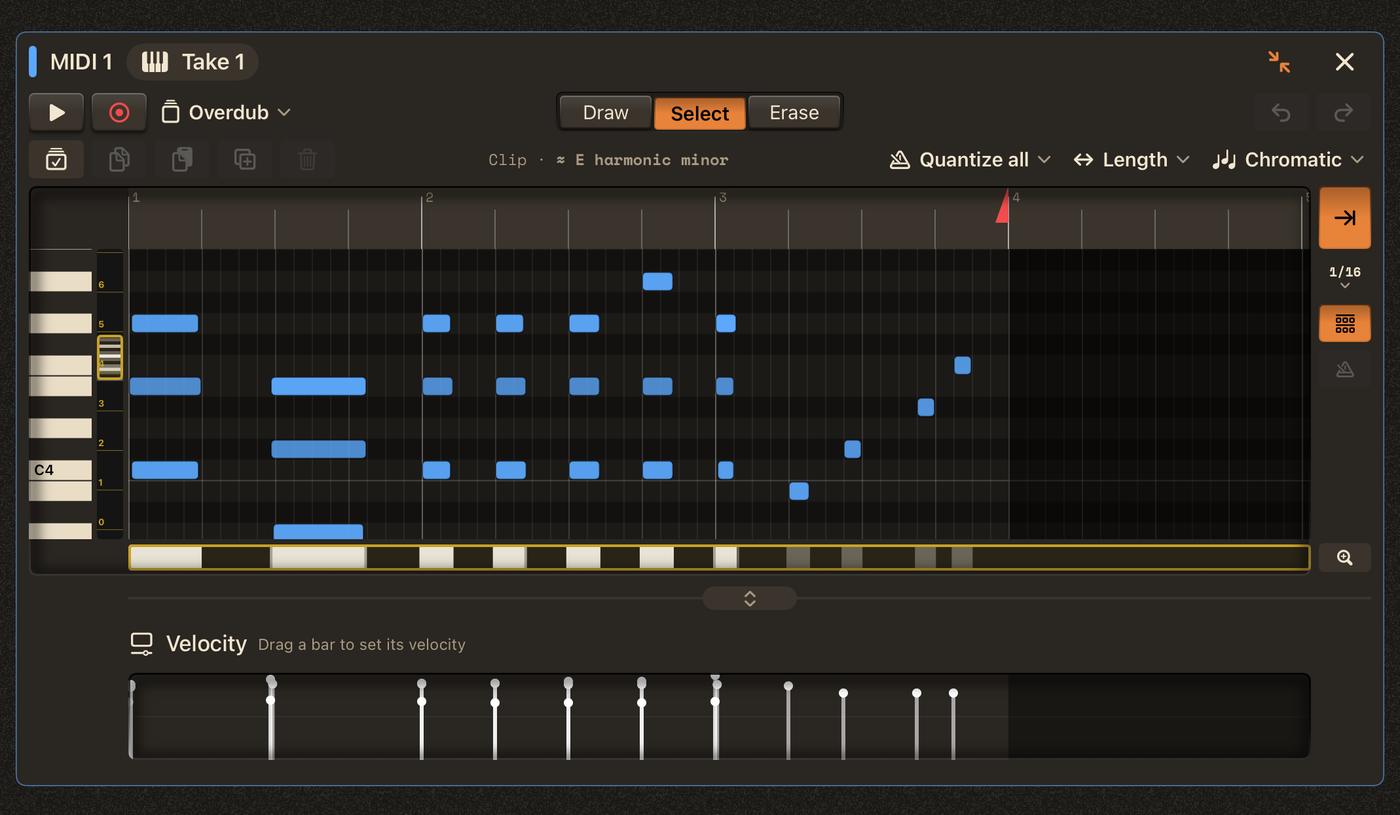
Loop, start marker and markers
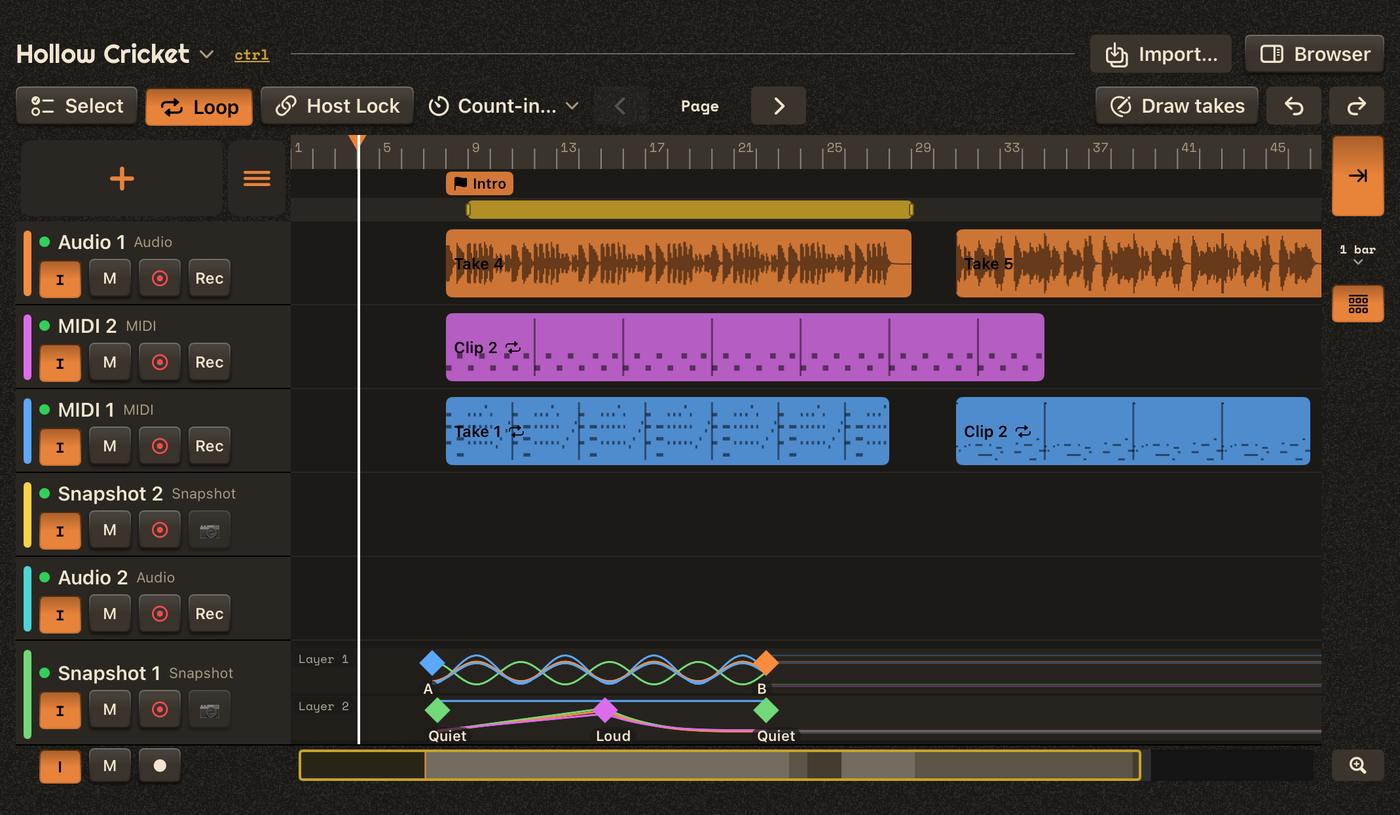

- Tap the ruler to set the start marker (where the song starts when the host starts from the beginning).
- Loop: on the loop strip under the markers, long-press then swipe to draw it; drag its grips to resize it; tap it to turn it on or off; long-press inside then drag to move it.
- Markers name the song's sections (Intro, Verse…). While playing, tap one to jump there at the next step of the grid.
Recording
- Free: arm a lane (●), then Rec records from the next step of the grid (the 1 bar key on the right: a bar, a beat…; off: almost at once) until you stop it — and stops on the grid too.
- Planned takes: turn on Draw takes and draw record ranges on armed lanes (or long-press a lane) — all of them record in one pass when the song plays, after a count-in. Planned takes behave like clips: select, move, resize or delete them, in Select mode too.
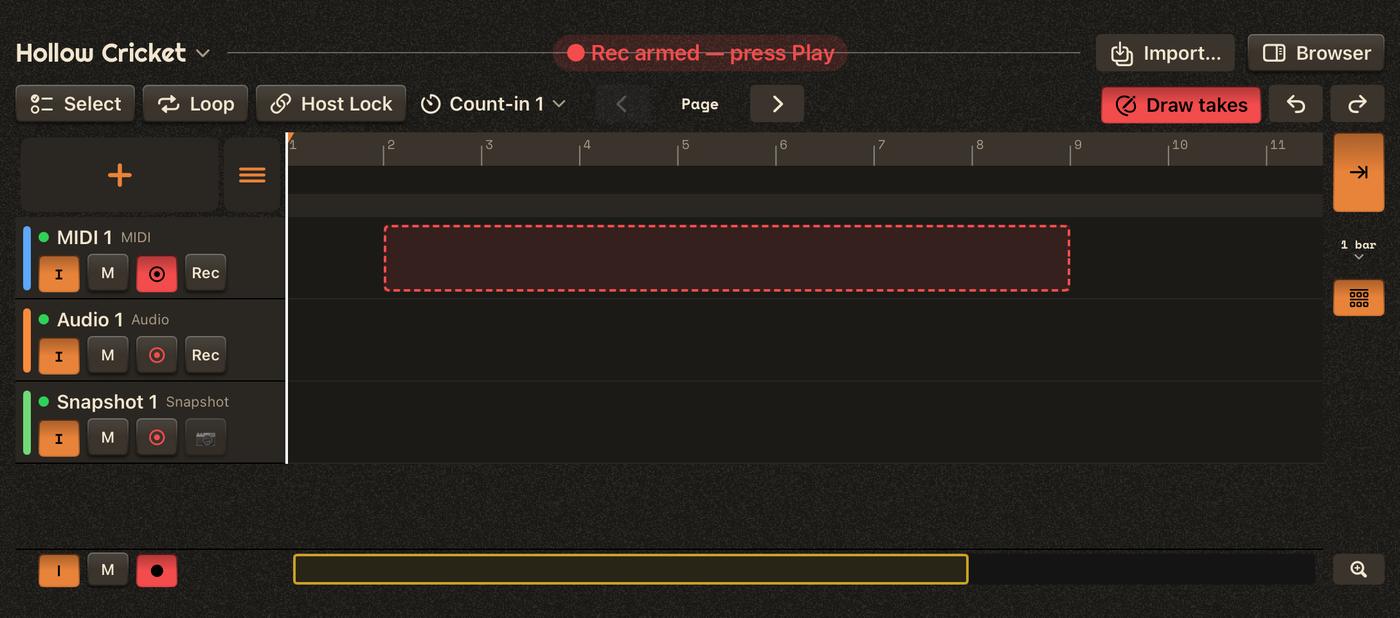
- Recording over a placement that plays makes a new layer: the lane grows a row for it.
Snapshot lanes
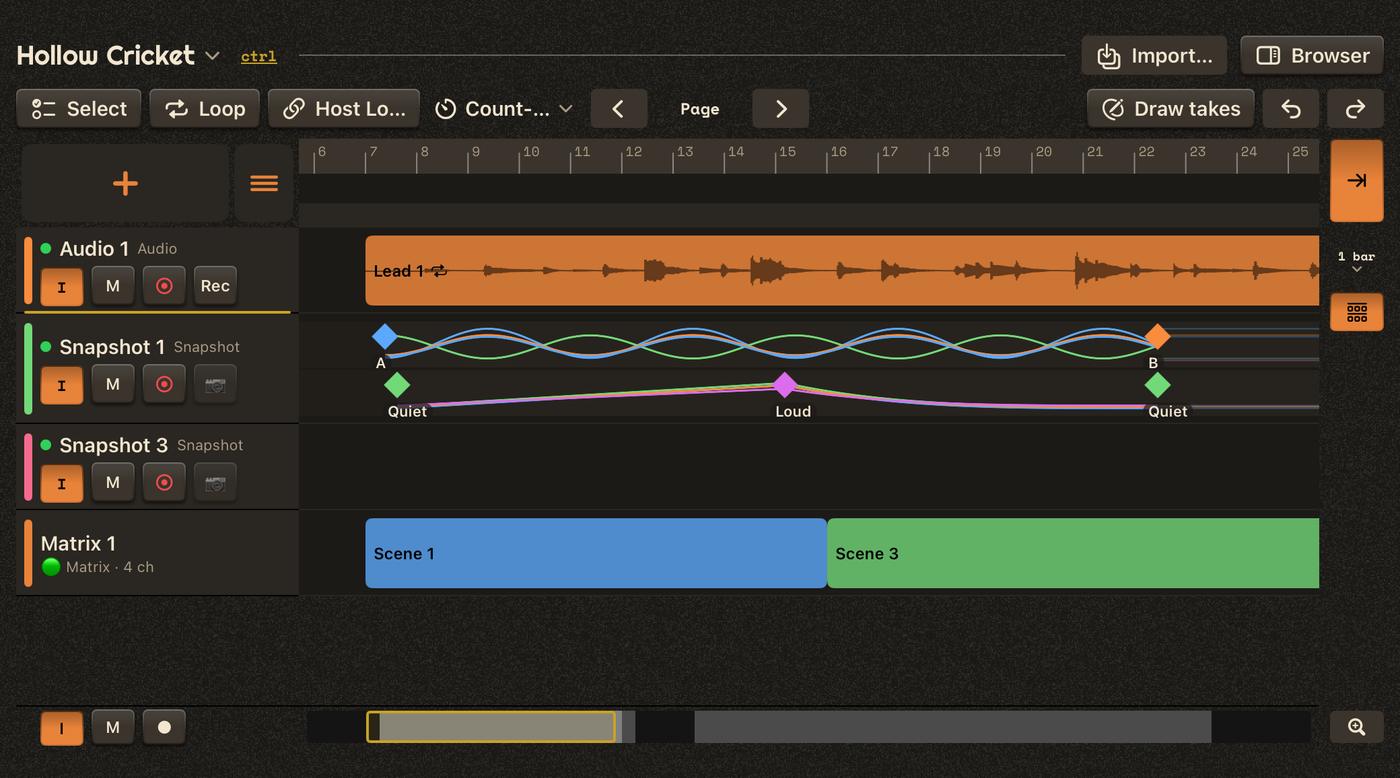
Snapshots are points (diamonds) on the lane. The span after each one holds its transition to the next one — tap the span to edit it: step, linear, exponential, or an oscillation (sine, triangle, saw, square) with its period. The last snapshot holds its values to the end.

Layers give groups of CCs their own timing: one layer morphs the filter over 8 bars while another moves the volume. Add one from the lane's menu (Layers ▸). When two layers hold the same CC, the upper one wins.
Matrices on the Timeline
A Matrix has its own lane: the scenes it plays, placed like clips. Under the Timeline, the Matrix follows them; launching by hand there takes over until Back to arrangement.
Groups
+ ▸ Group… gathers lanes: a header with collapse, mute and arm for all, and a line closing the group. Drag over the group's header strip to select a bar range of all its lanes, then copy, paste, duplicate, move or delete it as one block.
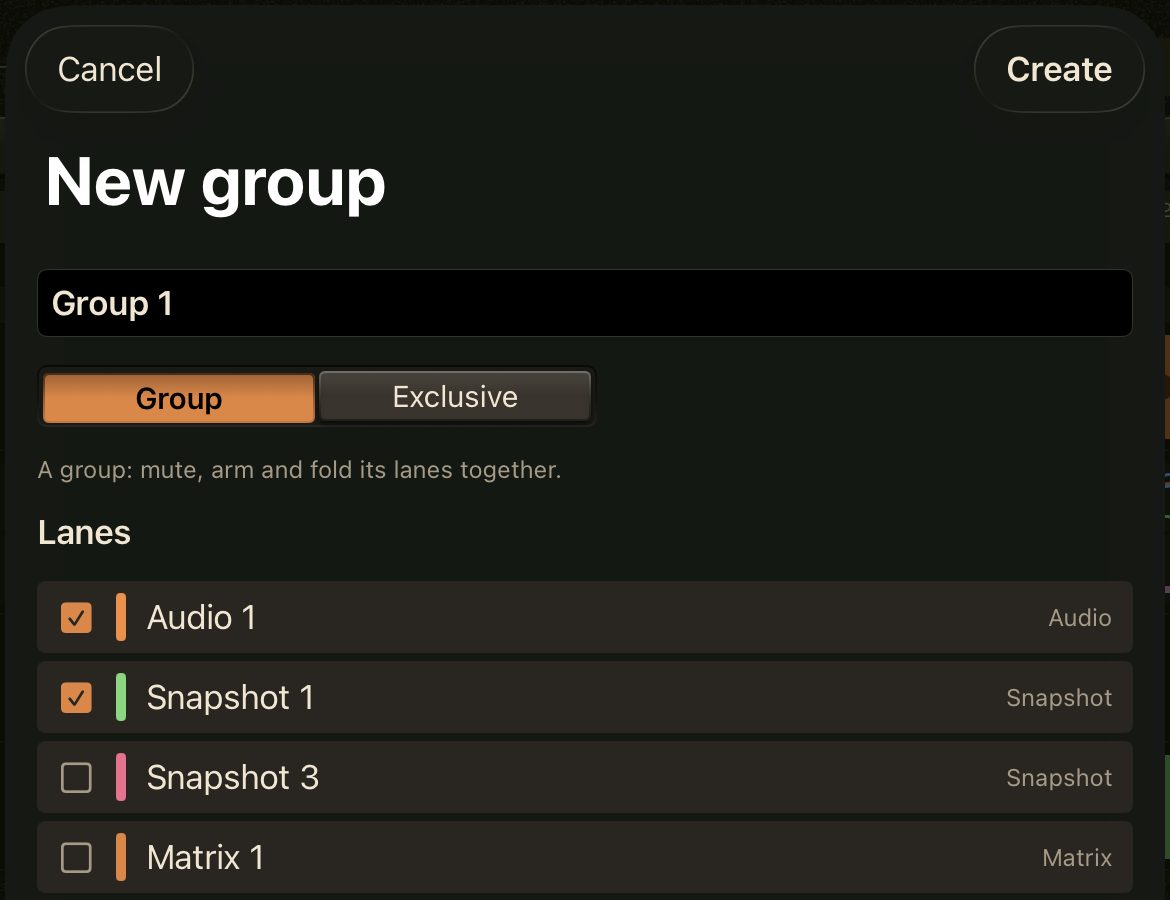
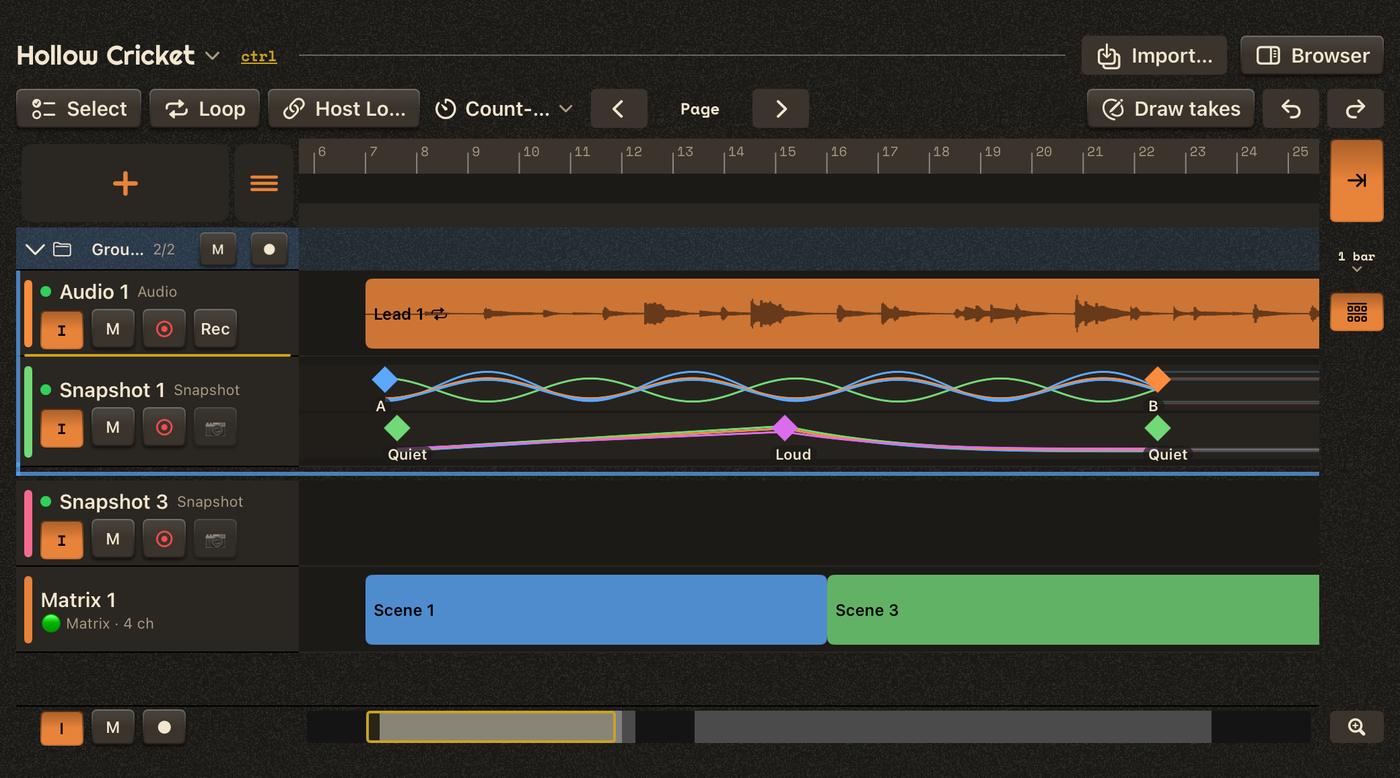
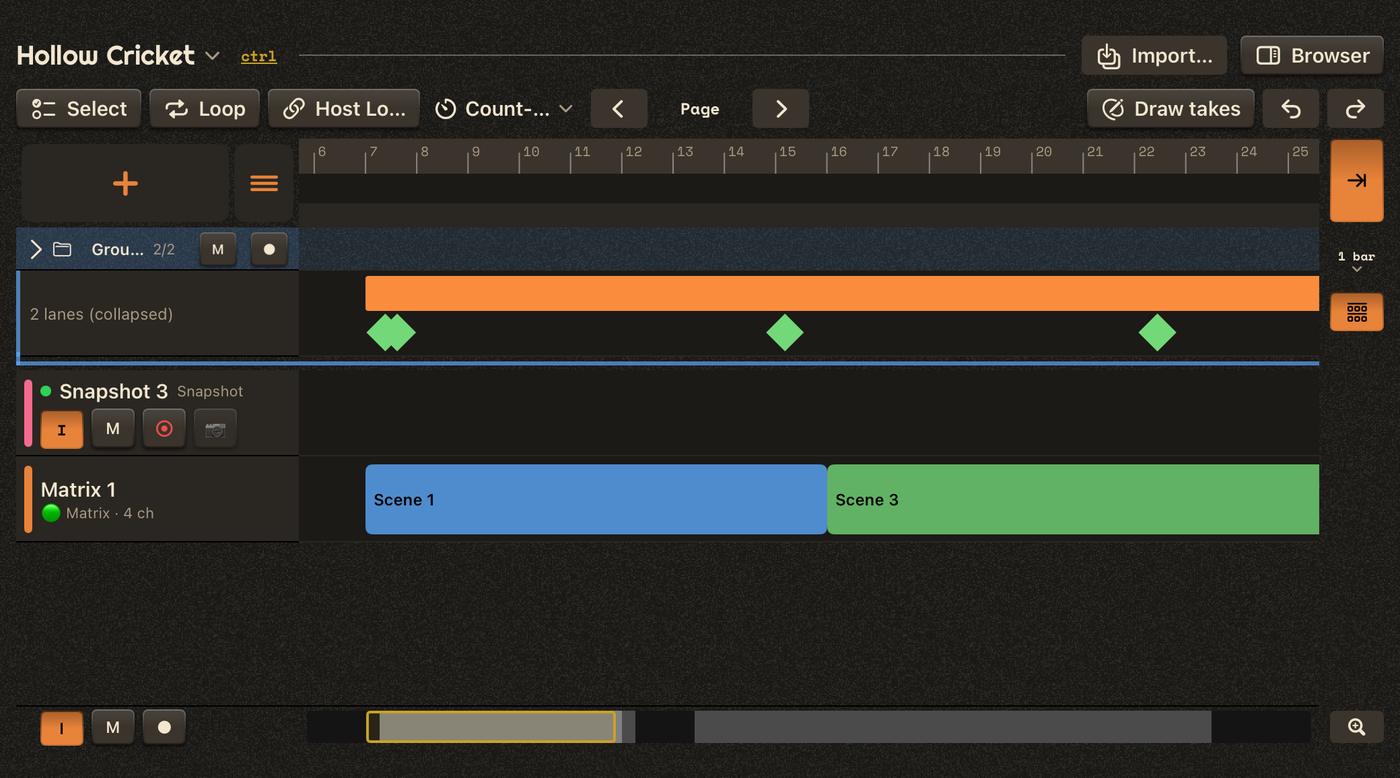
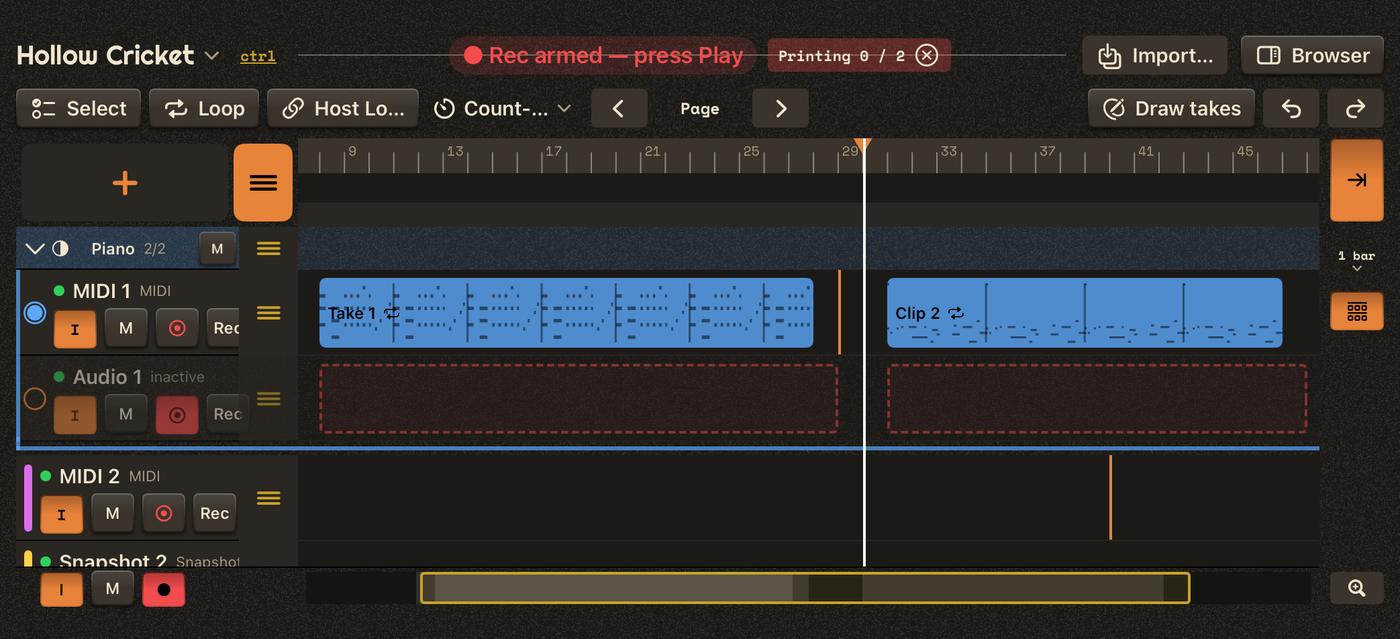
An exclusive group plays only its active member — e.g. a MIDI track and its printed audio. Collapsed, it shows only that member's lane.
Print to track
Print to… (lane menu) records a track's sound onto an audio track: a MIDI track through its synth, or audio through its effects — with a tail, looped placements rendered in full or not, and a switch to the printed track at the end.
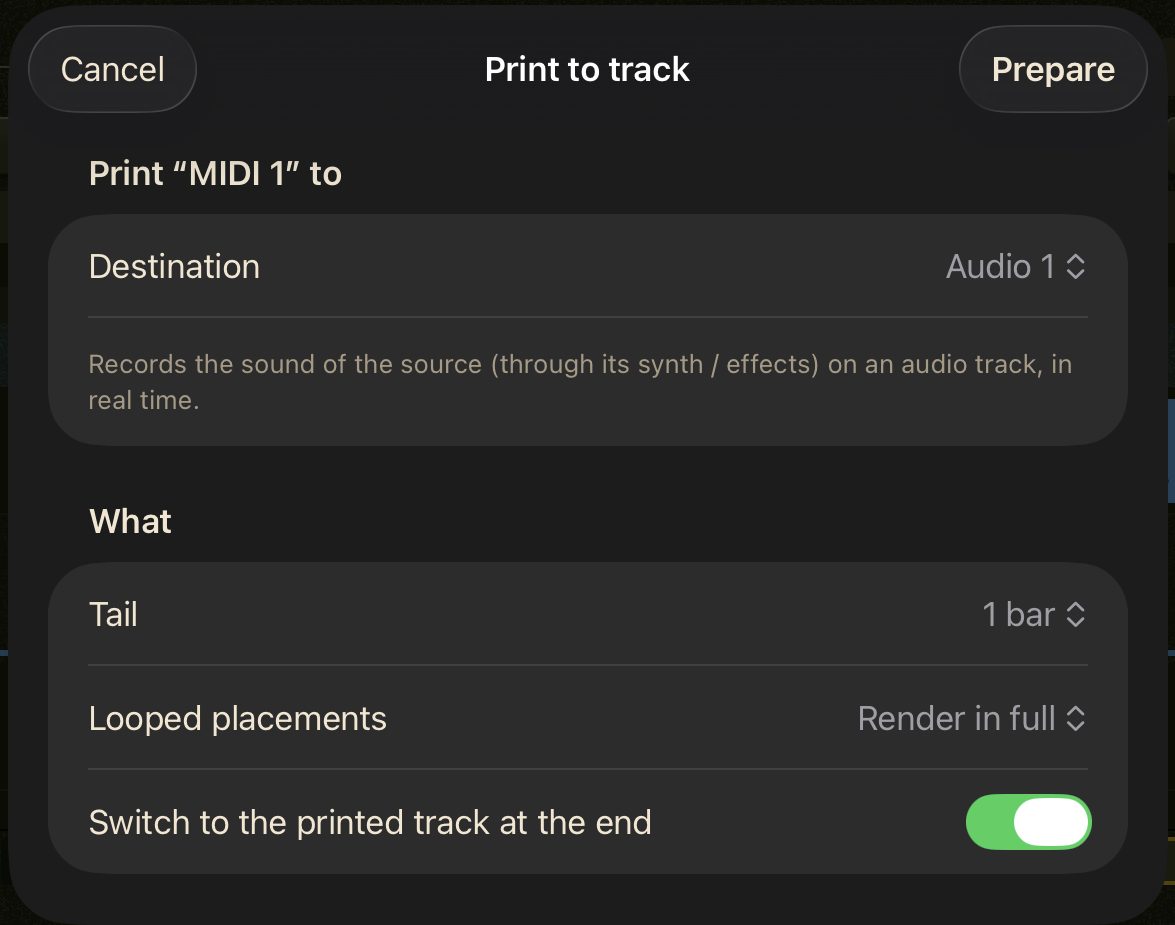
Orrery plans the recordings (Printing 0 / 2 shows the progress); press Play in the host and it records them in real time. The two tracks then form an exclusive group with the printed one active.
Claim tracks
Same orchestra, another song: when plugins of this host session sit on another song, the warning menu at the top offers Claim tracks… — each plugin on the left, the track it takes in this song on the right (same name first, same kind always; change it, make a New track, or Leave it), and the song's tracks still without a plugin below.
Import from another song
Import… brings tracks, groups, Matrices or a range of bars from another song — as a copy, or as a read-only reference (🔗) that follows its source. An automatic version is saved before, and the import is a single Undo step.
 Matrix
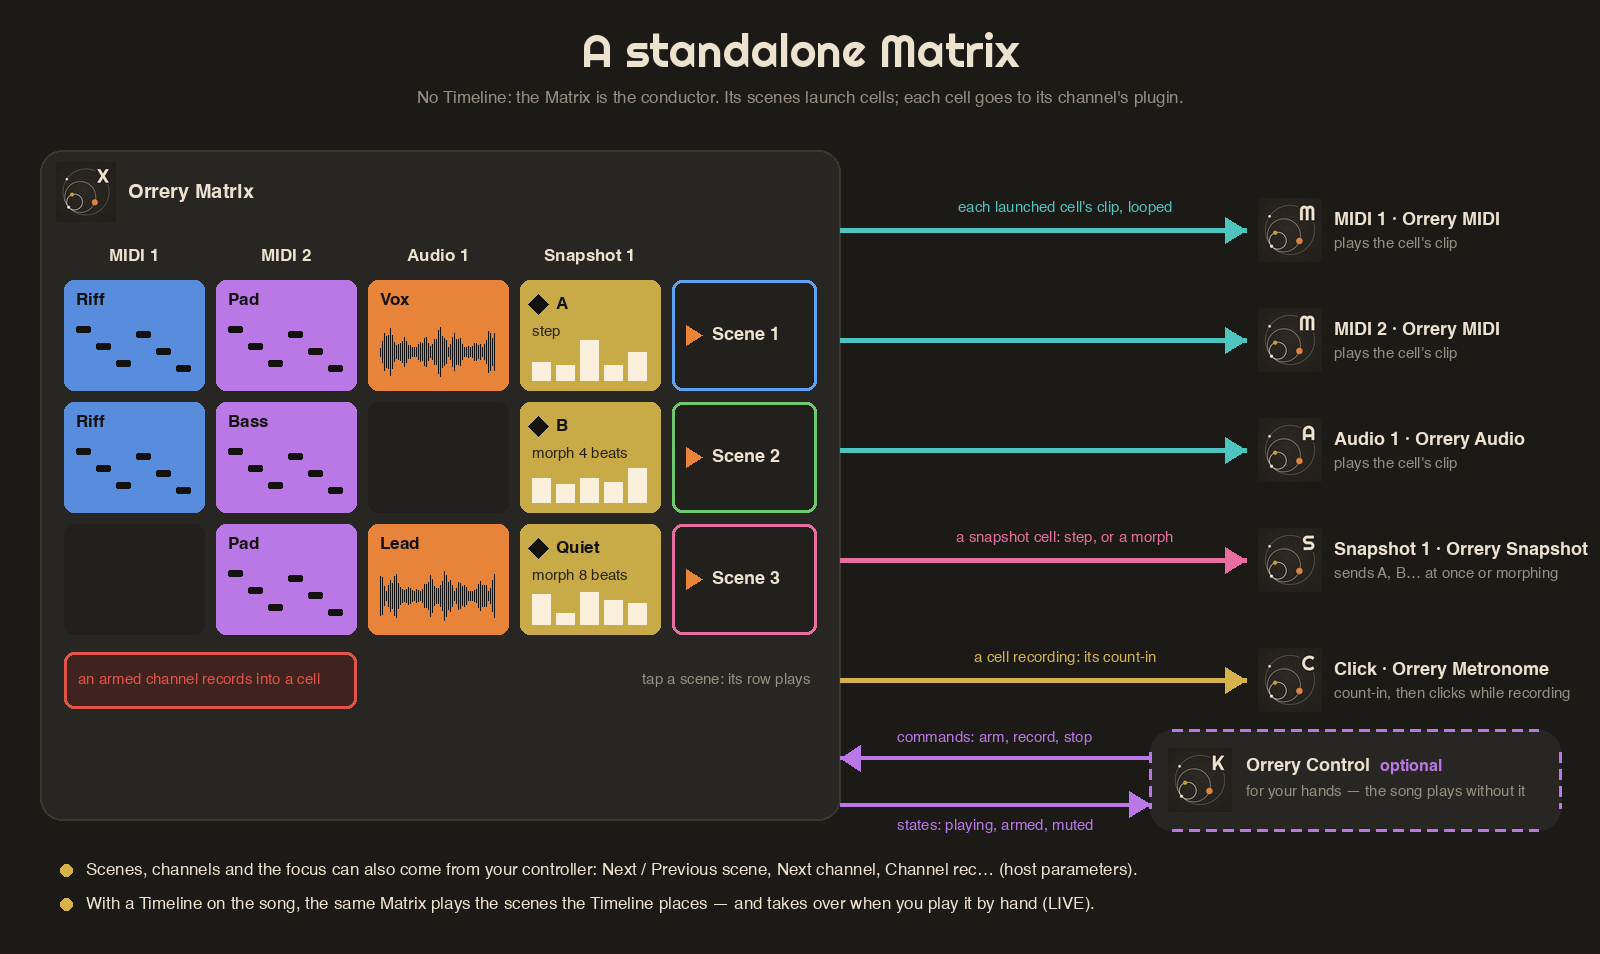
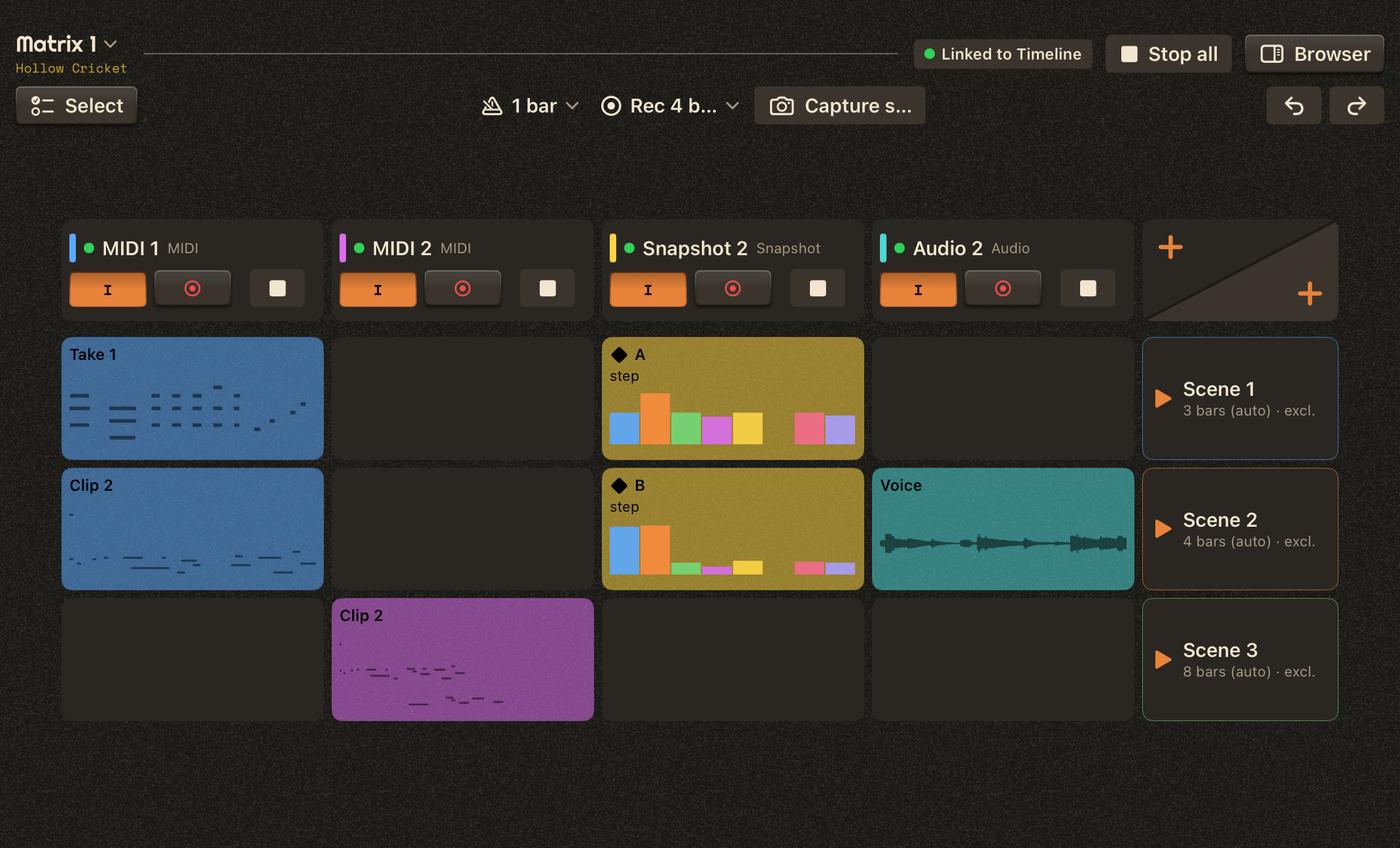
The Matrix launches clips live. Each channel (column) plays one track; each scene (row) is a set of cells launched together.
The header and tools
The header shows the link to the Timeline (LIVE and Back to arrangement when you've taken over), Stop all and the Browser. The tool row holds Select, the launch quantization (1 bar), the recording length (Rec 4 bars, or Free) and Capture scene (a new scene from what is playing).


Channels and scenes
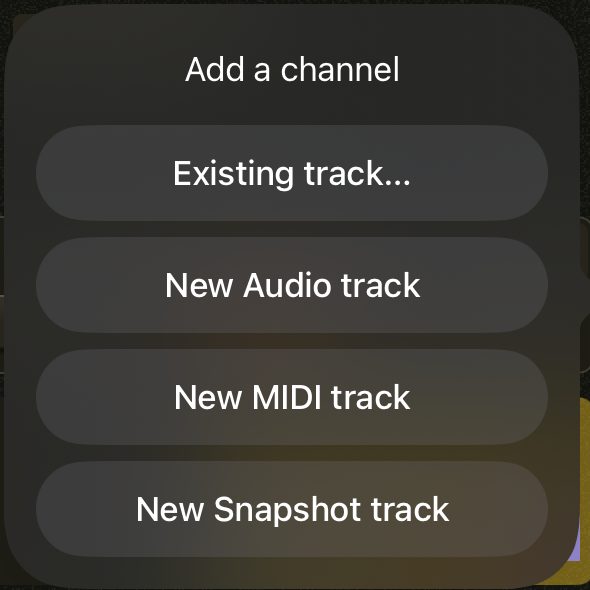
The corner of the grid adds a channel (upper half) or a scene (lower half). A new channel takes an Existing track… or a new Audio, MIDI or Snapshot track.
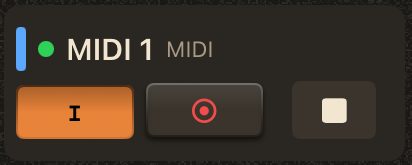
A channel header shows its track, whether its plugin is loaded, I (its Input), ● (arm) and ■ (stop this channel). Tap the track's name: with Orrery Control, its plugin's window comes to the front; hold it for the channel menu (bind, Track settings…, remove).
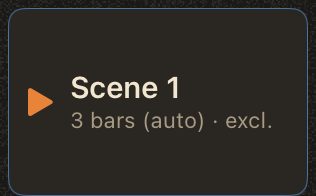
The scene button on the right launches the whole row; it shows the scene's length and play mode. Hold it for its menu: rename, play mode, length, color, duplicate, insert, move, delete.
Cells
Each cell shows its content: the clip's notes or waveform, a snapshot's values.
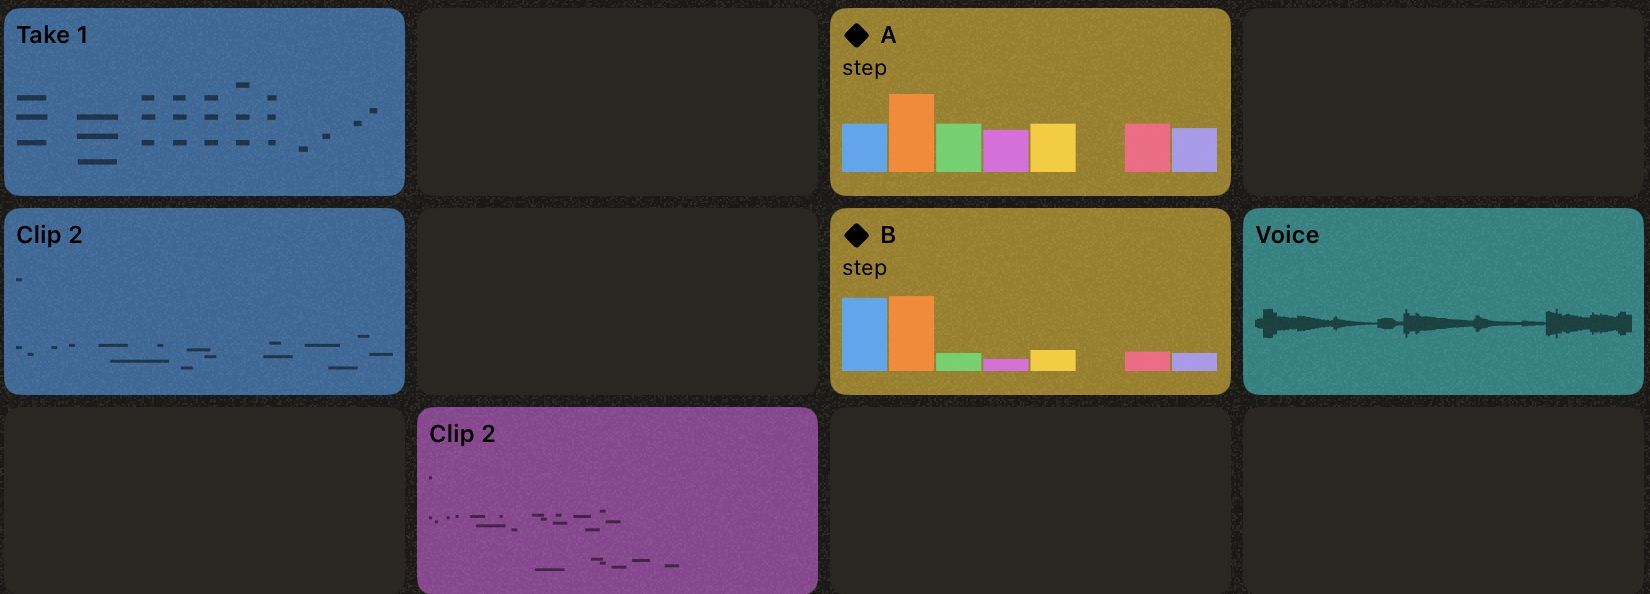
- Tap a cell to launch it at the next quantization point; tap the playing cell to stop it; an empty cell stops its channel.
- On an armed channel, tap an empty cell to record a new clip into it; it loops right away. Tap a playing cell while armed to overdub a layer onto it.
- Long-press a cell for its menu: assign a clip, loop, launch quantization, crossfade (audio), copy to another scene, edit, clear.
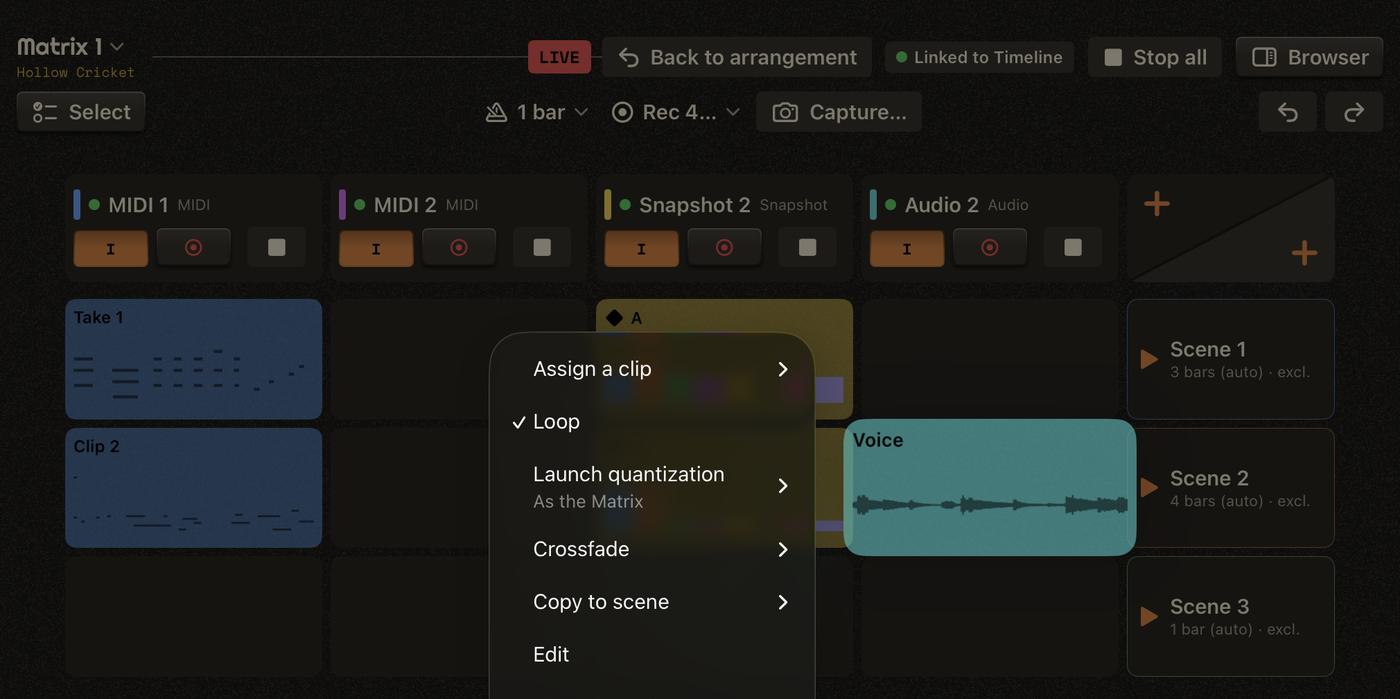
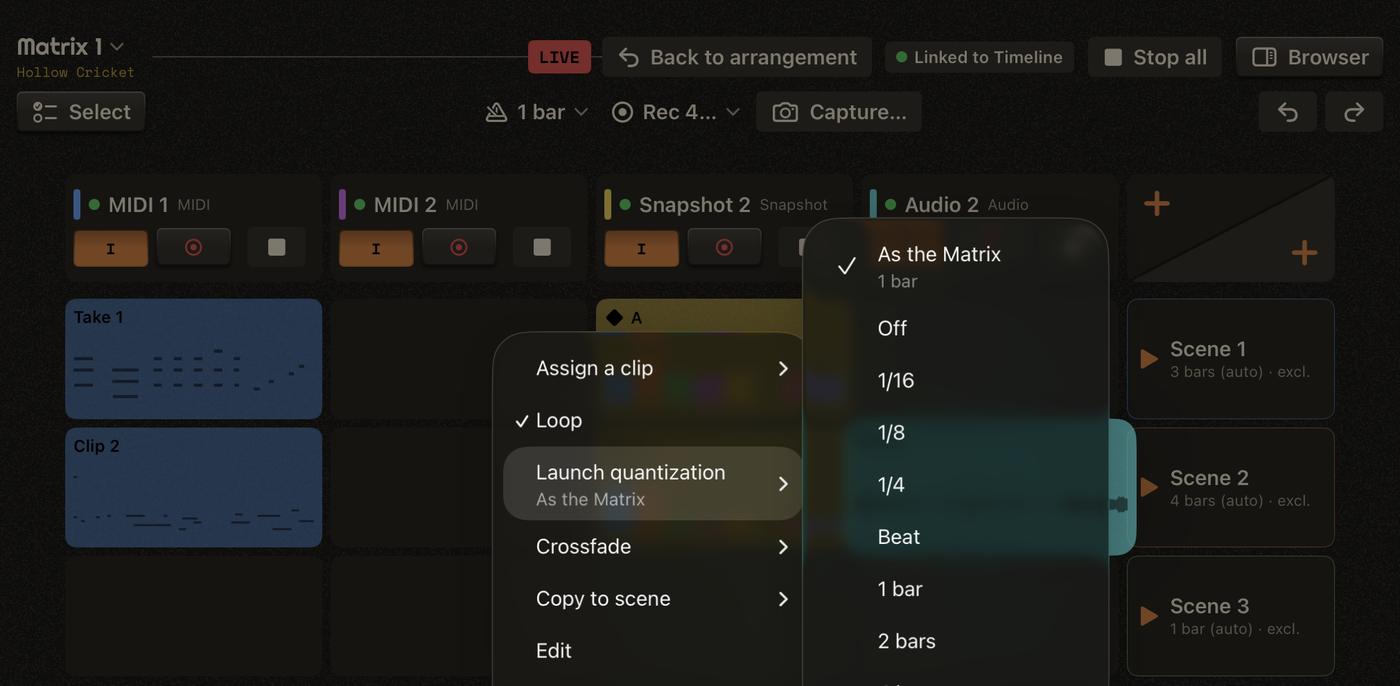
- Drag a cell to another cell of its channel to move it; drag a clip from the Browser onto a cell.
- A snapshot channel holds snapshots: launching one sends it, at once or morphing over the time set in the cell.
Editing a cell
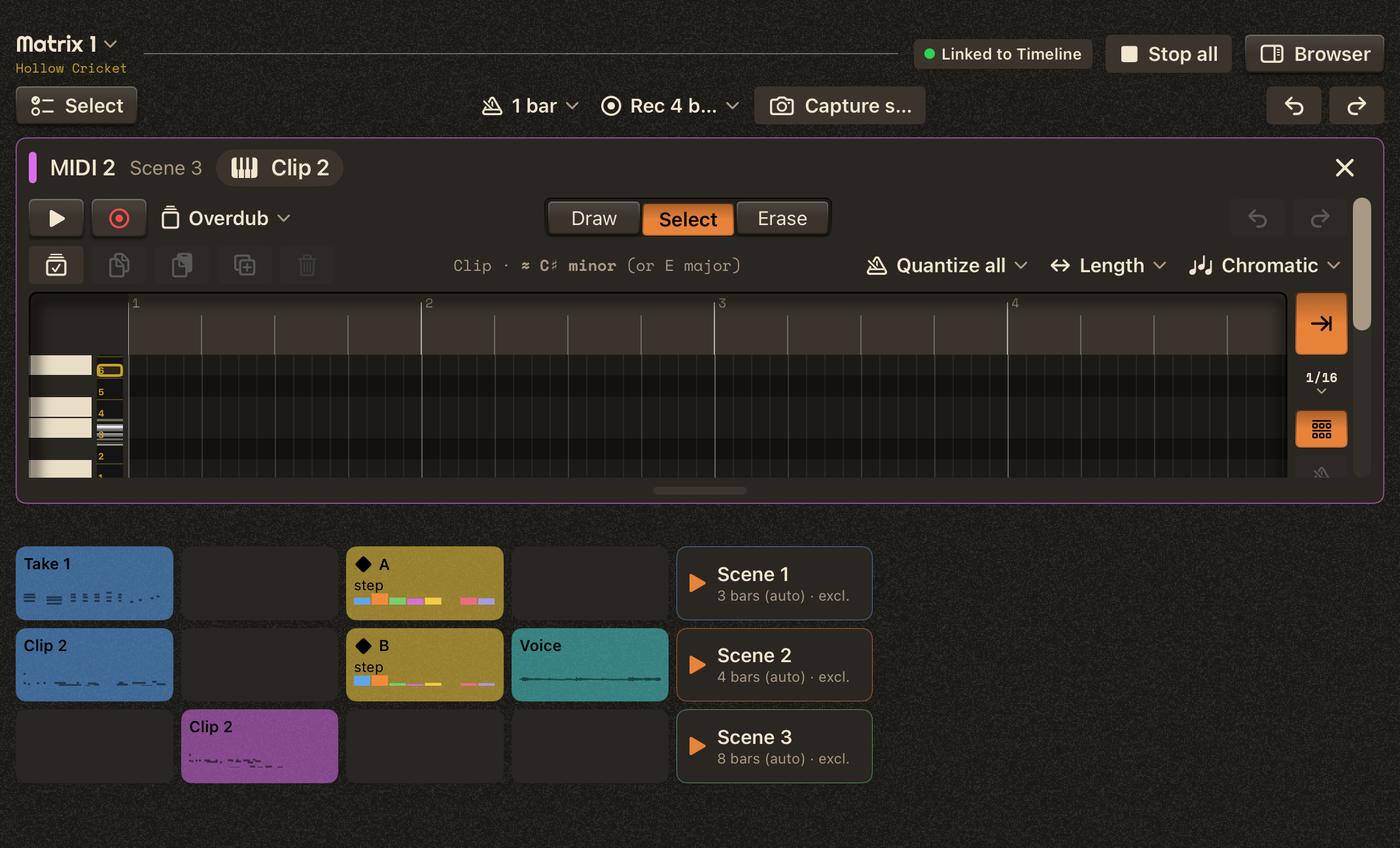
Edit (cell menu) opens the cell's editor above the grid; the grid's rows get shorter to keep it in view. The Maximize key gives it the whole window; the editor reopens the way you left it.
Select mode
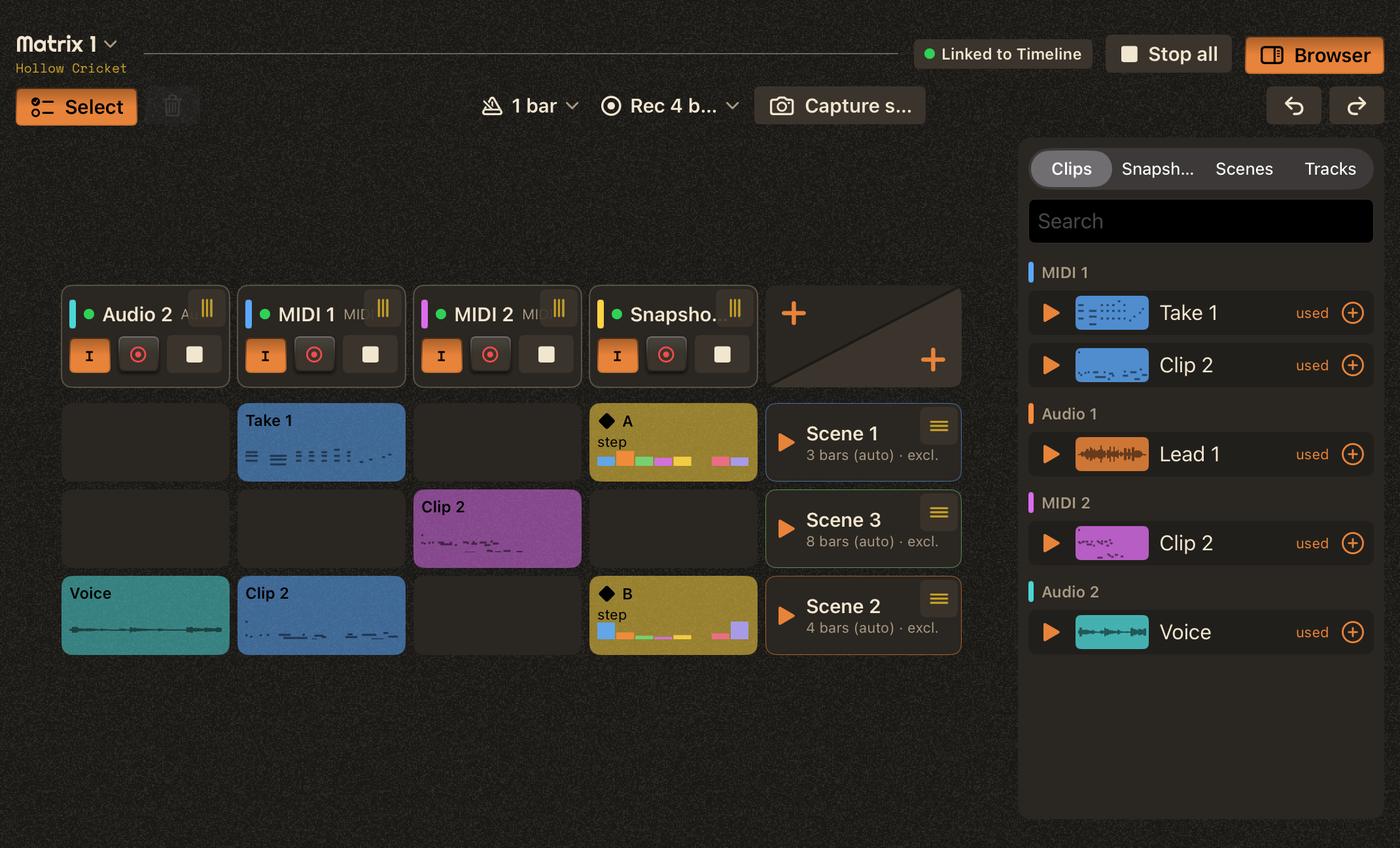
Select: tap channels and scenes to select them (delete them together), and drag their ≡ grips to reorder them — channels sideways, scenes up and down.
On its own
Without a Timeline, the Matrix is the conductor: its scenes launch cells, and each cell goes to its channel's plugin — clips, snapshots (at once or morphing), recordings with their count-in.
With the Timeline
Under a Timeline, the Matrix plays the scenes the Timeline places. Launching by hand takes over (LIVE); Back to arrangement gives the song back to the Timeline.
Foot switches and controllers can launch scenes, step through channels, arm, record or stop them: see Host setup for the parameters.
 MIDI
Load Orrery MIDI as a MIDI processor in front of a synth. It records and plays the MIDI clips of its track.
Now Playing
What the track plays, and its keys: Arm, Input and Record (a free take, starting at the next step of the Timeline's grid — a bar, a beat…).
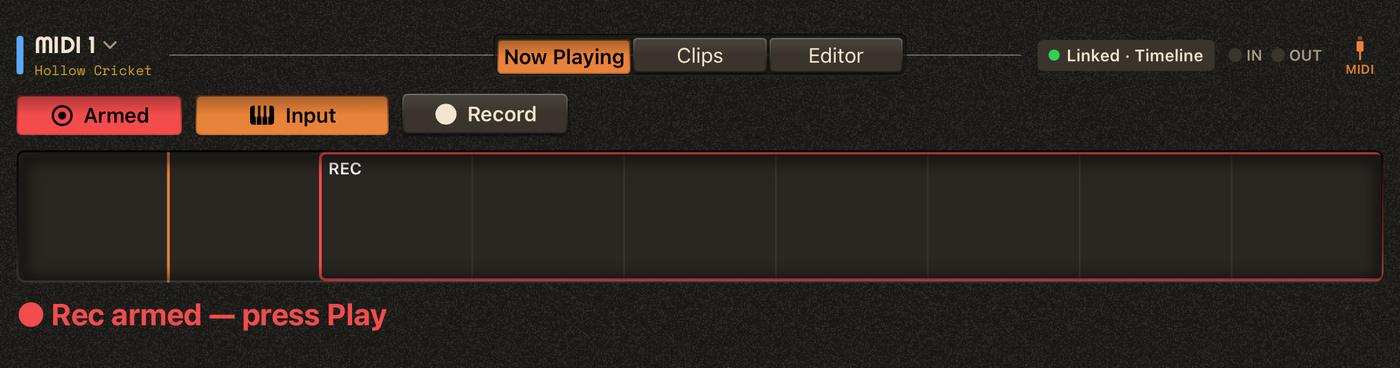
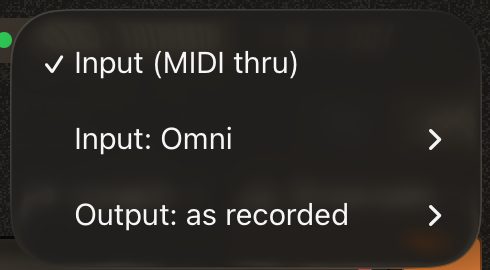
The MIDI light in the header opens its menu: Input (MIDI thru: what you play goes on to the synth), the input channel and the output channel.
Clips
The Clips view lists the track's clips with a preview of their notes; the playing ones are highlighted.
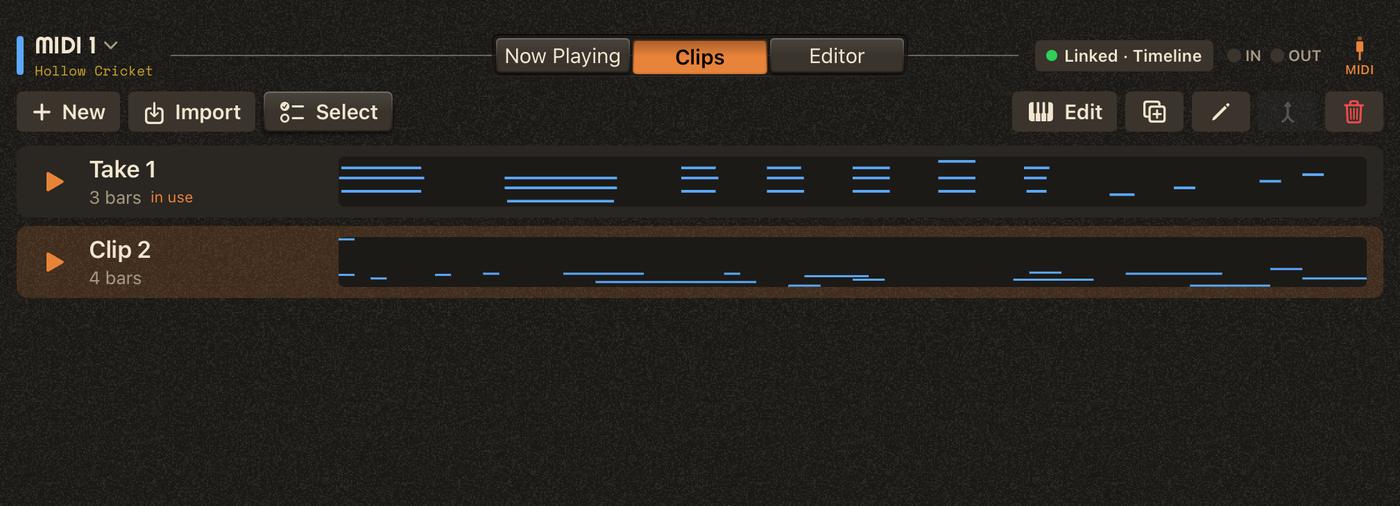
- New makes an empty clip; Import brings Standard MIDI Files (each becomes a clip).
- Double-tap a clip to edit it; long-press for its menu (edit, duplicate, rename, delete). Swipe a row left to delete it (it goes to the song's Trash).
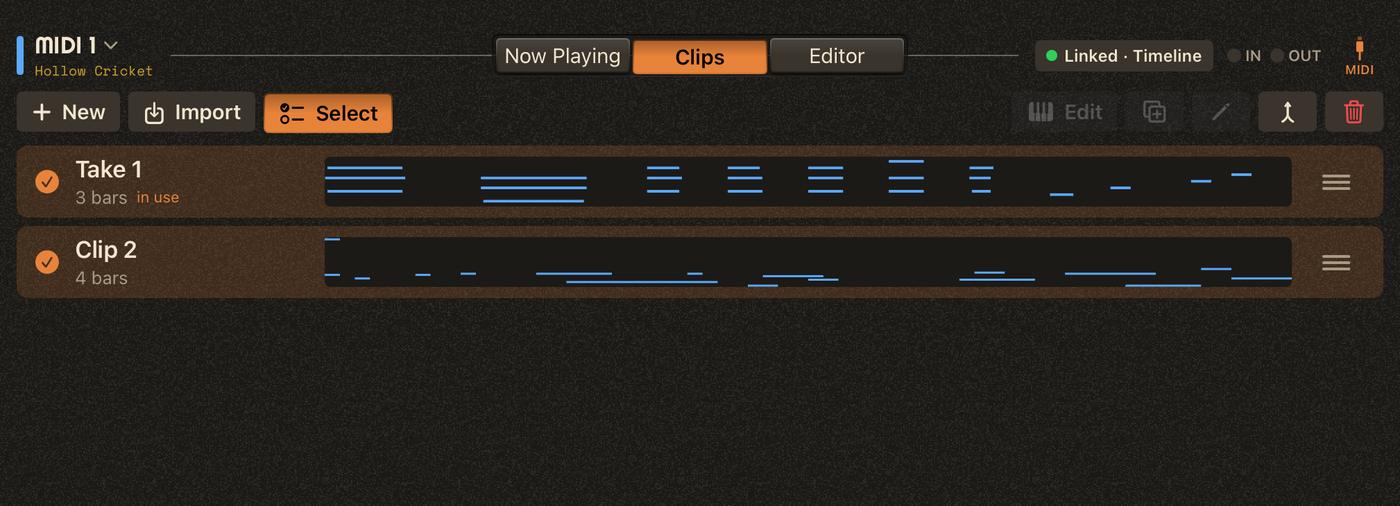
- Select for several: merge, delete, and the ≡ grips reorder them.
The editor
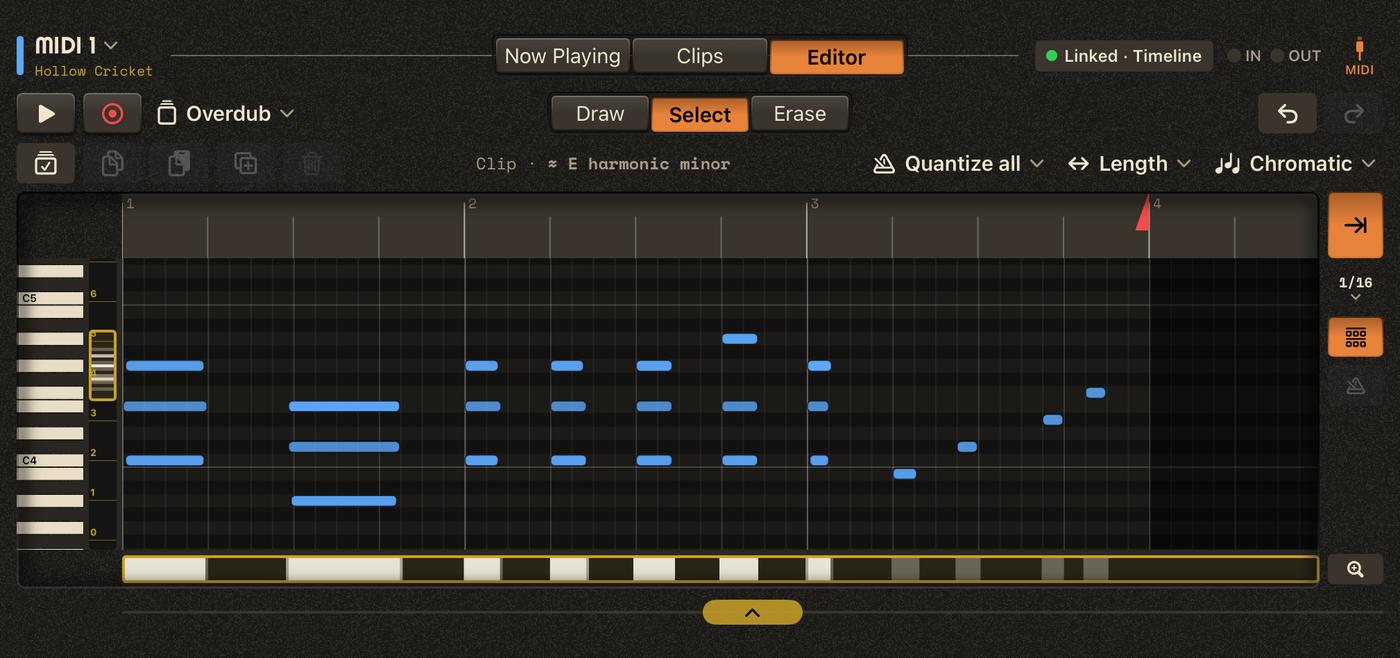
The first row plays and records; the middle picks the tool.

- Draw: tap to add a note (the last length used). Select: tap notes, or drag a rectangle. Erase: tap or drag over notes. In any tool, long-press empty space then drag to select.
- A selected note shows handles: the left one moves its start, the right one its end, the body moves it in time and pitch. They act on every selected note.
- The gold strips along the bottom and the left move the selection in time only or in pitch only — easy even for tiny notes. The small grips at the ends of the bottom one change the starts and lengths.
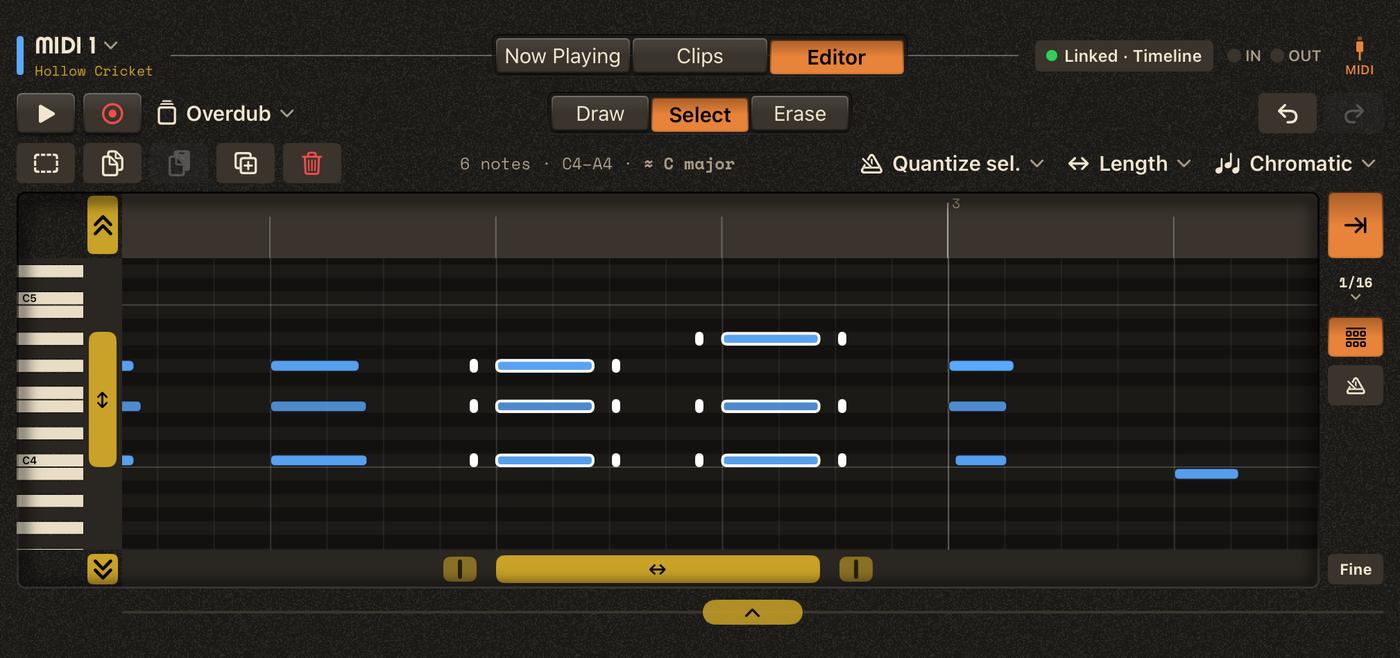
- With nothing selected, the strips are navigators: the whole clip in time, and the pitch range with its octaves. Drag the frame to scroll; pinch it, or hold Zoom and swipe, to zoom.
The second row: select all / copy / paste / duplicate / delete, what is selected (a note, a chord, a scale), then Quantize, Length and the key.

- Quantize: to the grid, with a strength, starts only or starts and lengths.
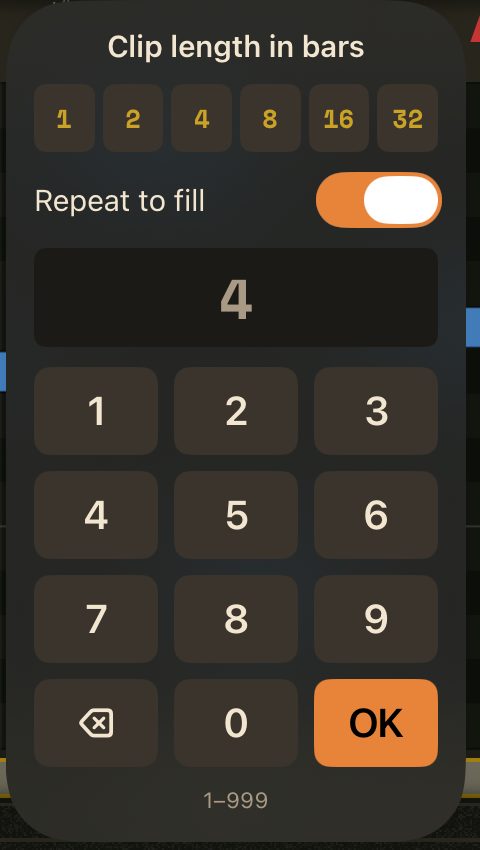
- Length: a number pad with quick values (1 to 32 bars). Repeat to fill (off by default) repeats the clip's content into the new bars when it gets longer.
- The clip's loop region is drawn on the ruler's loop lane (long-press then swipe), like the Timeline's loop.
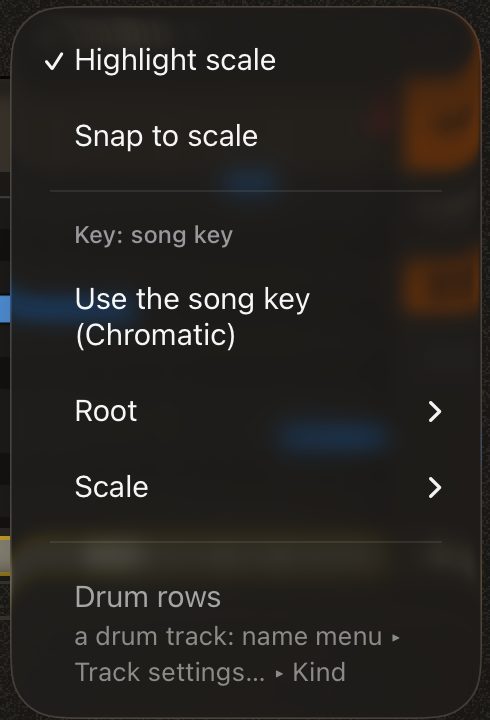
- Key (Chromatic, C major…): in-scale rows are shaded; with Snap to scale, notes land only on the scale.
On the right: Follow, the grid (1/4, 1/8, triplets…) and Snap. Hold Fine to move freely. Two fingers scroll, a pinch zooms (between your fingers).
Lanes under the notes
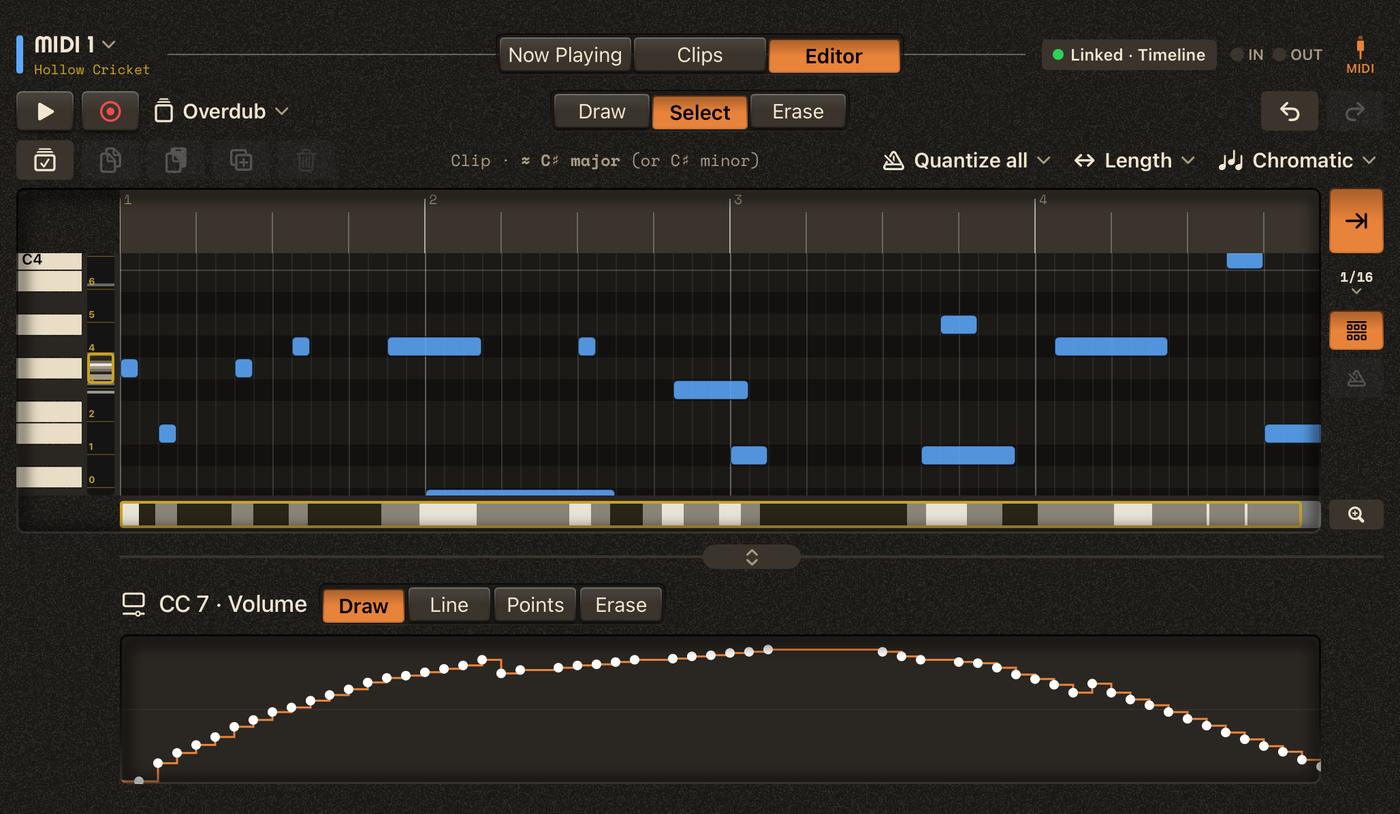
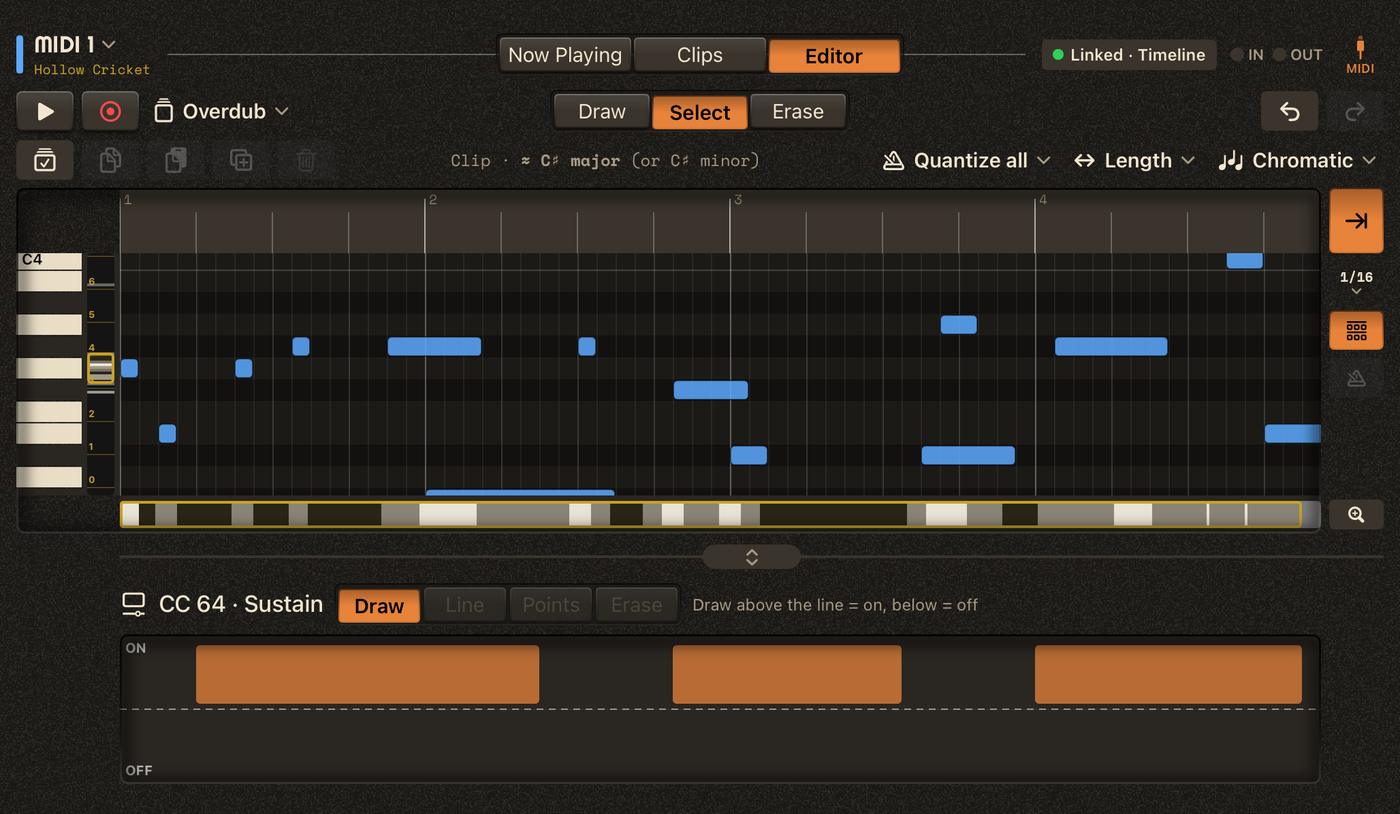
The lane under the piano roll edits Velocity (drag a bar; with a selection, all selected notes follow), or a CC, pitch bend or channel pressure: Draw with a finger, a Line, or Points. A switch CC (sustain…) draws on / off. Drag the divider to share the height.
Playing and recording in the editor
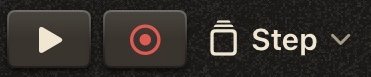
While the song is stopped, ▶ plays the clip in a loop. ● records into it after a bar of count-in, as the menu next to it says:
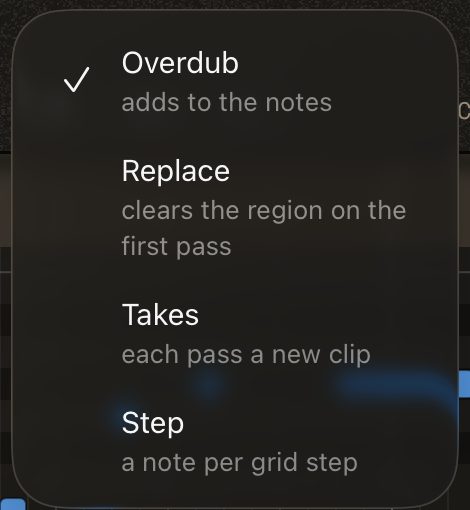
- Overdub: adds to the notes, pass after pass.
- Replace: the loop region is cleared when recording starts.
- Takes: each complete pass becomes a new clip.
- Step: notes one by one at the gold cursor, one grid step each (→ a rest, ← back). ● arms it; it works while the song plays too.
Drum maps
For a track that plays a drum machine: the name menu ▸ Track settings… ▸ Drum, then its map. Every clip of the track then shows one row per drum sound (Kick, Snare, Closed hat…) instead of the piano keys. Factory maps: General MIDI drums, Roland TR-8S and TR-6S, Korg volca sample2, 16 pads. Make your own in the app's Drum maps tab.
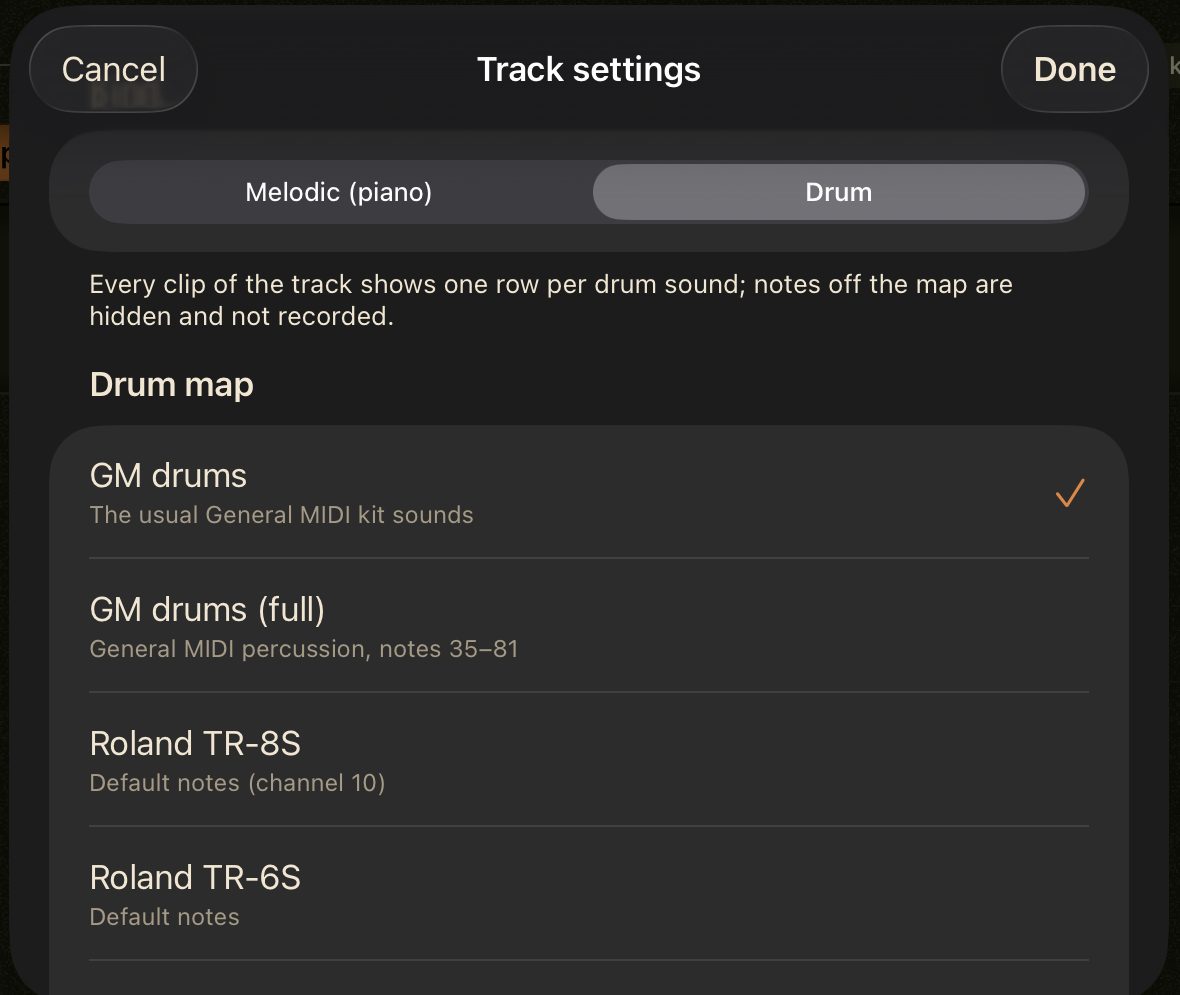
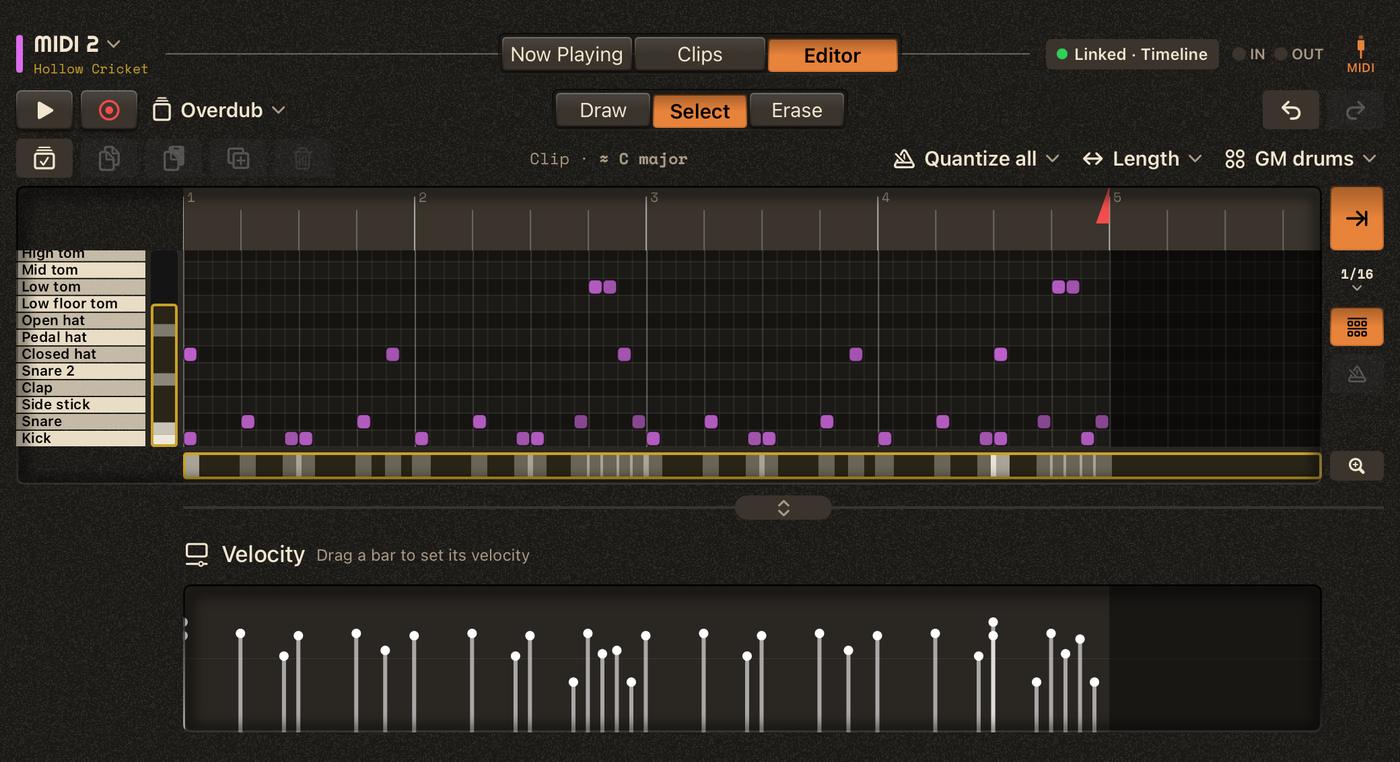
- Notes off the map are hidden (a notice counts them) and never recorded.
- Draw adds hits one grid step long; moving a note up or down goes to the next sound; tap a name to hear it.
- Changing the map: Convert moves each note of all the track's clips to the new map's sound of the same type — a song version is saved first — or Keep them as they are. A track set back to Melodic remembers its map.
 Audio
Load Orrery Audio as an effect on an audio channel. It records what arrives on the channel and plays its clips from disk.
Now Playing
What the track plays now and next, with Arm, Input and Record.
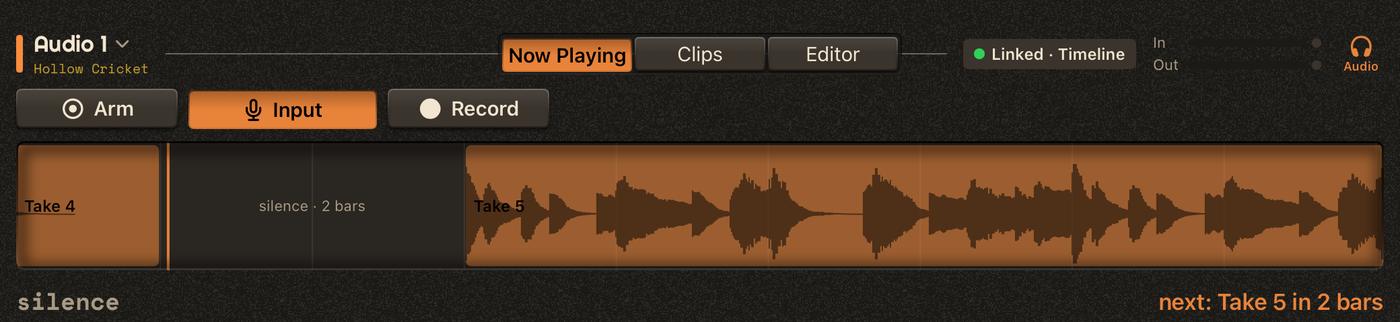
- Input (the mic key): off, the channel's input is ignored — not heard, not recorded. An armed track always hears it.
- Monitor input (on by default): you hear the input while recording; off, only the playback. You hear it when Monitor is on and Input is on (or the track is armed).
Clips
The Clips view lists the track's clips with their waveform, length and a tempo badge when a clip was recorded at another tempo (it plays at its original speed).
- New ▸ 1 to 16 bars: an empty clip of silence, to record into.
- Import: WAV, AIFF, CAF, M4A or MP3 files, converted in the background.
- Duplicate, split, merge, rename (long-press a row); swipe a row left to delete it.
The editor
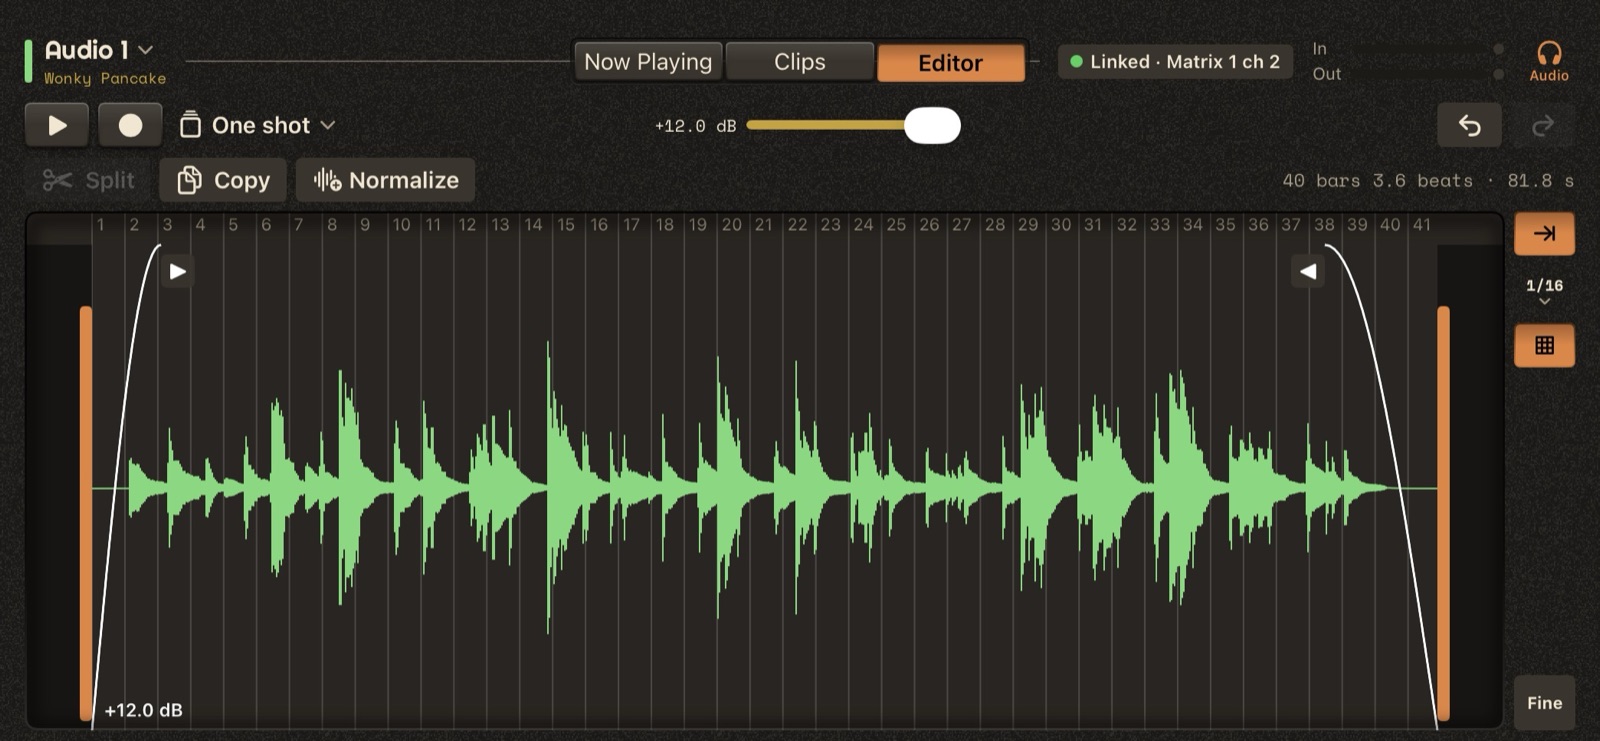
Edits never change the recording: trims, fades and gain are stored with the clip.
- Trim: drag the side handles. Fades: drag the triangles at the top corners inward.
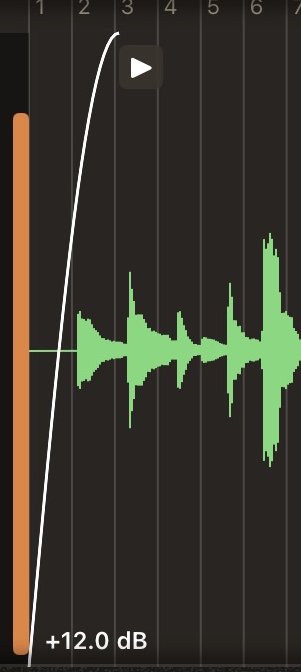
- Gain: −∞ to +12 dB (double-tap: 0 dB). Normalize sets it so the peak reaches 0 dB.

- Split at the playhead or a tapped position (the two clips share the recording); Copy makes an independent copy of the trimmed part.

Playing and recording in the editor
While the song is stopped, ▶ plays the clip (tap the waveform to start there). ● records after a bar of count-in, as the menu next to it says:

- One shot (default): one pass into the clip, then it stops — e.g. a new empty clip filled once. Undo brings the old sound back.
- Takes: the clip loops; each complete pass becomes a new clip.
- Replace: the clip loops; the last complete pass replaces its sound.
 Snapshot
Load Orrery Snapshot between a MIDI controller and a synth. It watches the CCs and program changes (PC) you choose, stores their values as snapshots, and plays them back — at once or morphing from one to the next.
Watching CCs (State)
The State view lists what is watched, with its current value.
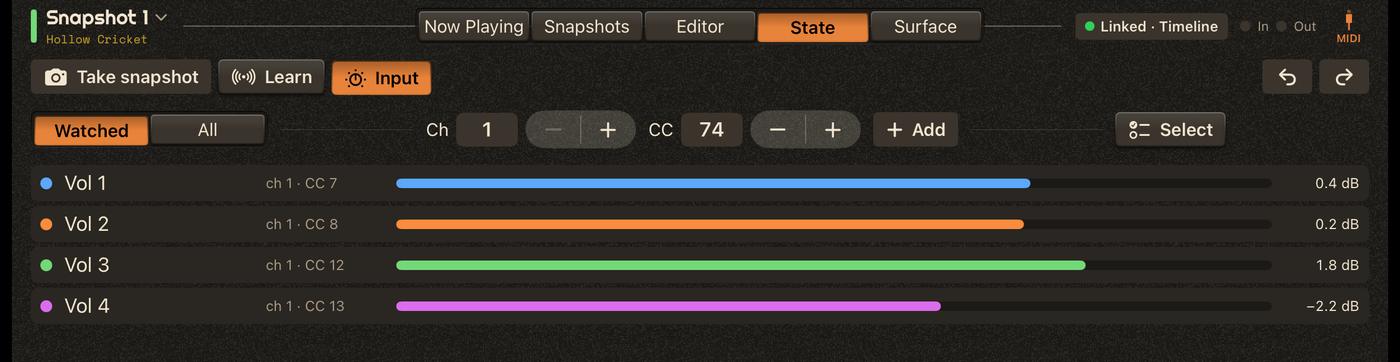
Learn adds every control you move. Or add one by hand: its channel and CC, then Add (hold Add for a program change). Watched / All shows only the watched ones, or everything received. Input (as on every track) lets what you play through.

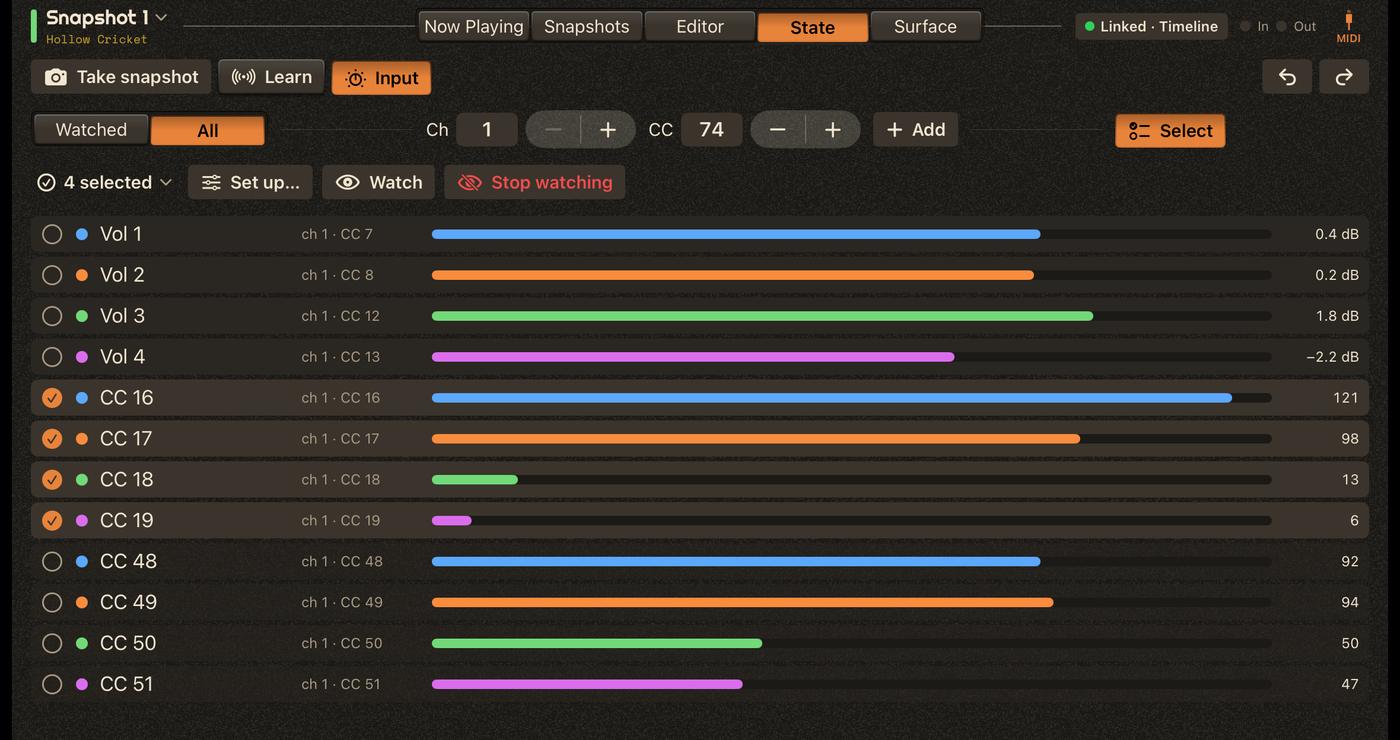
Long-press a row for Set up… — its name, how it morphs (Glide follows a transition; Jump keeps its value until the next snapshot, for switches and selectors; a program change always jumps), its color, its scale (how its value reads — percent, dB, Hz, pan, named steps…; a scale can also keep the CC inside a range, or on its steps) and its channel — or Stop watching (or swipe the row left).
Select sets up several at once — the same sheet: scale, morph, color, watch or stop watching them, or move them to another channel.
Snapshots
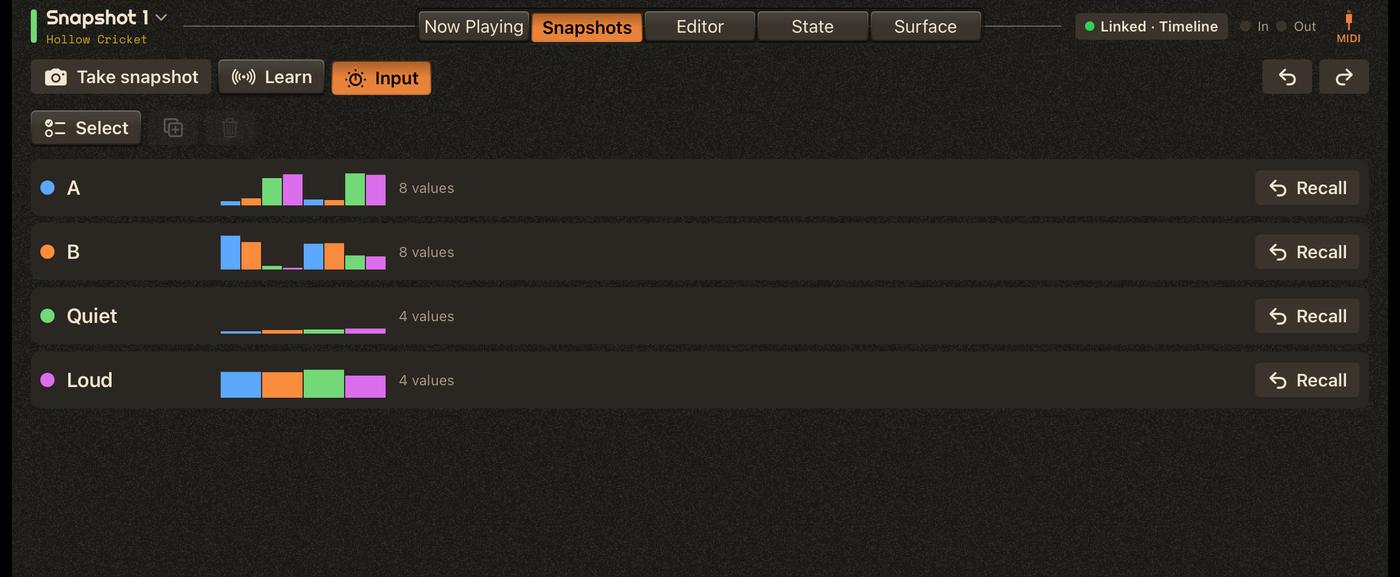
Take snapshot stores the current values. The Snapshots view lists them: tap one to edit it, Recall to send it (song stopped), Select to duplicate or delete several. The Editor view changes a snapshot's values one by one.
Playing them
- On the Timeline, place snapshots on the lane and choose each span's transition (see the Timeline page). A program change is sent at its snapshot, before the CCs.
- In the Matrix, a snapshot cell sends its snapshot, at once or morphing from the current values.
- Now Playing shows the morph under way: A on the left, B on the right, each CC's curve and where it is now. With several layers, a chip per layer.
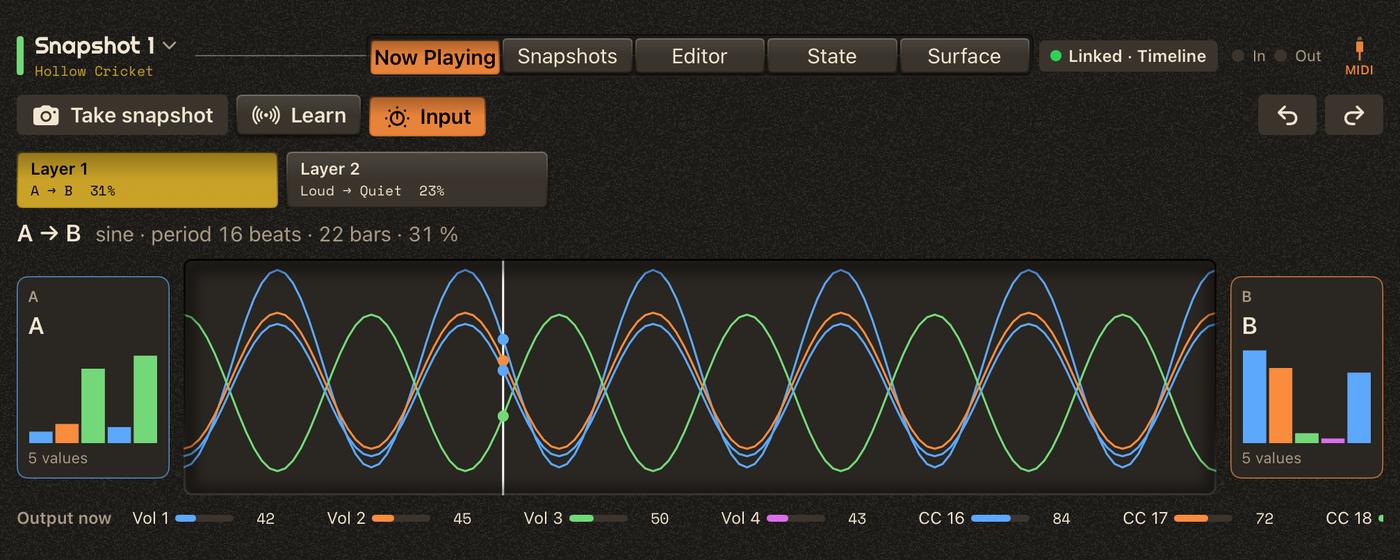
Moving a watched control while the song plays takes over that CC until the next snapshot.
MIDI
The MIDI key in the header opens the MIDI panel:
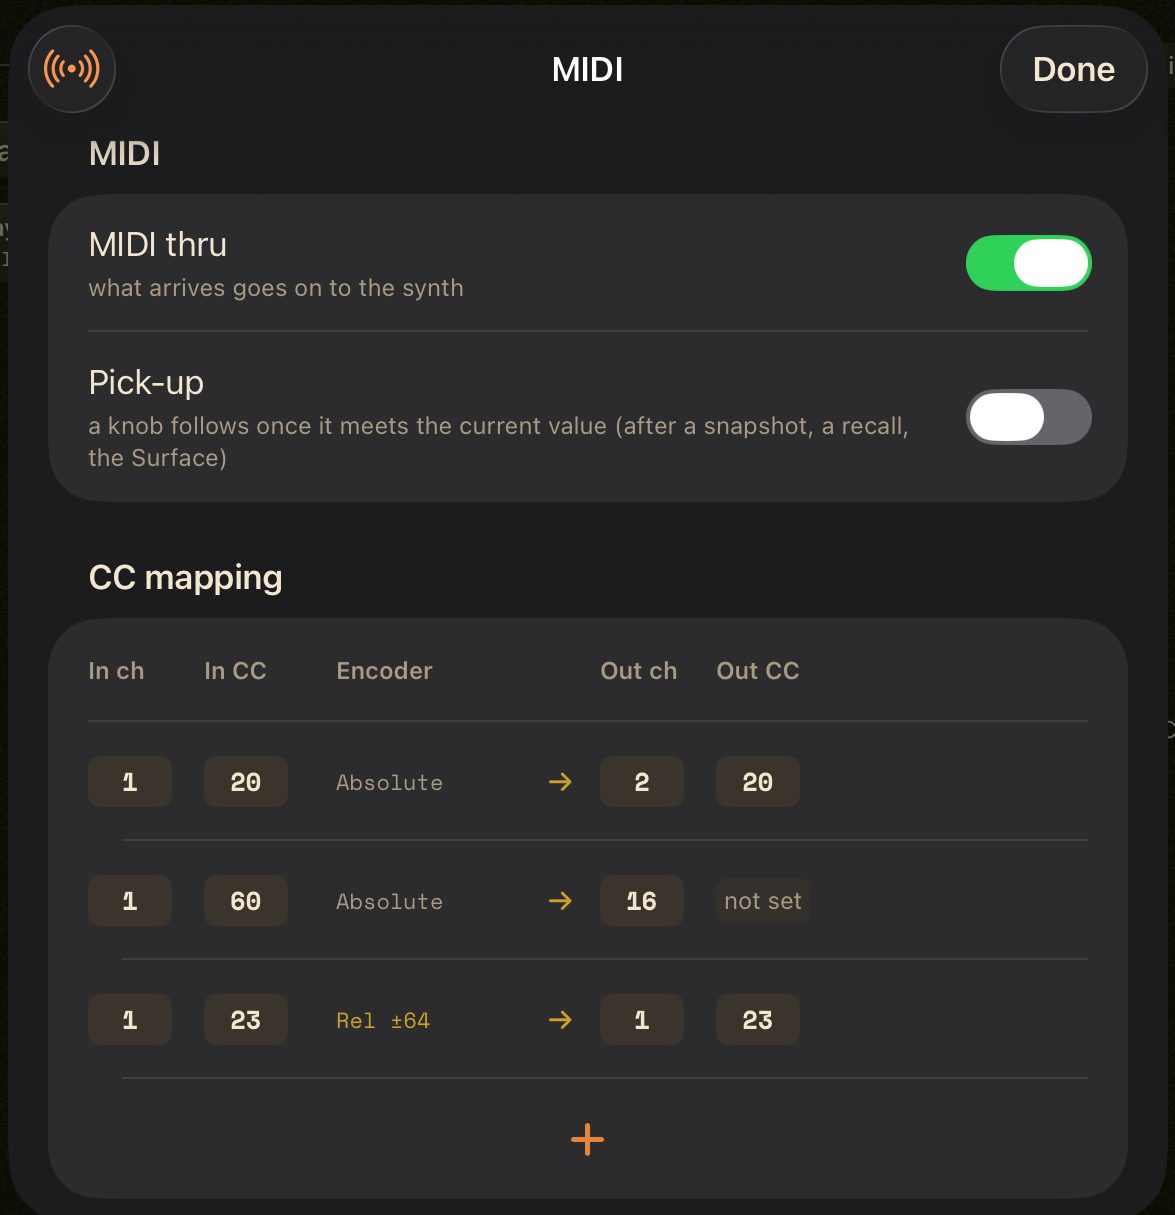
- MIDI thru: what arrives goes on to the synth.
- Pick-up: after a snapshot or a recall, a hardware knob does nothing until it meets the current value — no jump.
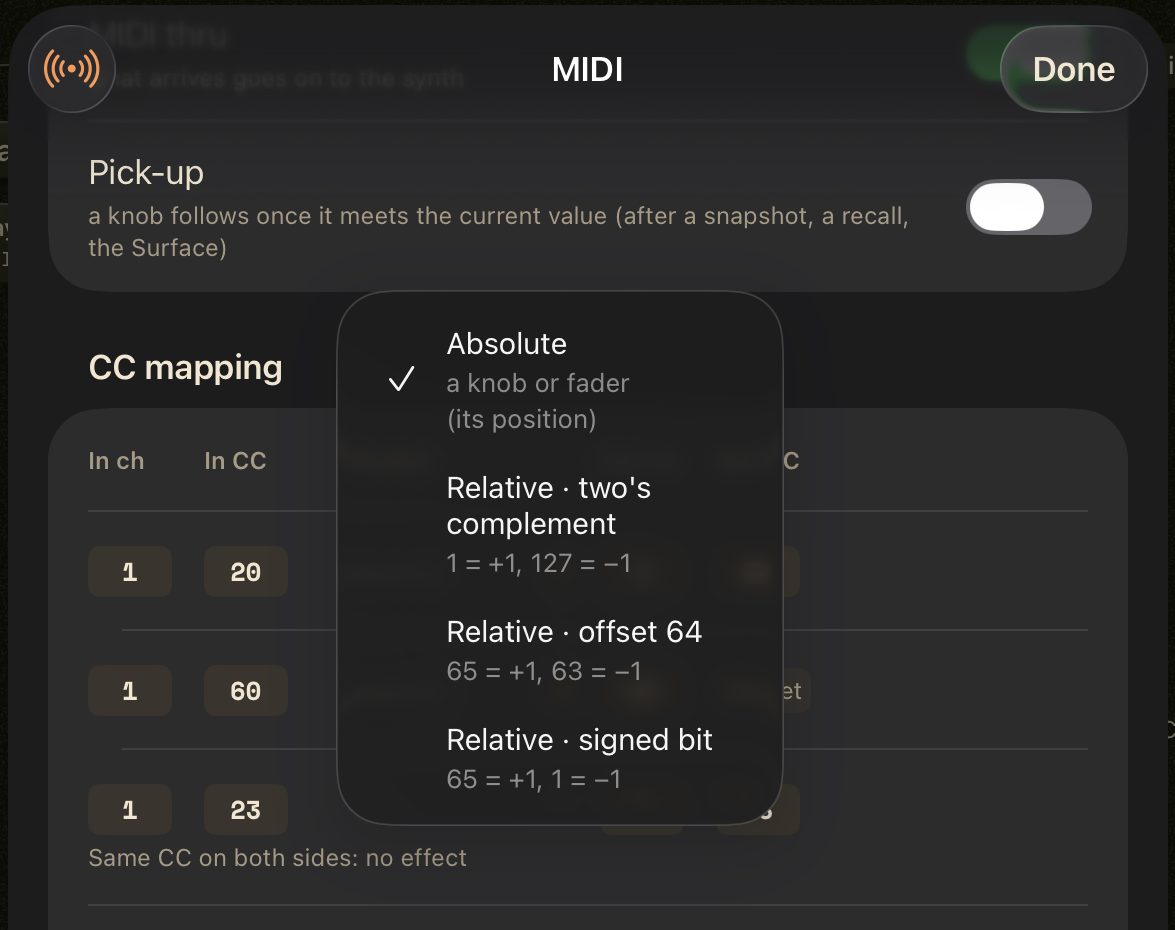
- CC mapping: rules that rename a controller's CC for the synth (In → Out). A rule can also read a relative encoder (Encoder column) — every Learn detects one by itself and adds it here. Learn at the top left adds rules for the controls you move, until tapped again; the + row adds one by hand.
Templates
Template… in the track's name menu opens the templates: a track's setup — watch list, names, scales, Surface, optionally the CC mapping — to reuse in any song. The snapshots are never touched.
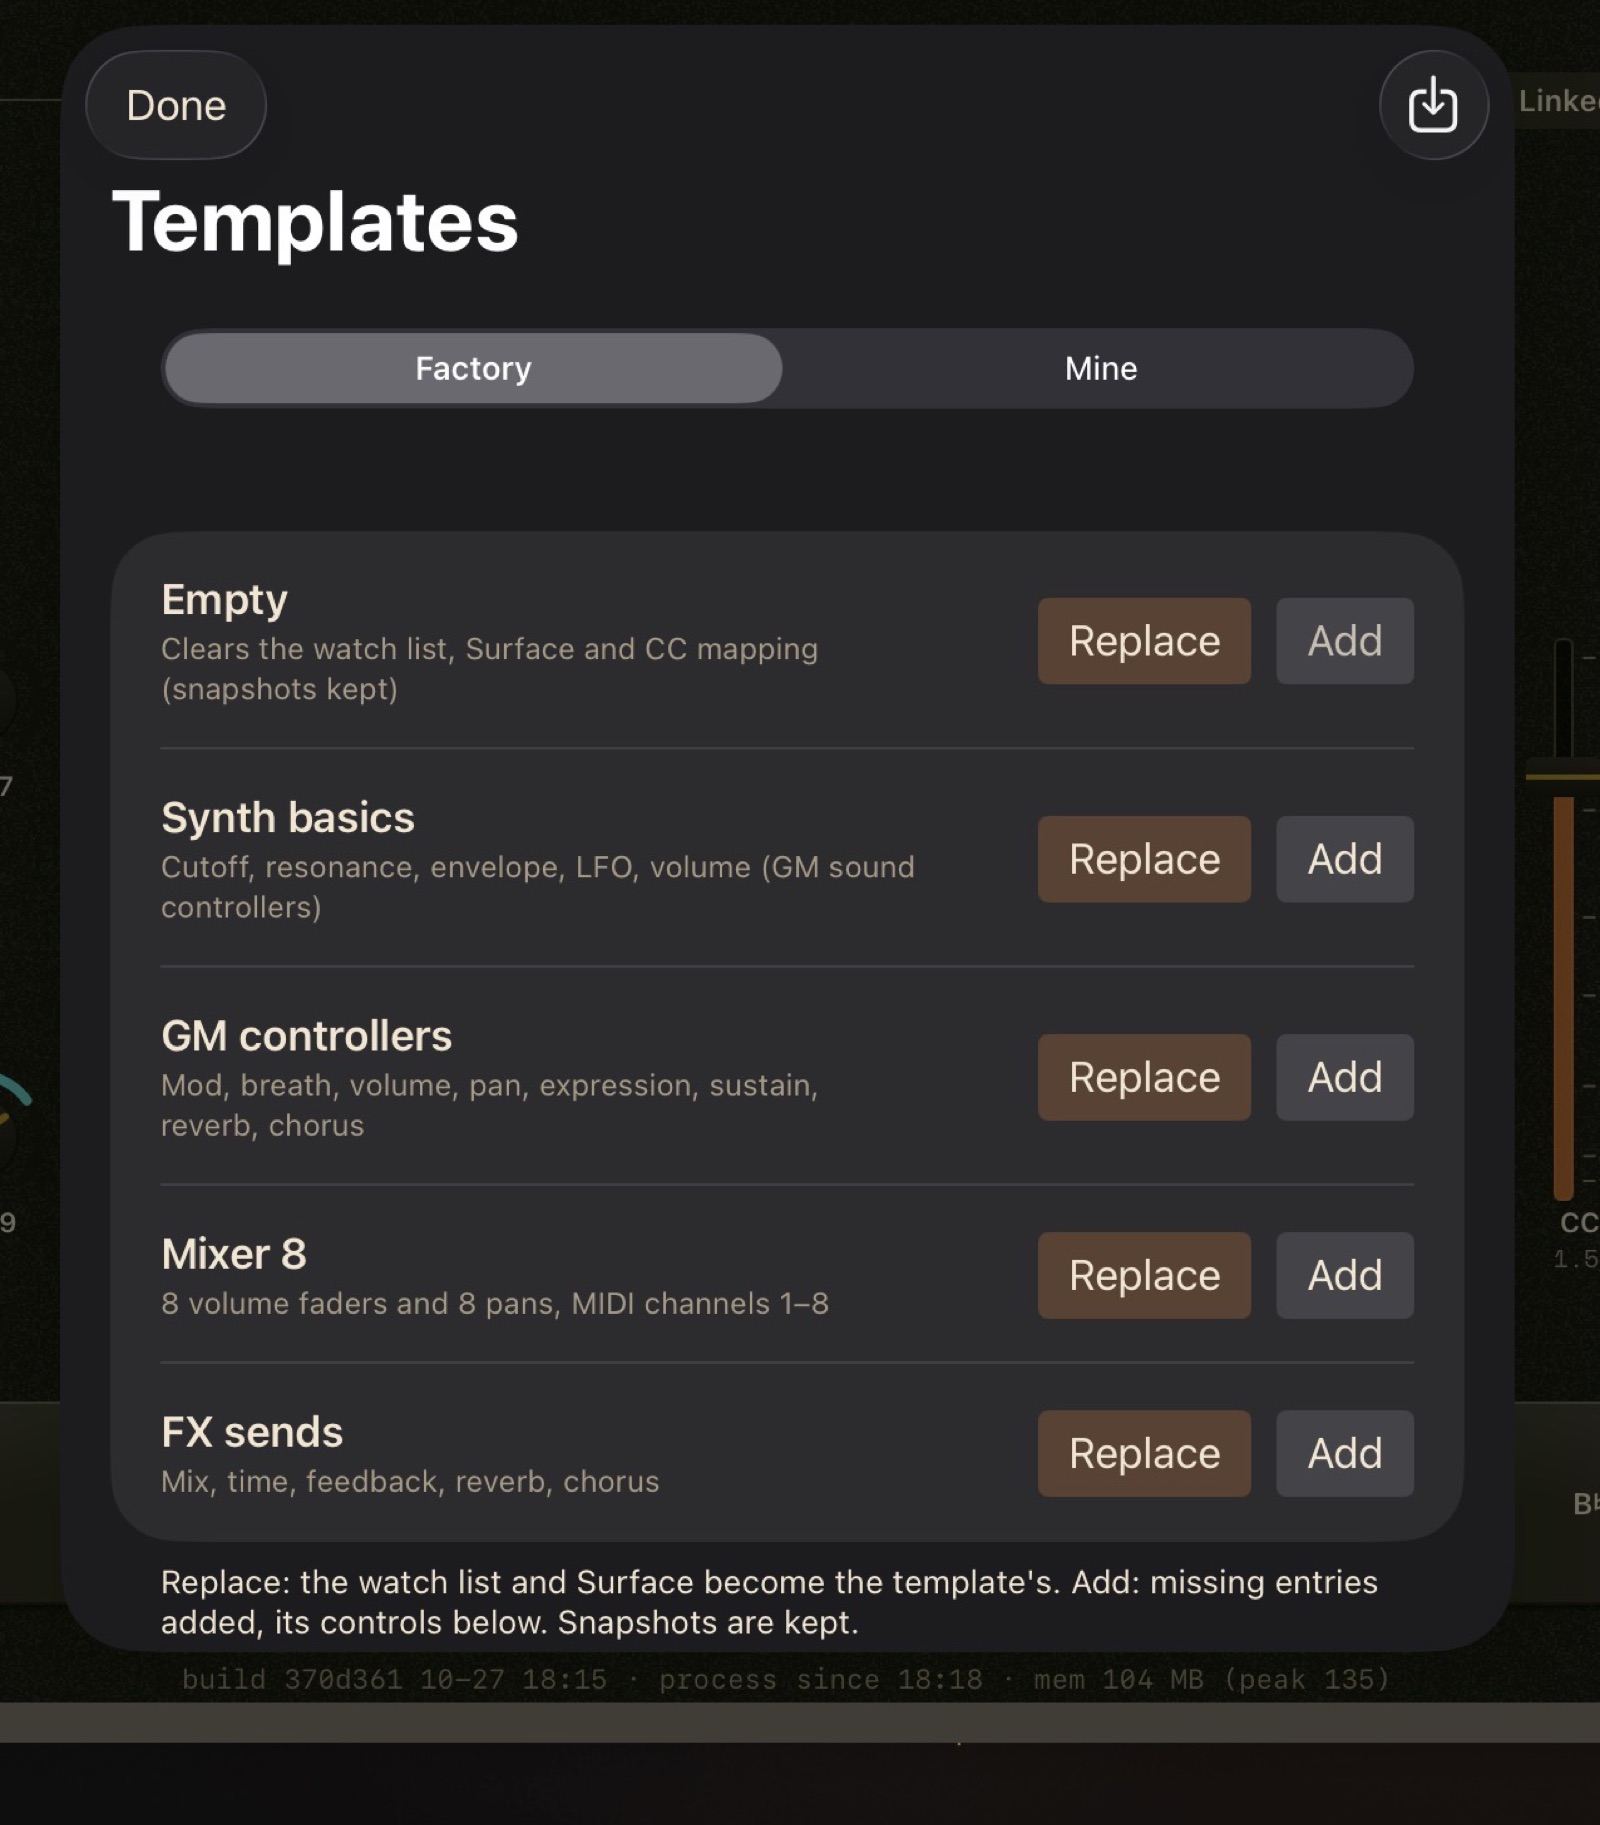
- The key at the top right saves this track's setup as a template.
- Factory and Mine: each with Replace (the setup becomes the template's) or Add (what's missing is added). Empty clears everything.
- Mine have ⋯: rename, share (a small file), delete.

Snapshot Surface
The Surface view of Orrery Snapshot is an on-screen controller: rotaries, faders, buttons, program changes, morph faders, labels and lines on a grid. It shows the current values and sends what you move — as if it came from your controller.
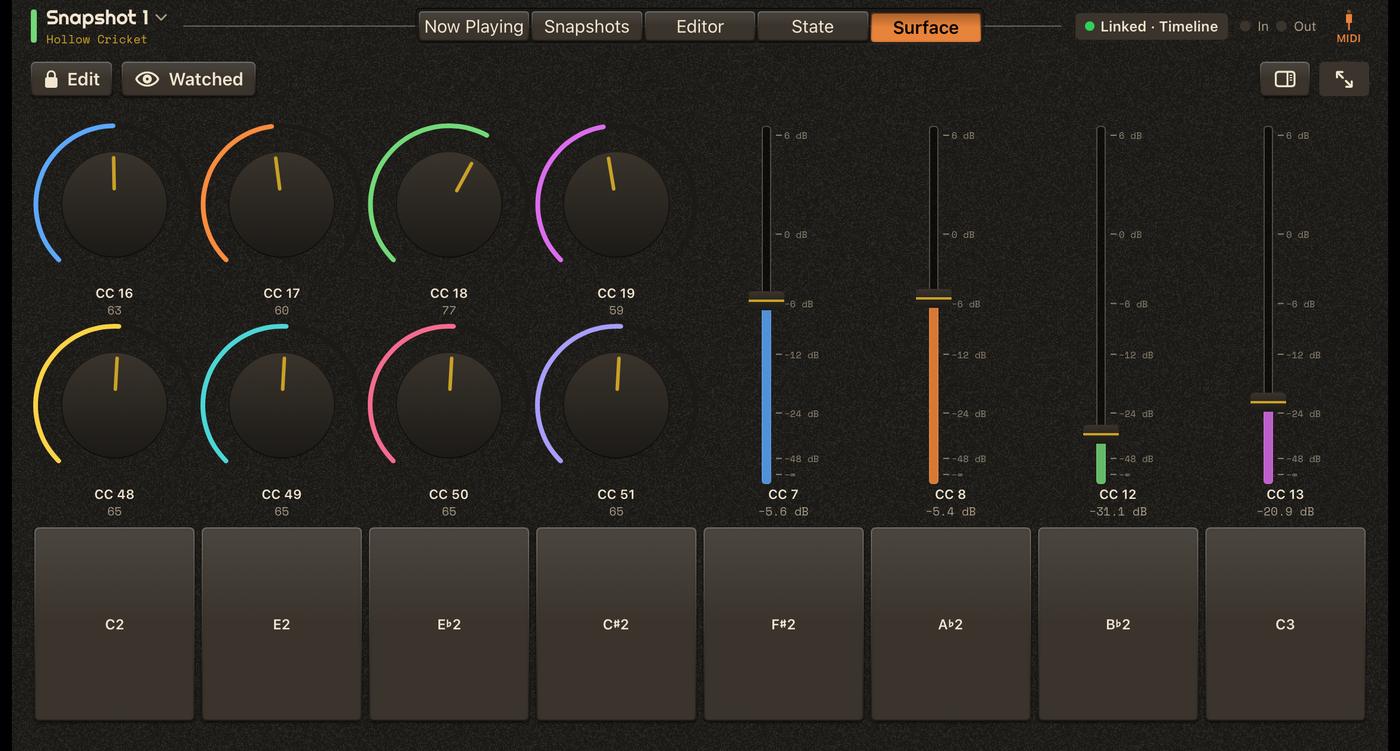
When it shines
- No controller with you? The Surface is one: every knob and fader your synth needs, laid out the way you think, right next to the music.
- Your studio controller, on the go. Rebuild the hardware that sits on your desk — same layout, same CCs, same names — and take the session anywhere with just the iPad. Learn builds it as fast as you can move its knobs; back home, the real controller takes over: both send the same CCs.
Playing it
- Rotary: drag up or down (slowly for fine moves); double-tap for its default value. It colors from the middle when its scale has one (pan).
- Fader: drag along it; double-tap for its default value.
- Button: toggle or momentary; a Note button plays a note live (never stored).
- Program: − and + step through the programs (or the named ones); tap the name for the list.
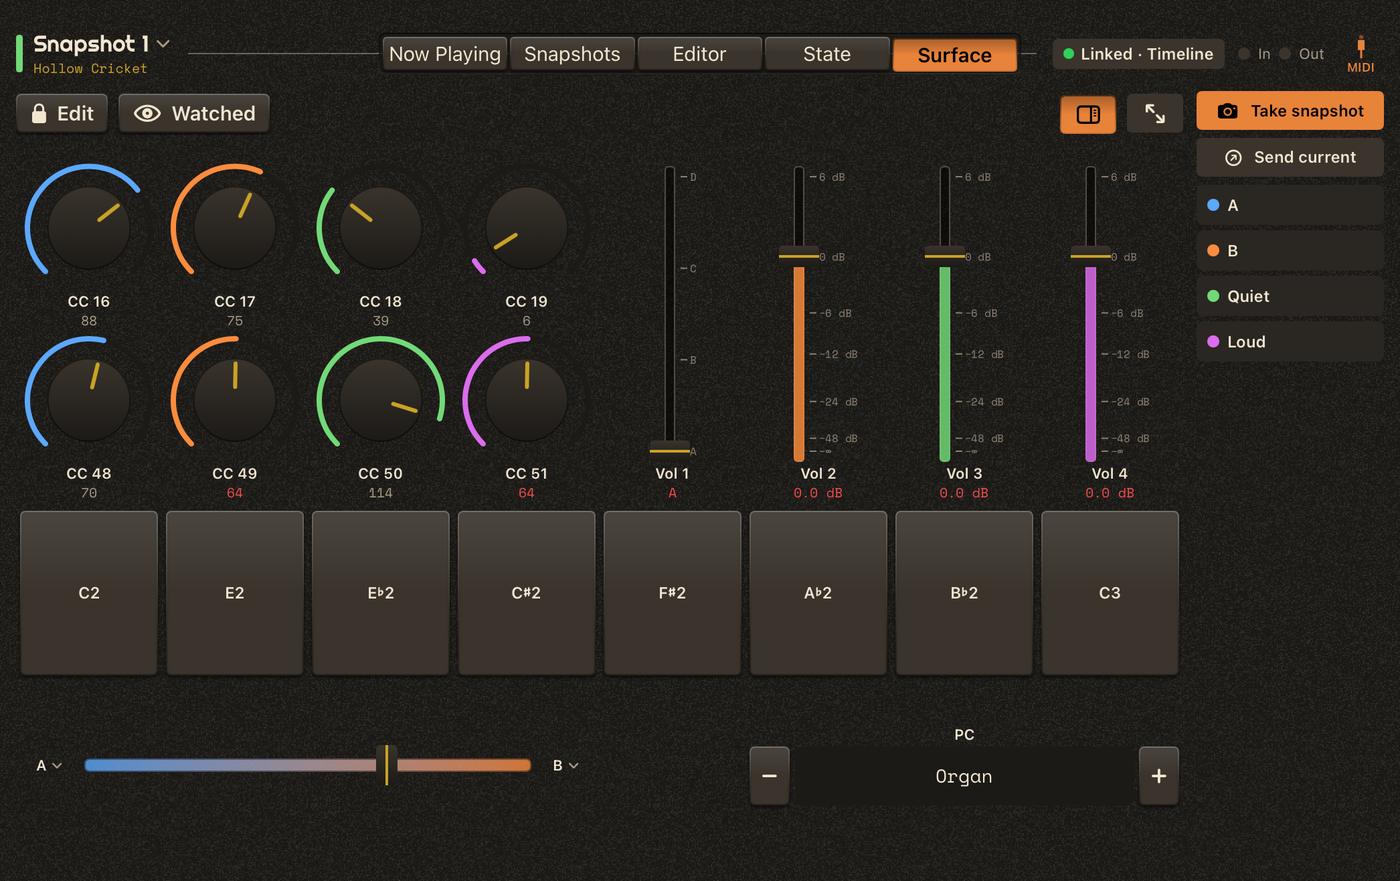
- Morph: a fader between two snapshots. Moving it sends the values between them (a Jump CC or a program change switches at the middle). Tap the key at either end (the snapshot's name ▾) to choose that end's snapshot. A controller fader or encoder can drive it, even with the window closed.
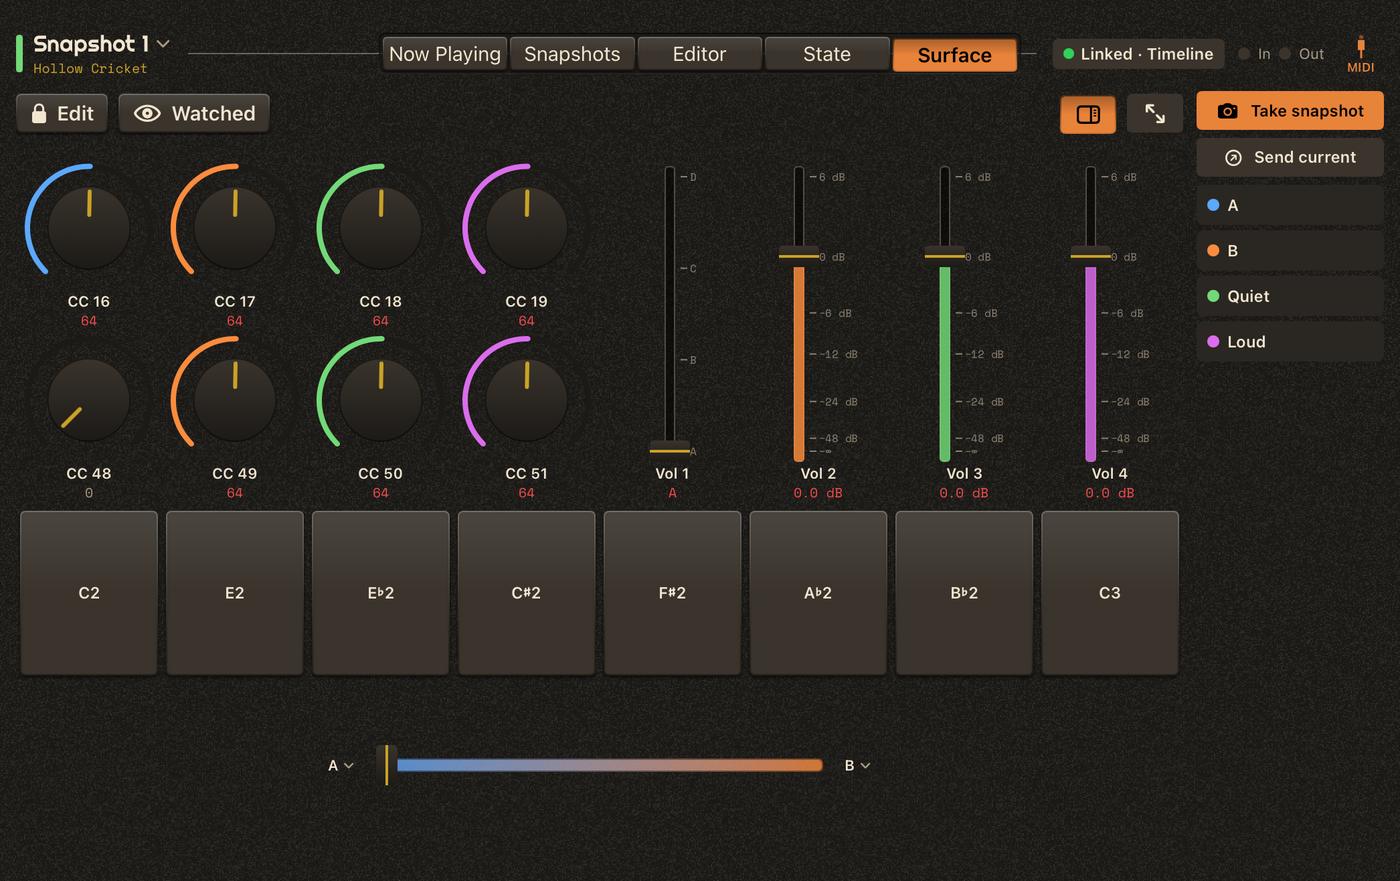
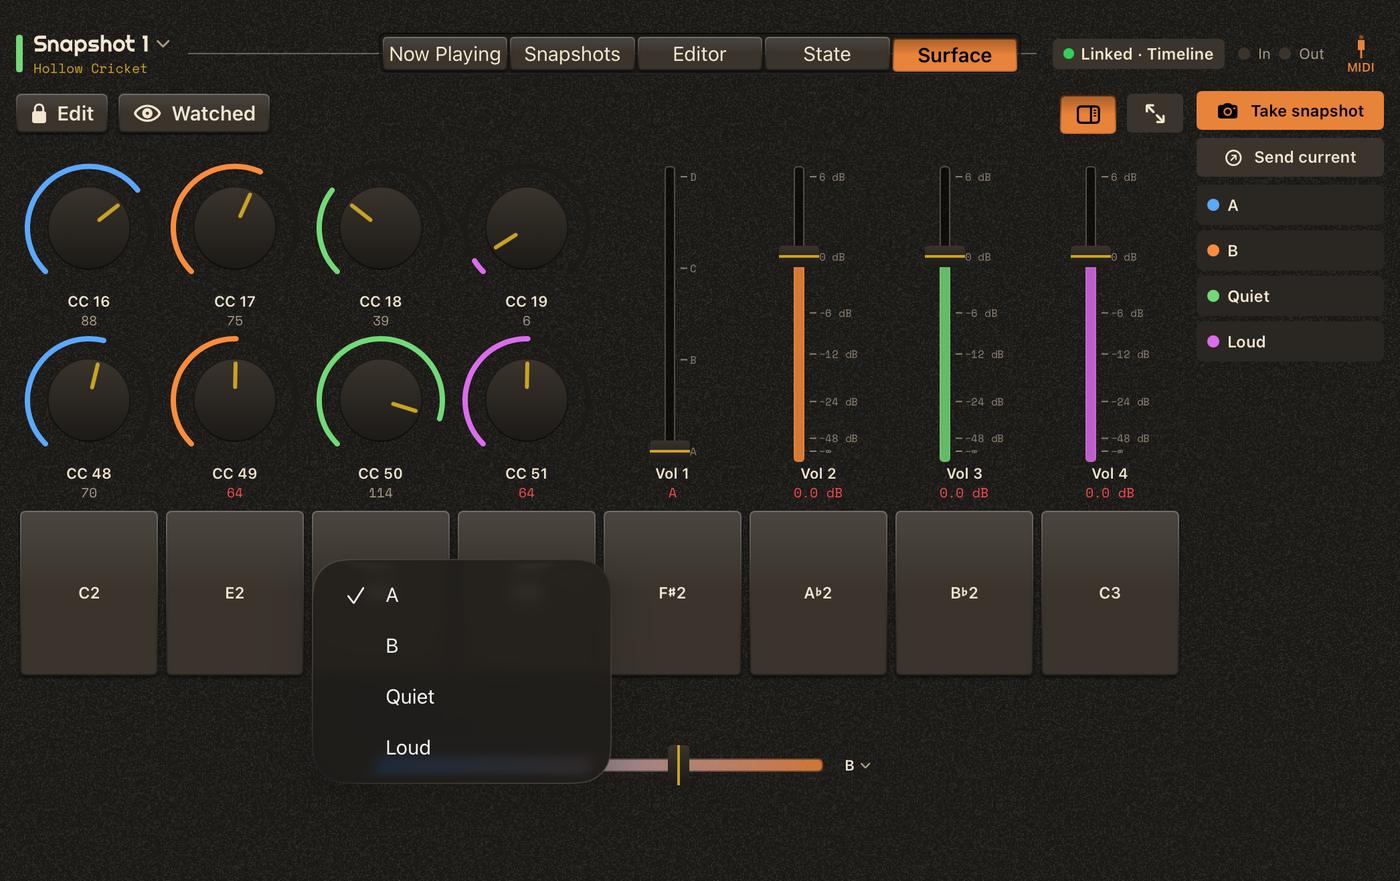
A value in red — or a button's name — isn't known yet: nothing received or sent for it.
Keys
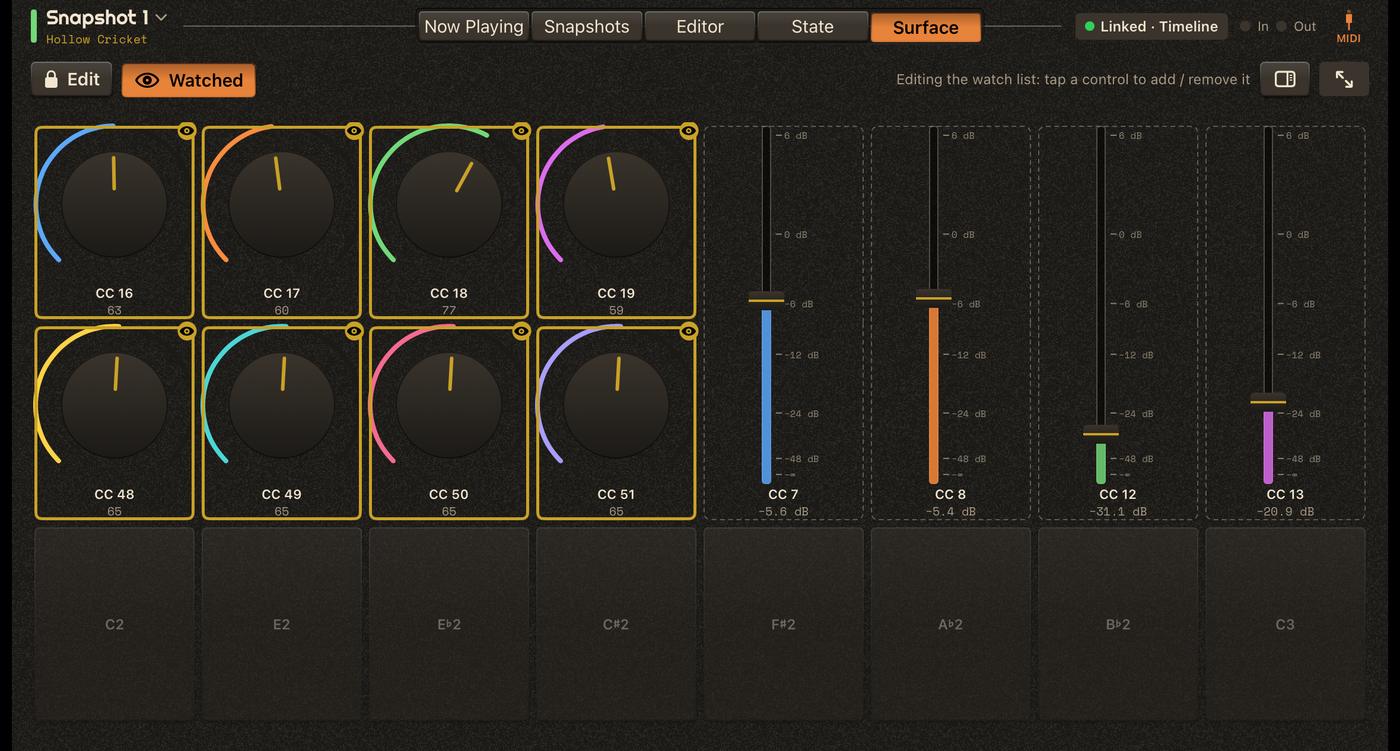
Edit unlocks the layout; Watched shows which controls' CCs are watched (boxed) — tap one to add or remove it.
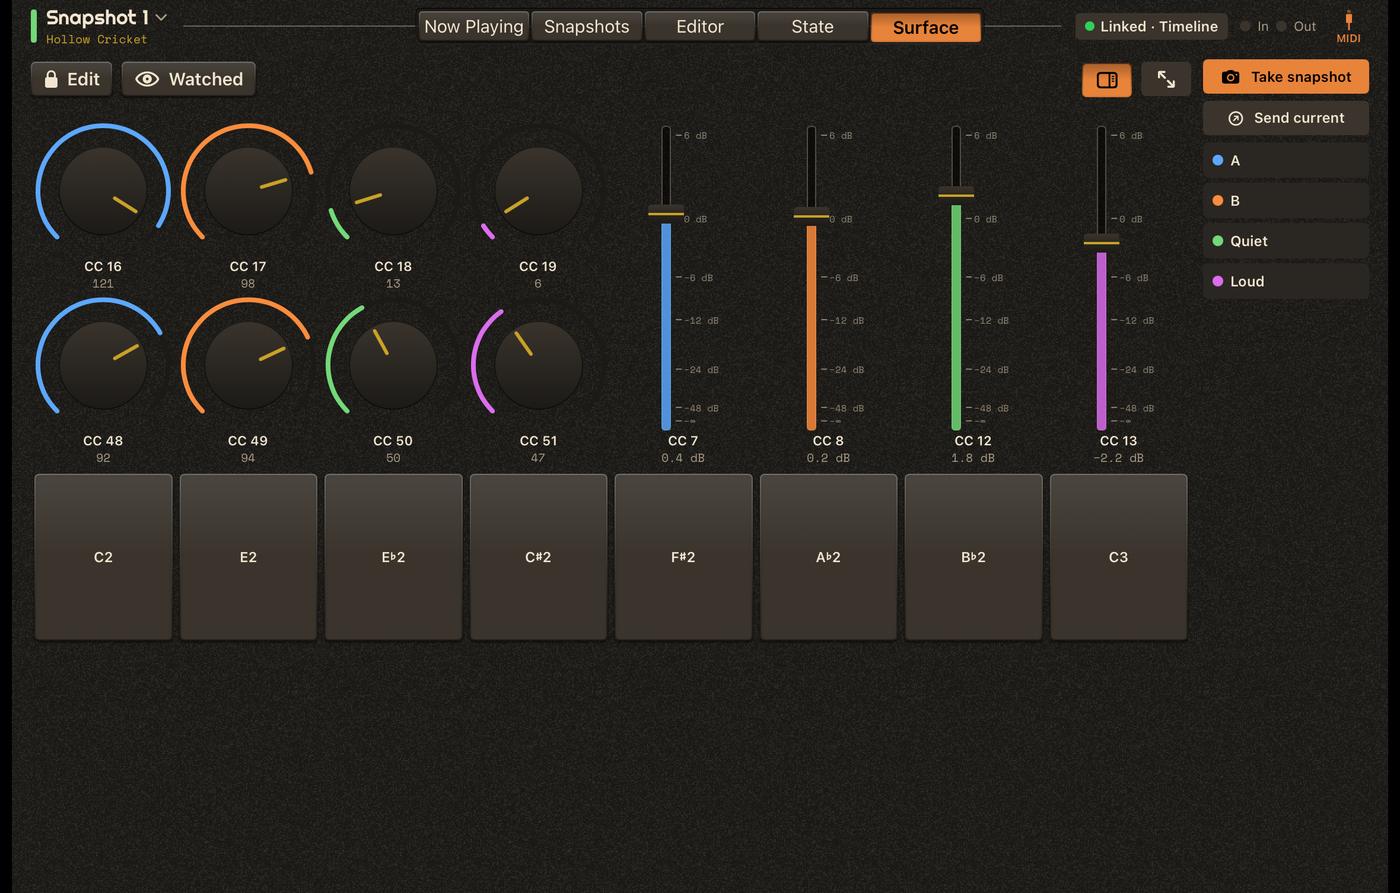
On the right: the snapshot browser (show / hide) and full screen.
The snapshot browser
- Take snapshot, and Send current (sends every control's value, so the synth matches the Surface).
- Tap a snapshot to recall it (song stopped).
- Swipe a snapshot right → Edit: the Surface shows its values (controls not in it greyed); move them, then Done.
Editing the layout
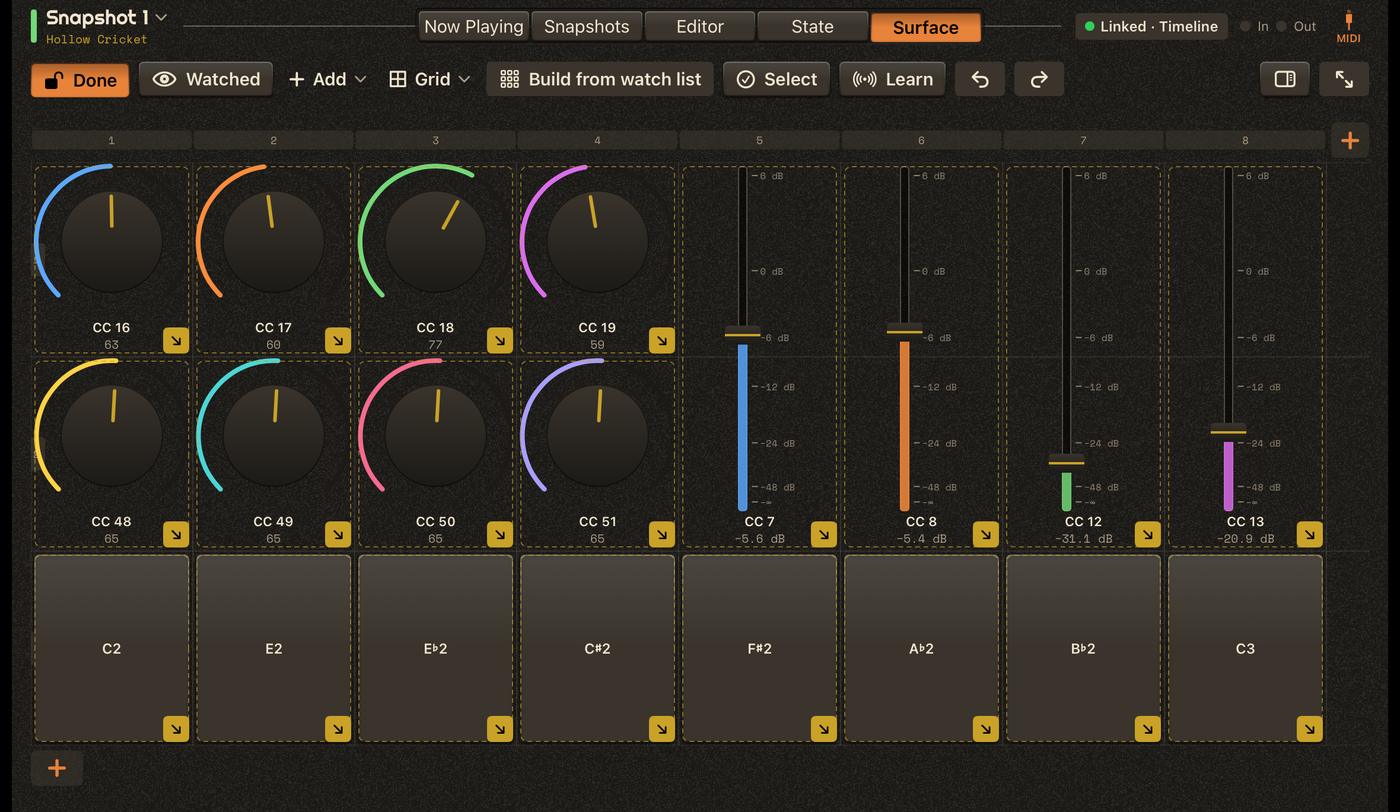
- Add a control, or tap / drag over empty cells to add one there.
- Drag a control to move it; drag its gold corner to resize it; tap it to set it up.
- Learn: each control you move on your controller gets a control here (a program change: a Program; a note: a Note button).
- Paint: pick a color (or Auto), then tap the controls to color them; Done ends it. A control's color is its CC's: the State view, the snapshots and the Surface show the same one.
- Grid ▸ Double for finer placement (nothing moves); Build from watch list lays out a rotary per watched CC.
- The numbered tabs above and on the left insert or remove a column or row; the large + keys add one.
A control's setup
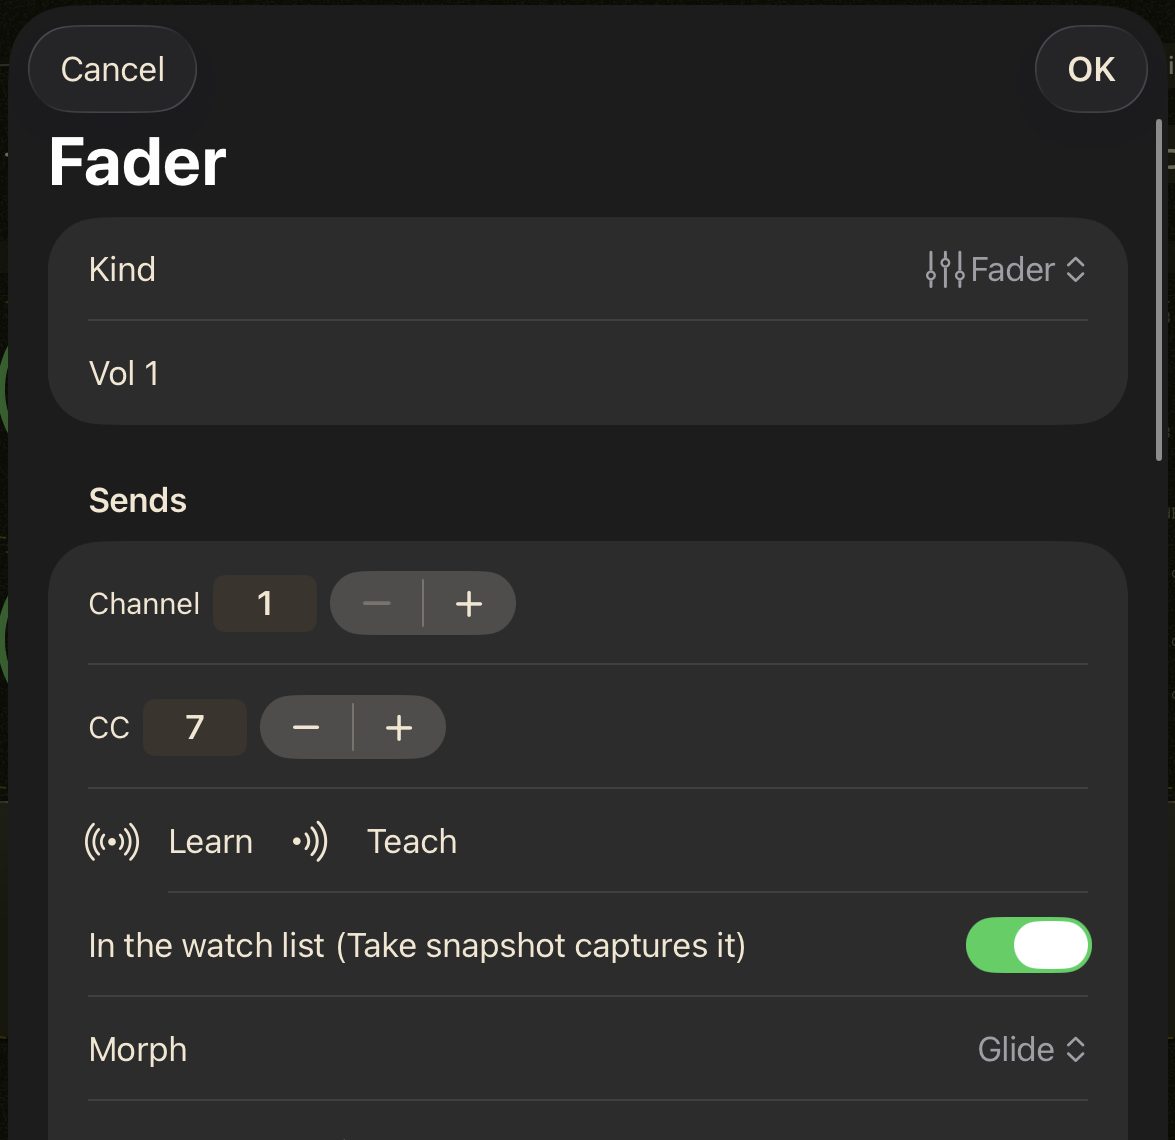
Tap a control in Edit: its kind and name, what it Sends (channel, CC — Learn it from your controller, or Teach it to the synth), whether it's in the watch list, and its morph.
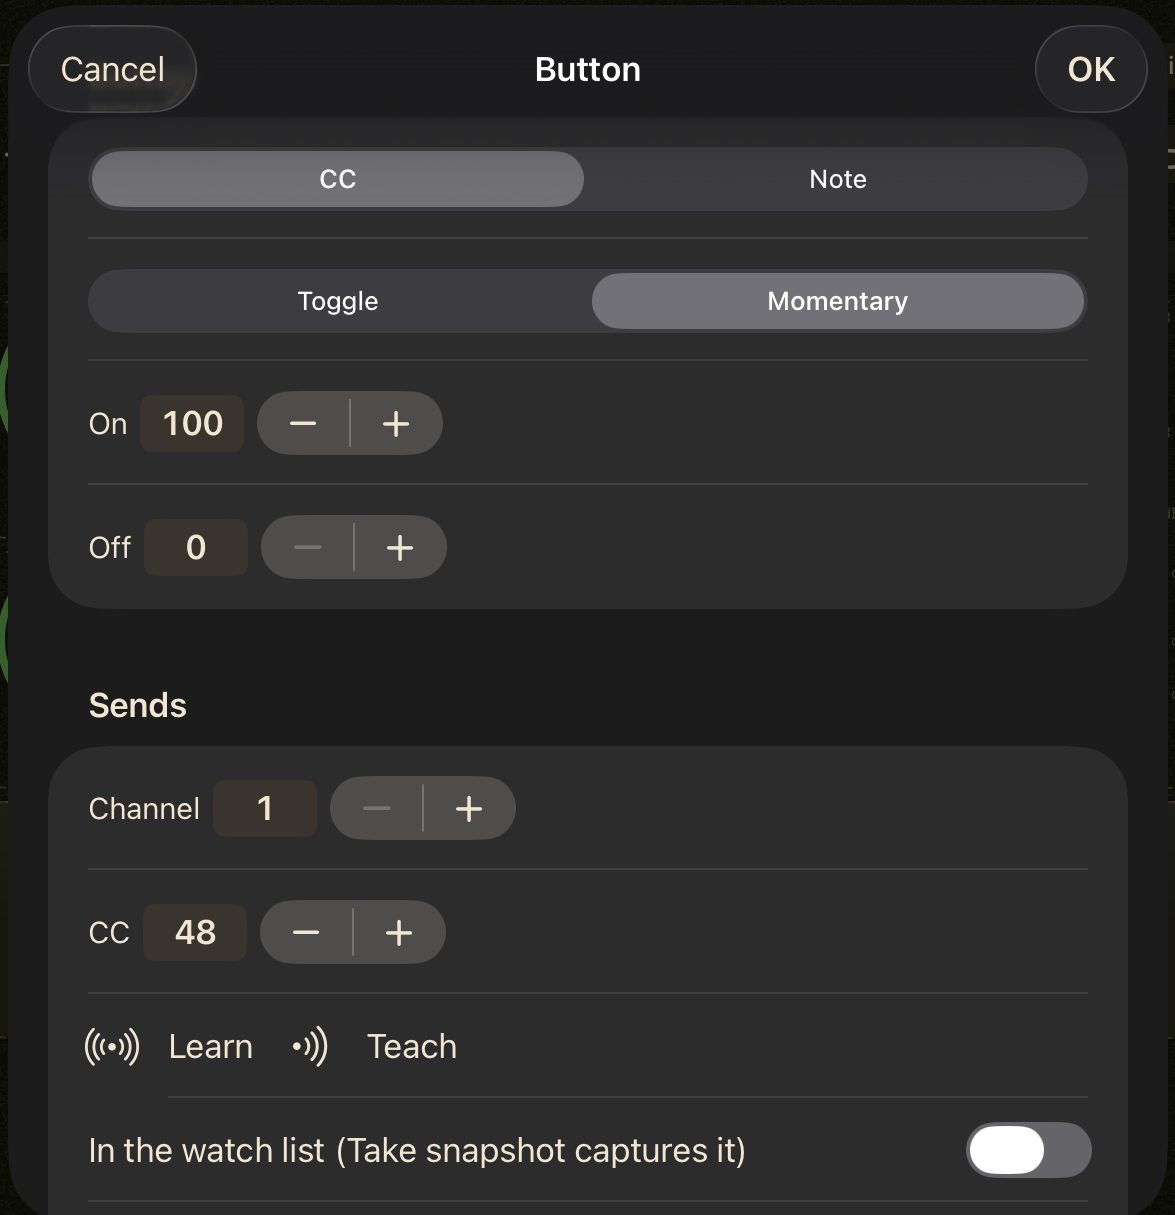
A button is first CC or Note, then toggle or momentary, with its on / off values (a note: its velocity).
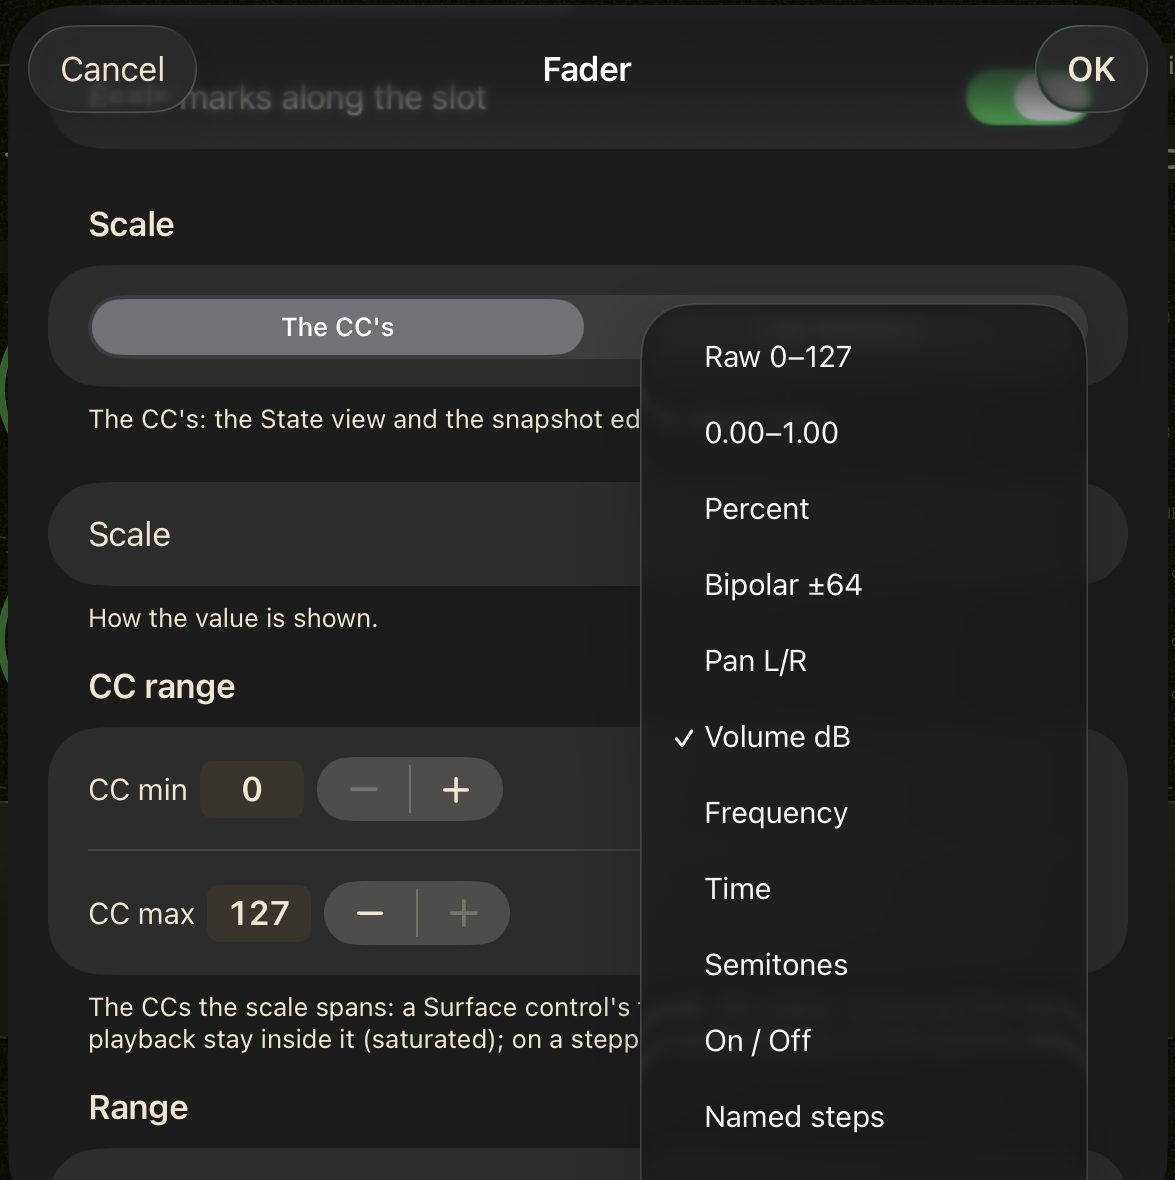
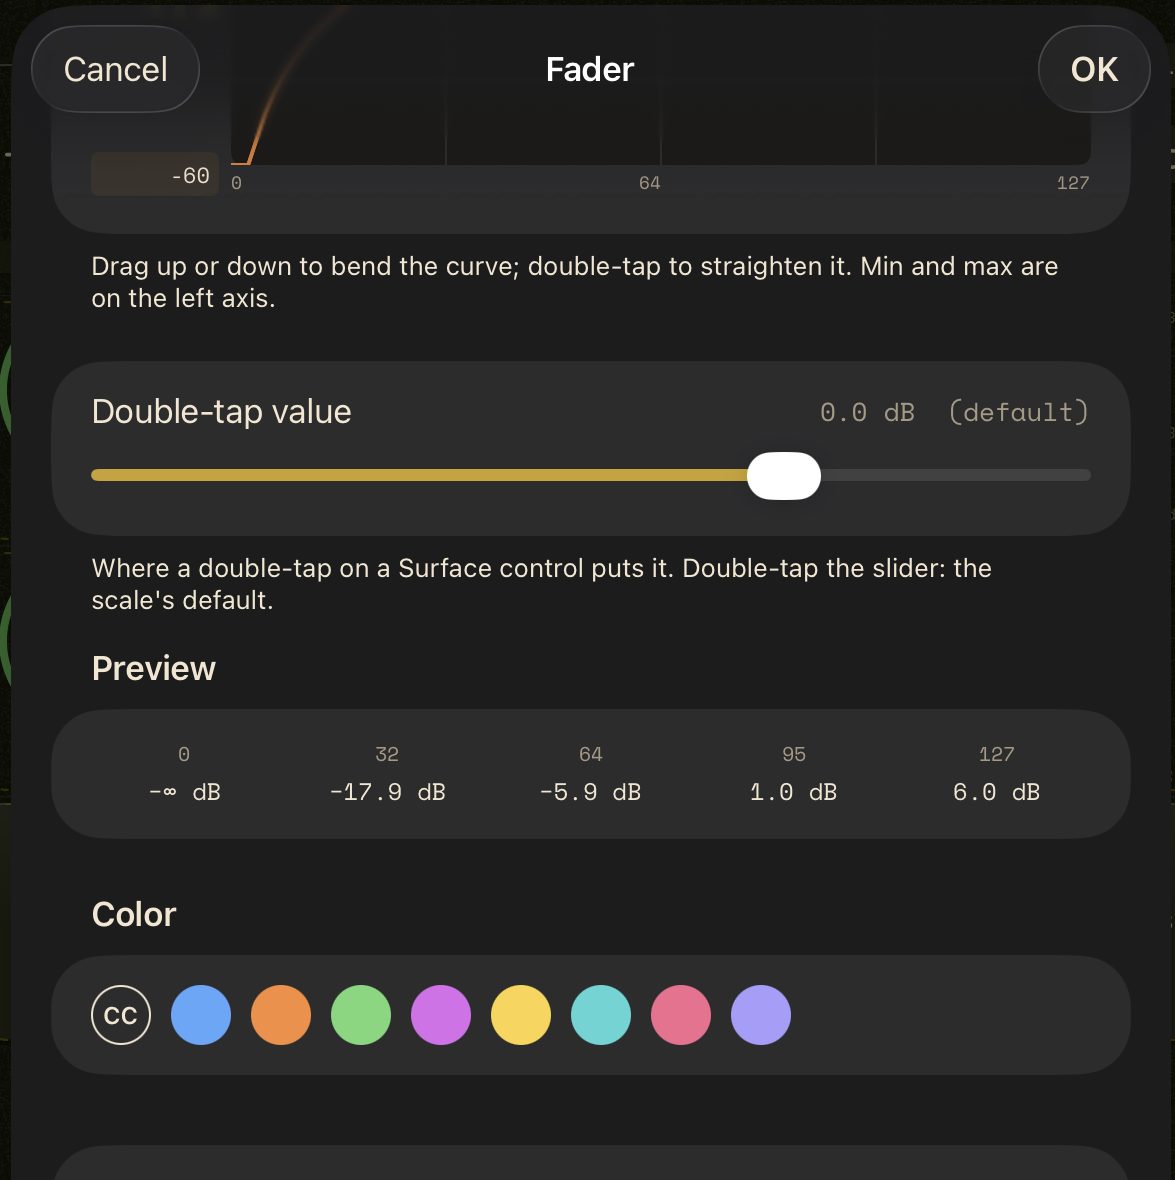
Scale: the CC's own (shared with the State view) or the control's; how the value reads, the CC range it spans, and its unit, decimals and curve — drag the curve to bend it.
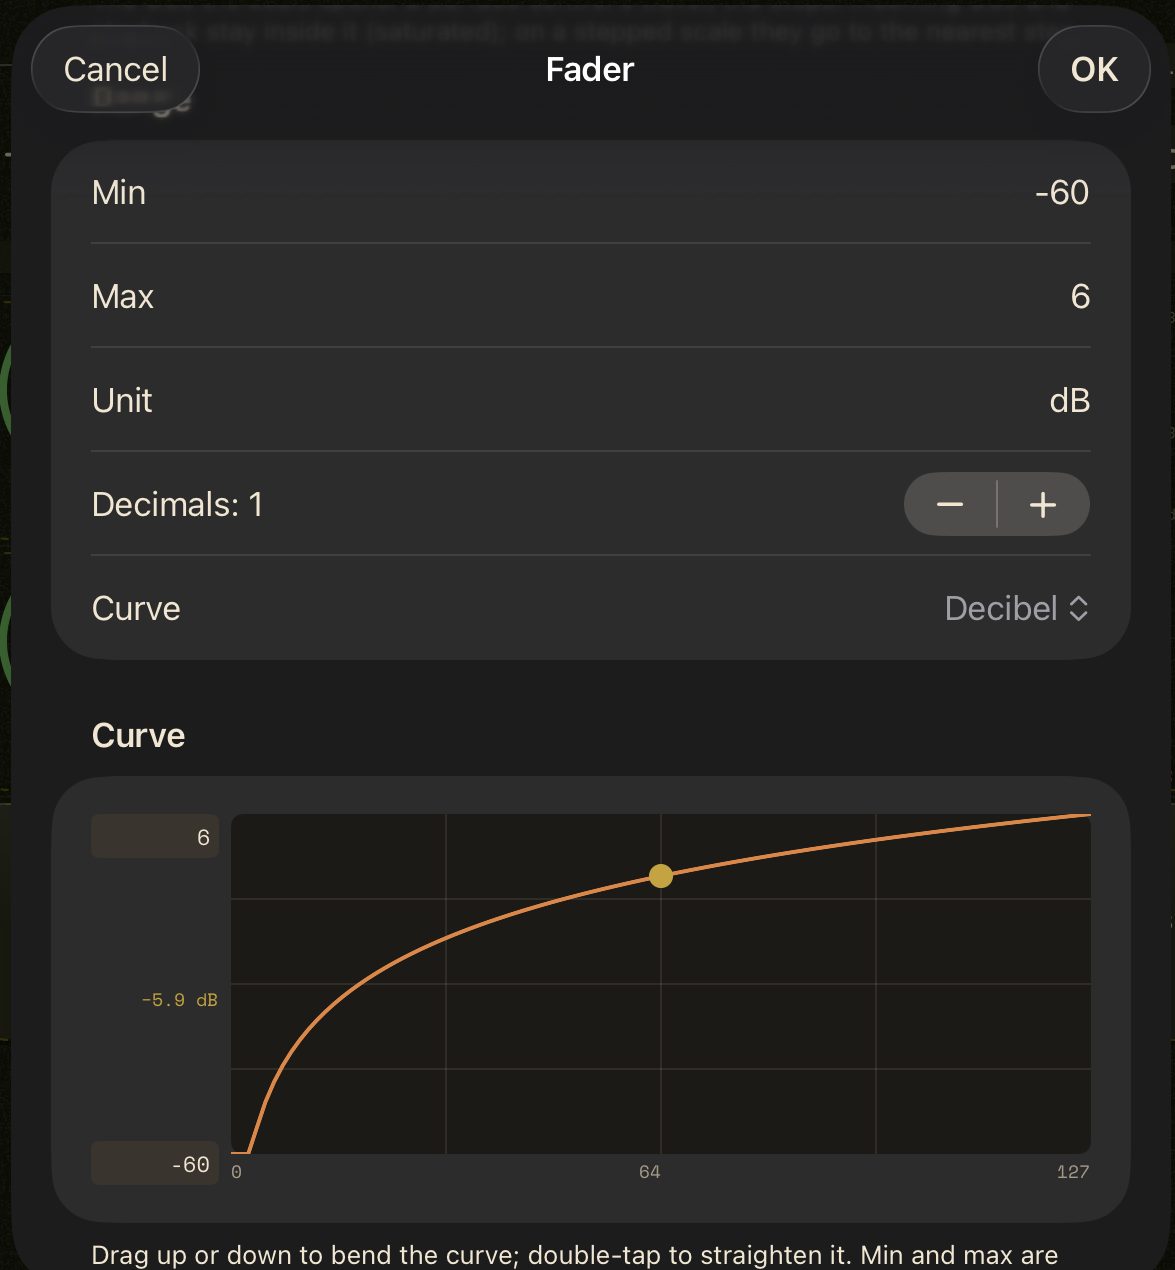
The double-tap value, a preview of the values along the travel, and the color.
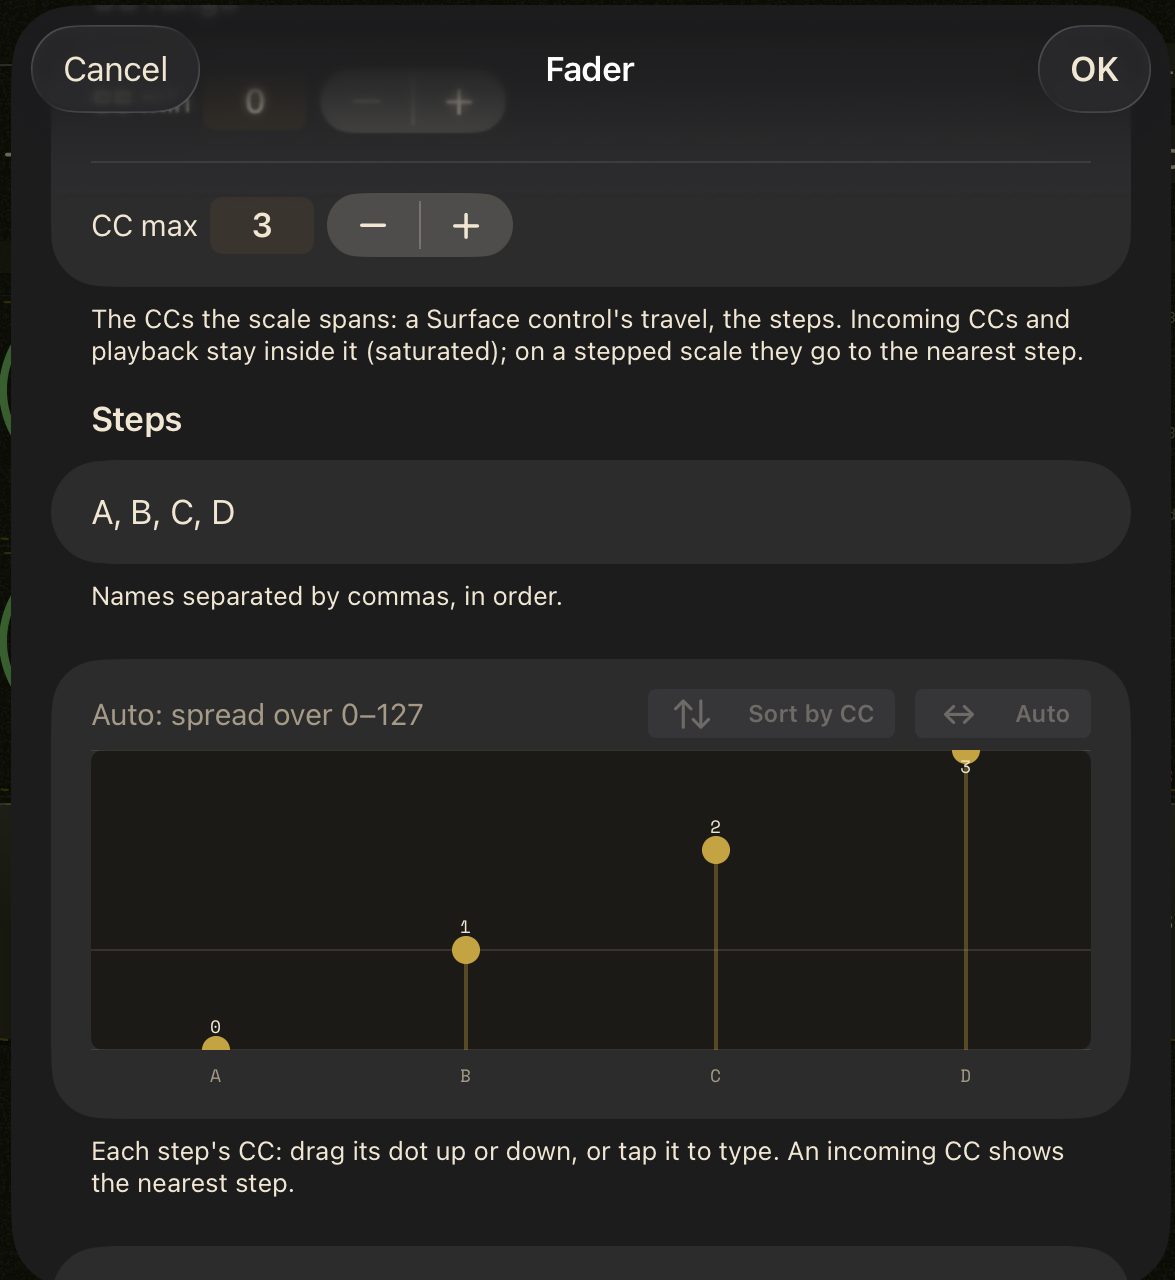
Named steps (A, B, C, D…): each step's CC on a graph — drag a dot, or tap it to type.
Several at once
Select (in Edit): tap controls, or drag over the grid. Then drag one of them to move them all, or:
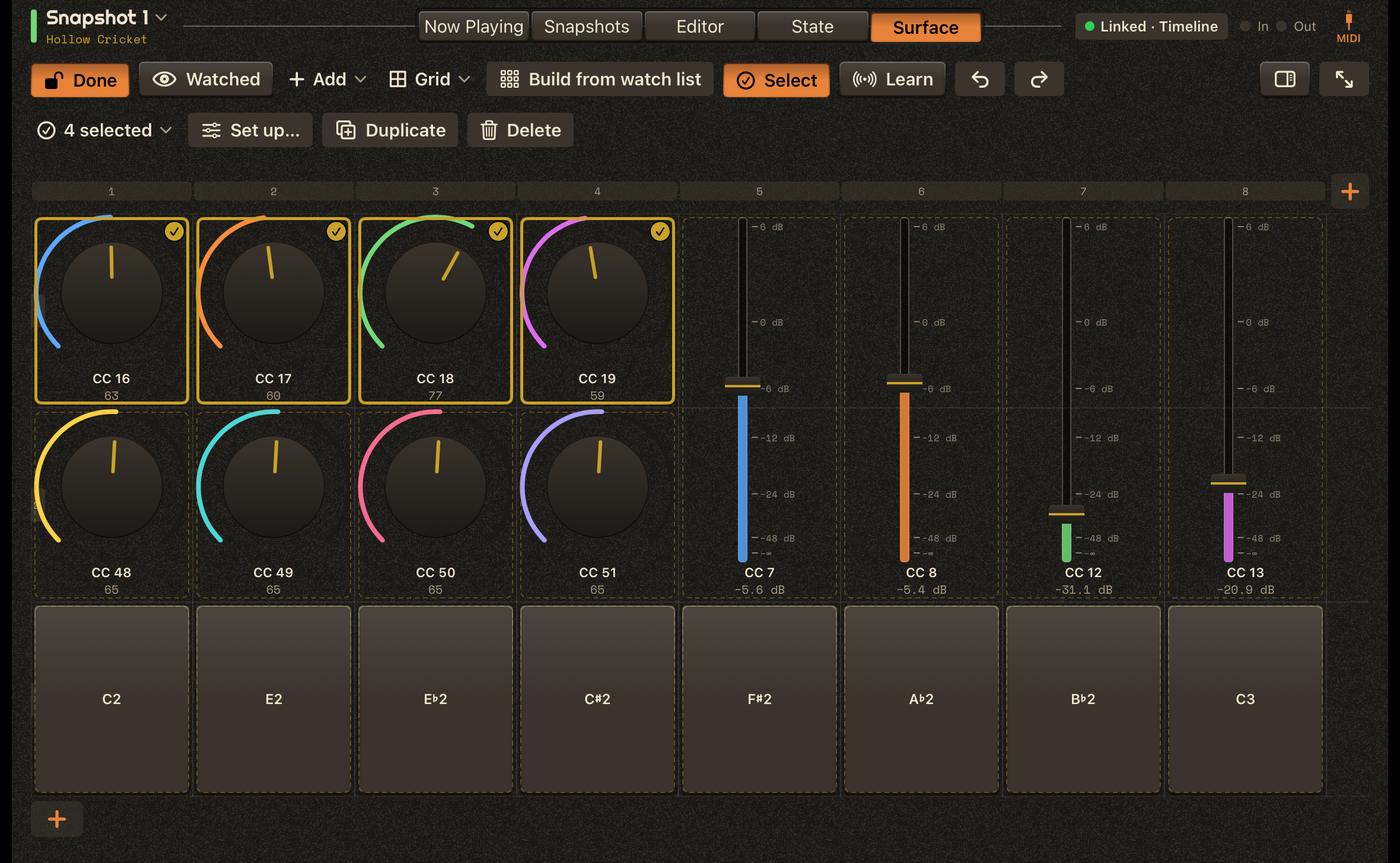
- Set up…: one sheet for all — kind, size, color, scale, numbers, channels and names (keep, set, or consecutive; # stands for the number). Only the fields you change are applied.
- Duplicate: a copy in the next free place, its CCs moved past the selection's.
- Delete.
 Metronome
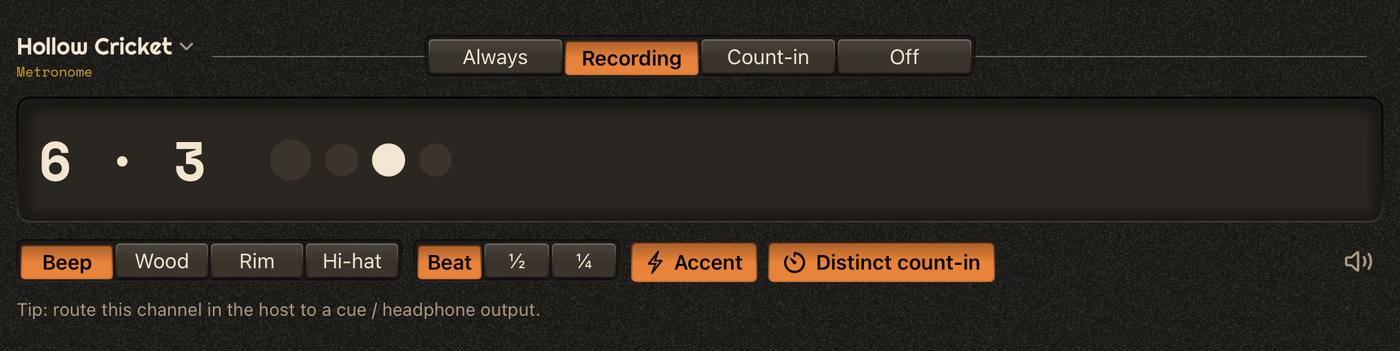
Load Orrery Metronome as an instrument, on its own channel: you can send the click to headphones only, out of the main mix, with its own fader.
When it clicks
- Always, Recording (count-ins and recordings, default), Count-in only, or Off.
- It follows the host's tempo and time signature, and plays only while the host plays. The bar and beat show large.
Sound
Built-in clicks (beep, wood, rim, hi-hat), a subdivision (beat, ½, ¼), the first beat accented, and a distinct count-in sound.
Count-in
A count-in is set in the Timeline (tool row) and the Matrix: off, 1 or 2 bars. When a recording starts, the song starts that much earlier so you hear the bars leading in; a countdown shows on screen. Without a Metronome loaded, the count-in still happens, silently.
 Orrery Control
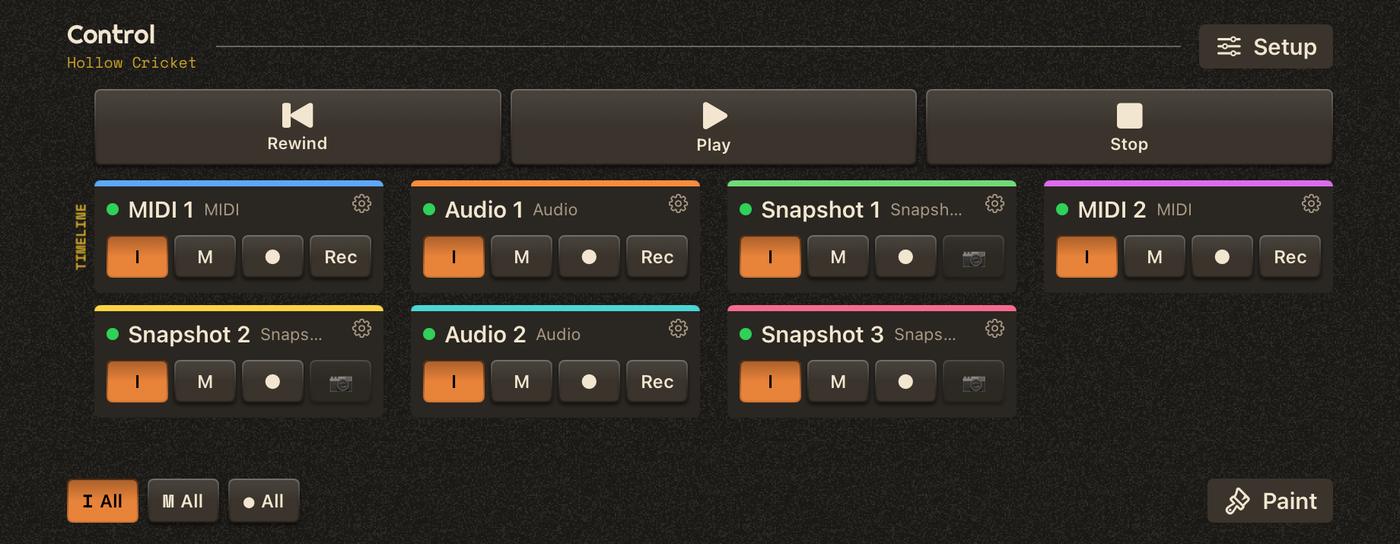
The session's controller — optional. The song plays without it: the Timeline, the Matrix and the track plugins don't need it. Load it when you want to shape how you play the session — Orrery driving the host (windows, mute, arm, the transport), every track at a glance, a controller or a foot switch stepping through tracks and scenes.
Set up
Route Orrery Control's MIDI output to the host's MIDI control input (in AUM: MIDI Control). Then open Setup: Keys first (the transport, your own buttons), Auto assign, the tracks' messages, the AUM maps and the display. Each message has Teach (it repeats until Stop, while the host's MIDI learn listens) and Learn (the next CC or note you send sets it).
Track states → host
Each track has its own channel (song order) and each state its CC:
- Selected — a one-shot, sent each time you tap a track's name (a lane, a channel, a card): map it to the plugin's Show in front, and its window comes up.
- Muted → the channel's mute; Bypass (muted with Bypass when muted, or an inactive exclusive member) → the plugin's bypass;
- Armed → the channel's record enable; Input, Playing — off by default.
Send all (Setup) resends every state; also at song open and on Play, so the host stays in sync.
Keys
Rewind, Play, Stop (and Record, your own buttons) send messages to map in the host. Play, Stop and Rewind check themselves: if the host doesn't react, the key shows ! — map it. Previous / Next marker act on the Timeline directly.
The overview
One card per track, by where it plays (the Timeline, each Matrix — the place's name upright, in gold): its light, name and kind, then I, M, ● and Rec (Timeline tracks) or 📷 (snapshot tracks, armed: a snapshot). A green outline: it plays; a red one: it records. The gear opens Track settings…; a tap on the name brings its window up.
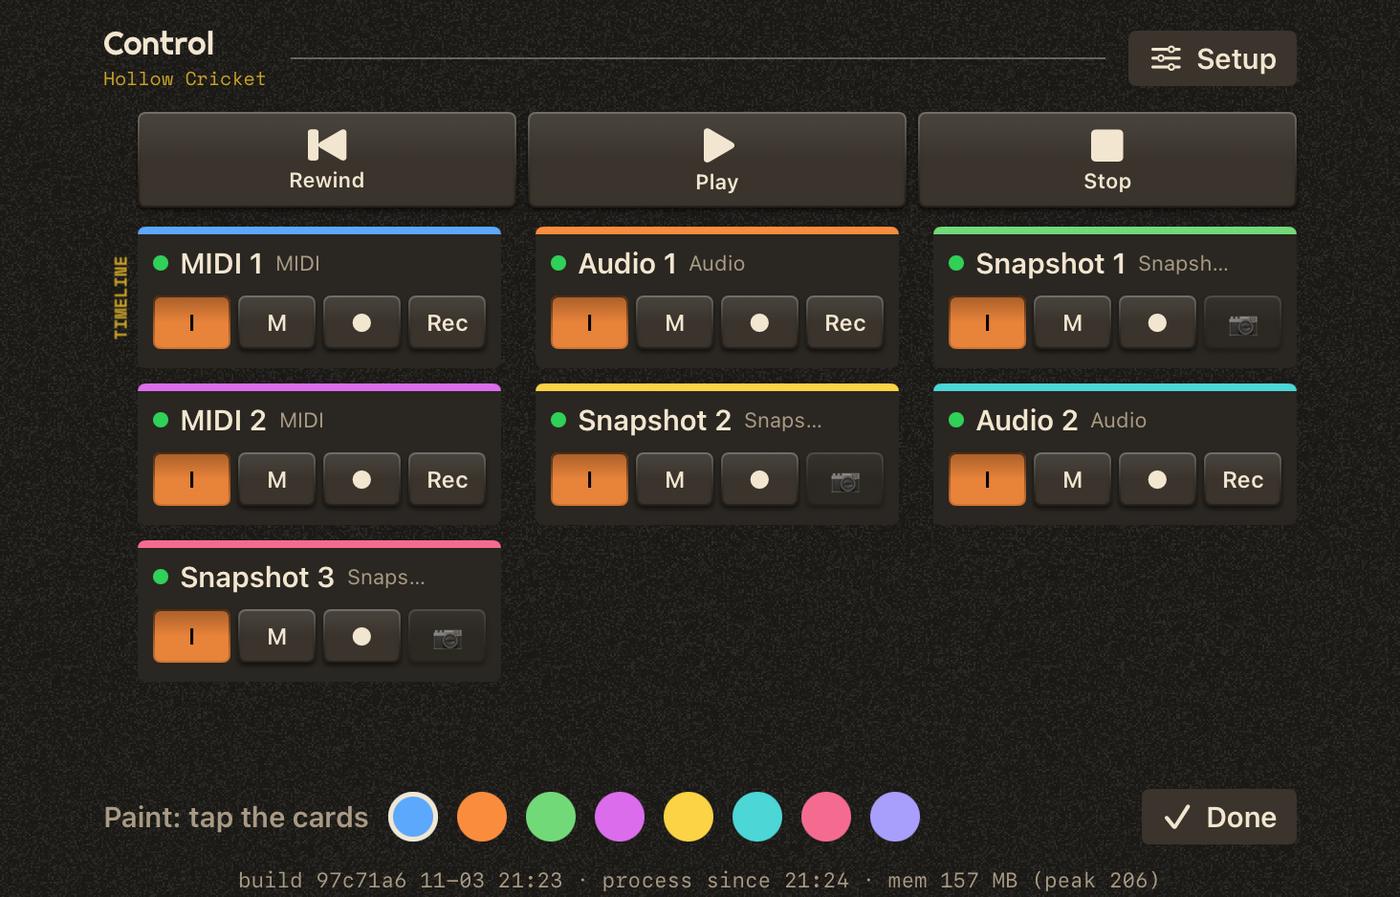
Below, I All, M All, ● All: lit while any track has its input / is muted / is armed — a tap turns that off everywhere, or, when none is on, on everywhere. On the right, Paint: pick a color, tap the cards.
Any size
Make its window as small as you like: one row of transport keys; bigger, the markers and your buttons; then the cards, on one line or wrapping.

The focus
Control has a focus — one track per song, shown by a thin gold line under its card, its lane and its channel (a Matrix lane or a collapsed group shows which: 2/4). Tapping a name moves it there; so do the host parameters Next / Previous track and Track. The focus's Input, Mute, Arm, Rec and Window parameters act on it — map them to a controller (see Host setup).
Maps for AUM
In Setup: Link AUM's MIDI Mappings folder once, then Generate for AUM — AUM's Transport, each track's Orrery plugin, each MIDI track's synth (slot 0 of its channel), each audio track's channel. In AUM: MIDI control ▸ Load.
- Loading a map replaces what was mapped there. To keep your own mappings: Save them in AUM first, then Merge with a saved map…, and load the “+ Orrery” map.
- Remove this song's AUM maps… (Setup) deletes the maps Orrery wrote for the song; the app's Clean up tab removes those of deleted songs. Your own maps stay.
ctrl
With an Orrery Control on the song, the Timeline and the Matrix show a small ctrl: tapping it asks Orrery Control to send Show Control — map that to Orrery Control's own Show in front, and it comes up.
Songs
Songs are stored by Orrery, outside the host. The host's session only remembers which song each plugin uses — the song itself is saved continuously.
In the plugins
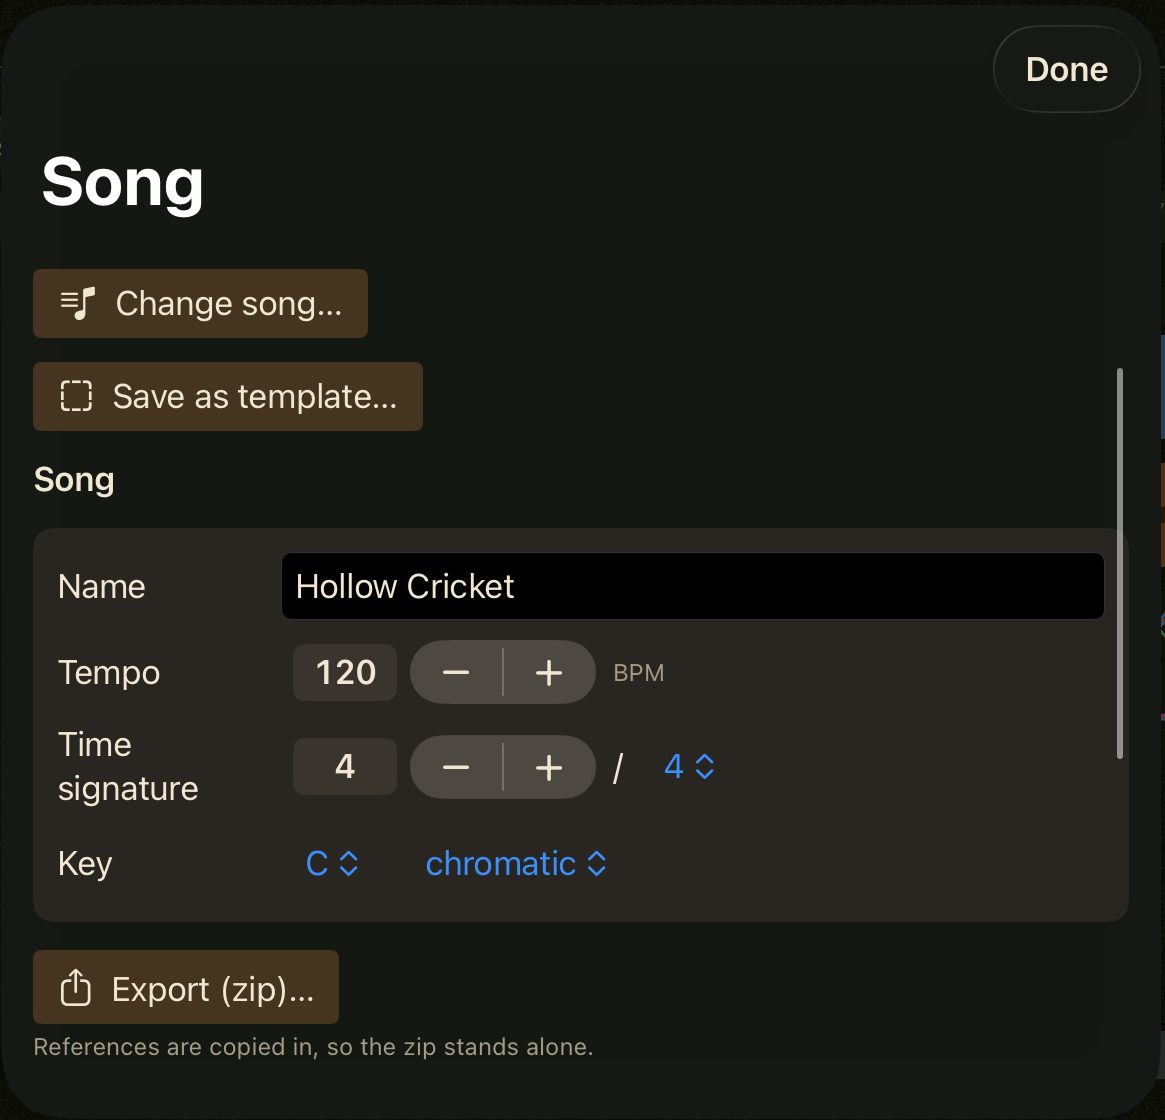
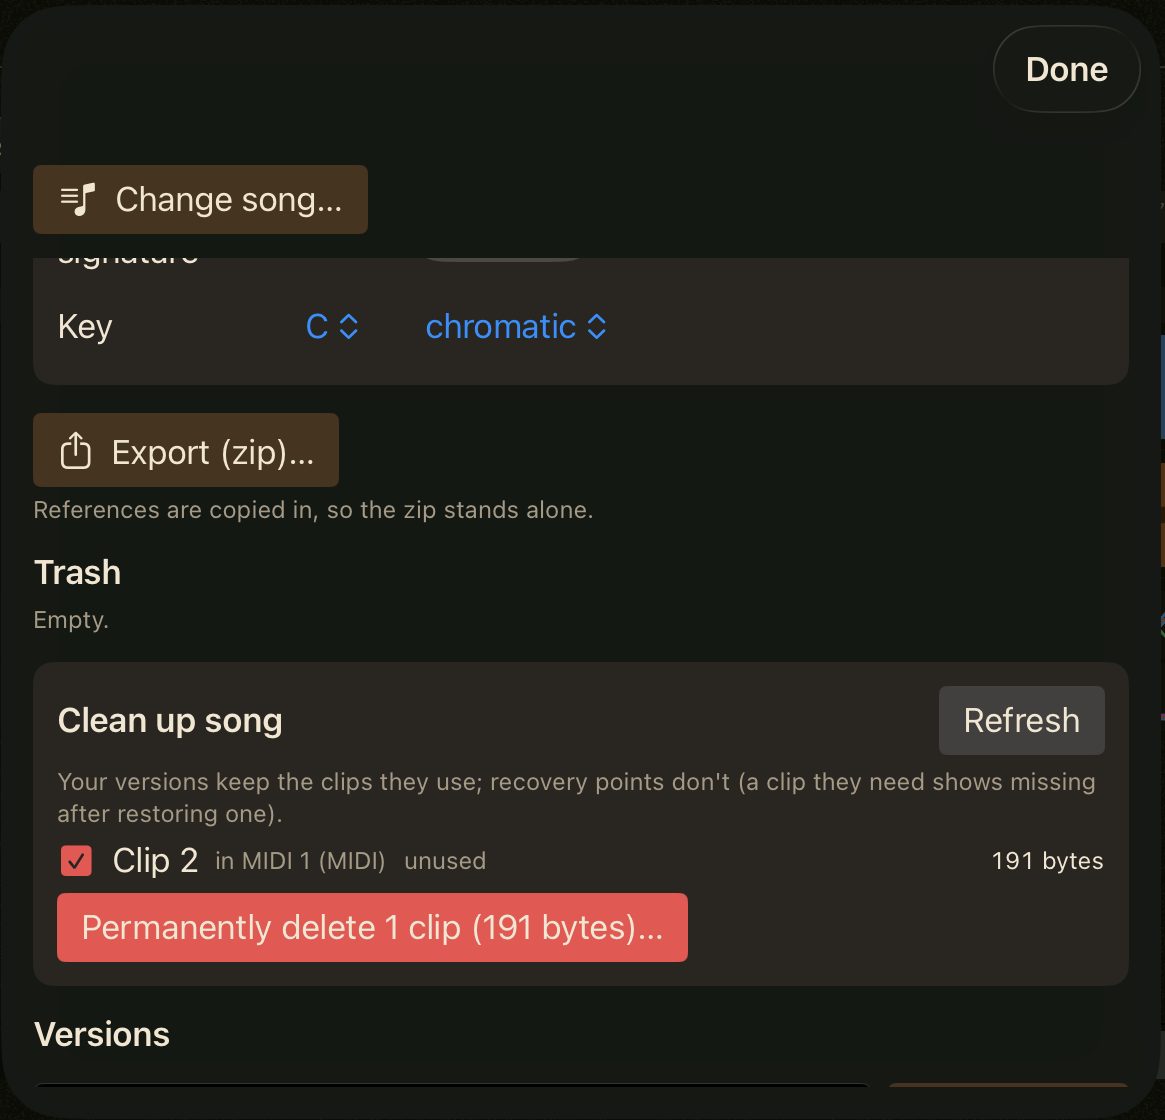
The song's name in the Timeline (or a track's name menu in the other plugins) opens the song panel: Change song…, Save as template…, the song's name, tempo, time signature and key, Export (zip)…, the Trash, Clean up song and the versions.
The Songs tab (this app)
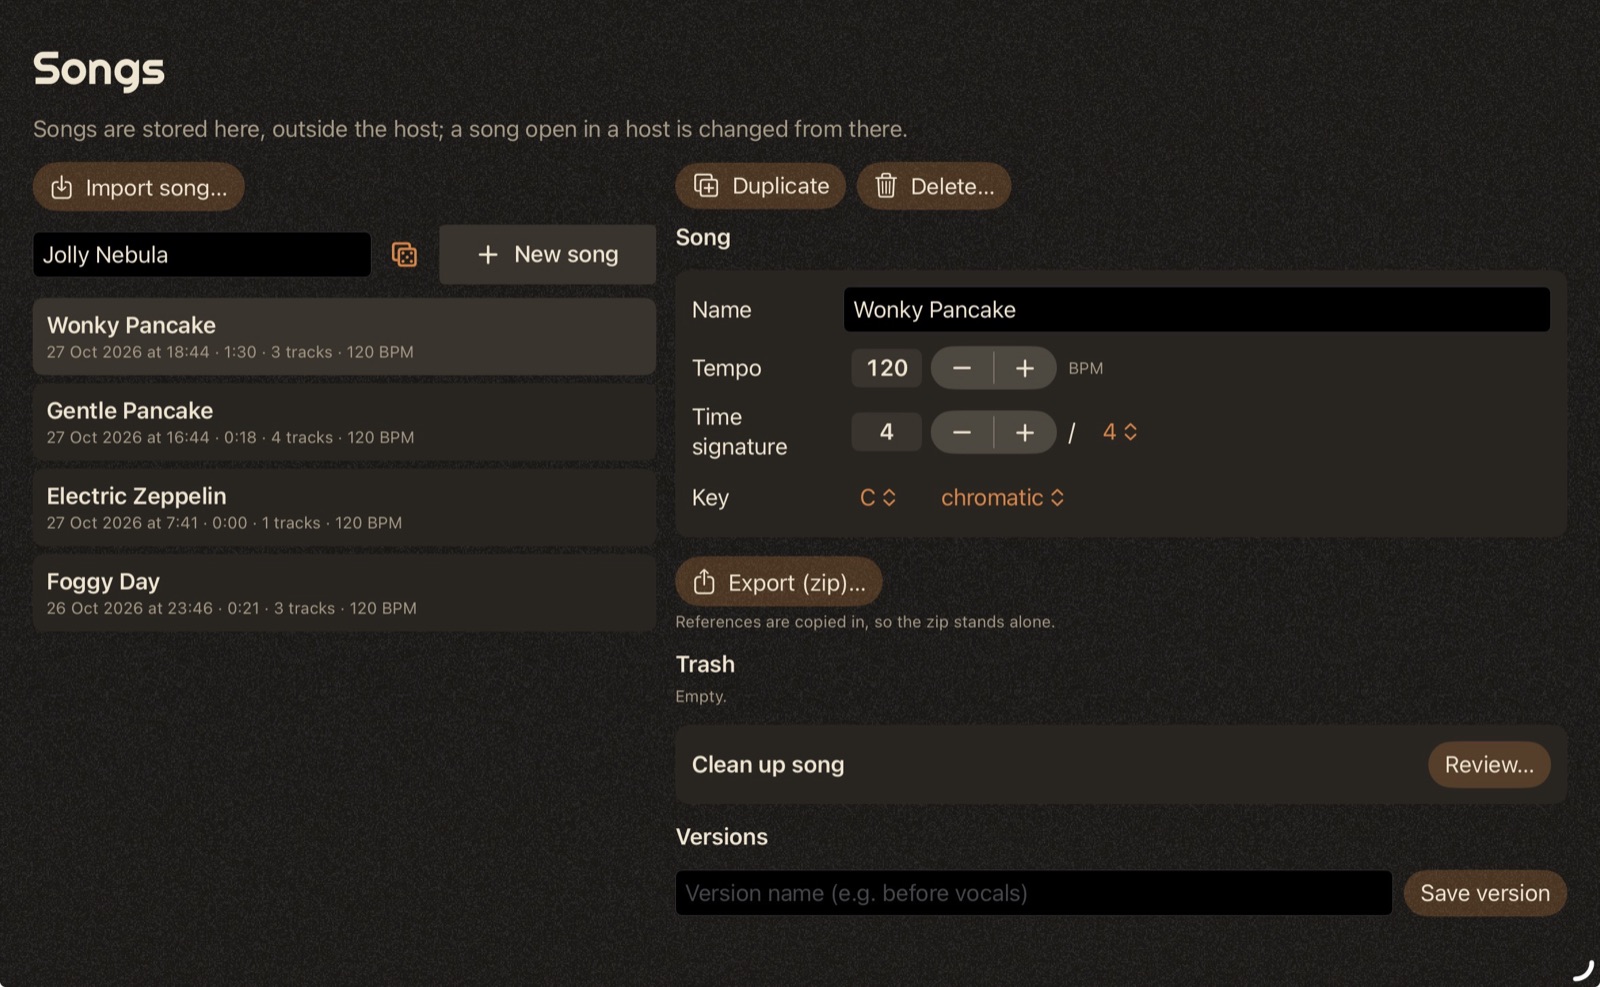
- New song (the dice proposes a name), Import song… (a zip exported from Orrery, on this iPad or another one). Songs / Templates switches the list; the search field filters it.
- Select a song to change its name, tempo, time signature and key, or to Duplicate or Delete it.
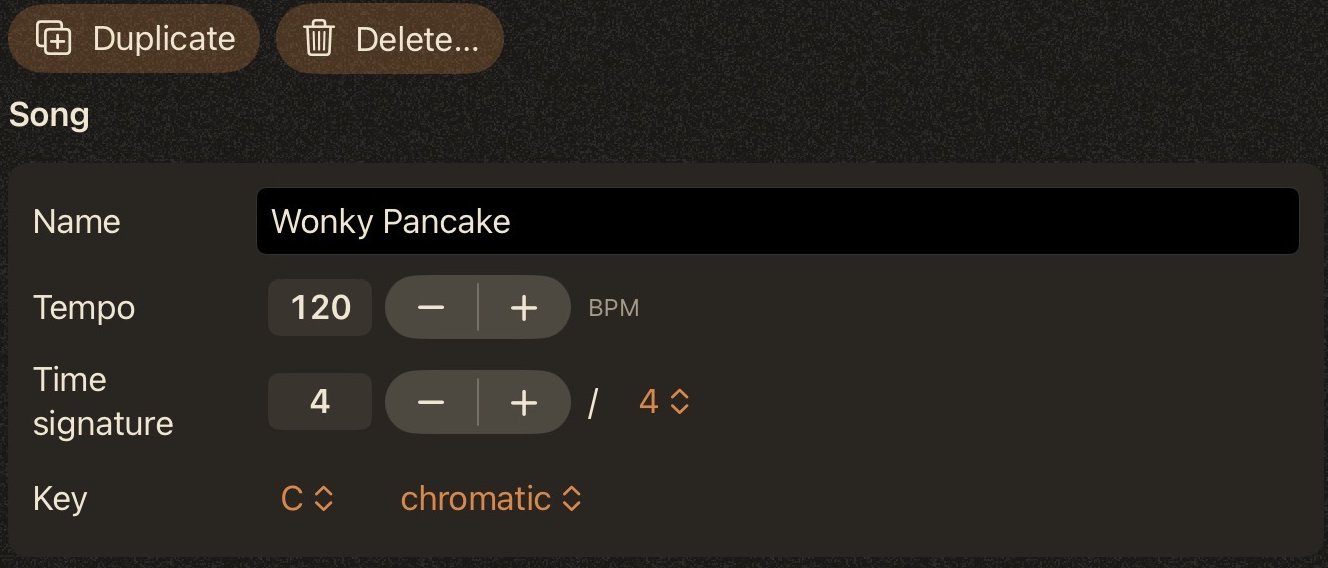
- Export (zip): the whole song in one file, references included.
- Trash: deleted tracks and clips, restorable. Clean up song removes them for good, with recordings no longer used.
- Versions: save one before a big change (“before vocals”); restore it later. Recovery points are also saved before opening, restoring and importing (the last 5).
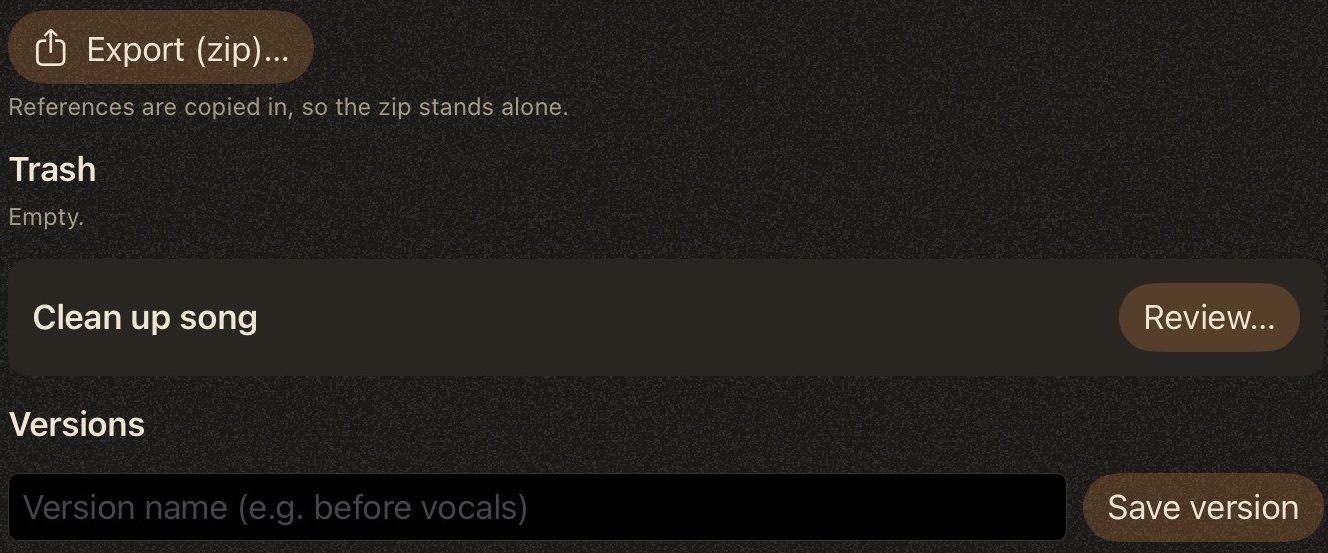
Clean up (this app)
The Clean up tab finds what deleted songs left behind — the AUM maps Orrery wrote for them — and, song by song, the clips no song version uses. Each removal asks first.
Templates
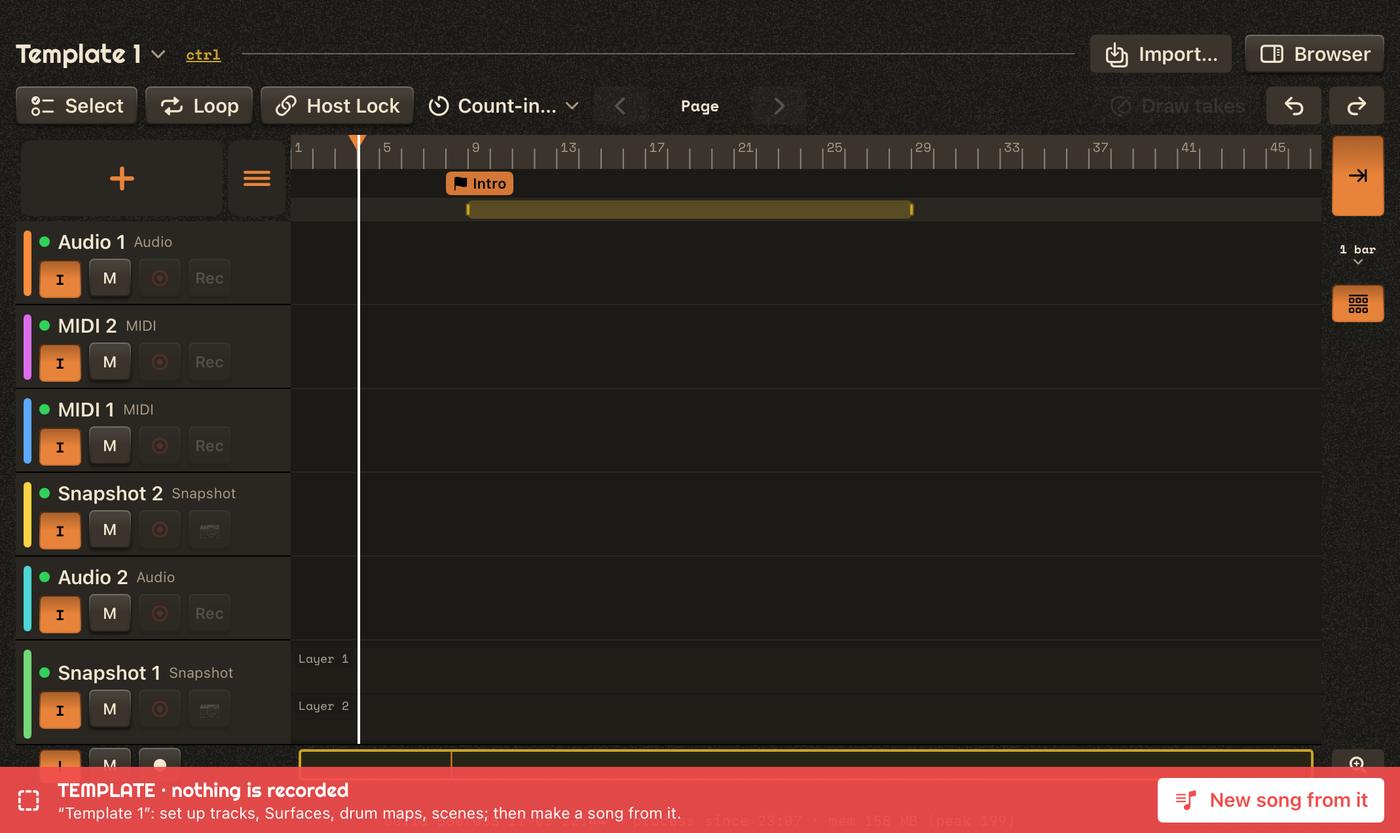
A template is a song without content: its tracks, lanes and groups, the Matrix's channels and scenes, the Snapshot watch lists, Surfaces and CC mappings, the drum maps — no clips, no snapshots, no recordings. A starting point for new songs.
- Save as template… (the song panel), or New template from scratch in the Templates list: a name, and whether to copy the tempo, the markers, the loop and the Snapshot CC mappings.
- On a template, every Orrery plugin shows a red band: nothing is recorded there. New song from it asks for a name, then every plugin follows.
Host setup
Transport
Orrery follows the host's Play / Stop and tempo. The Timeline's sync (Host Lock key):
- Relative (default): Play starts the song at its start marker.
- Locked to host: the song position is the host's position.
Host control
Orrery tells the host what it does through Orrery Control (see its page): load it, route its MIDI output to the host's MIDI control input, and map its messages.
Parameters
Every Orrery plugin has Audio Unit parameters: map them to a controller or a foot switch in the host (in AUM: the plugin's MIDI control). Push buttons act when pressed and go back to Off by themselves.
- Orrery Control: All input / mute / arm, Next / Previous track and Track (the focus), the focus's Input / Mute / Arm / Rec / Window, Previous / Next marker, Loop, Send all states.
- Timeline: Next / Previous track (its lanes, a Matrix's channels at its place), the focus's Input / Arm / Rec, All input / arm / rec; Sync mode, Count-in.
- Matrix: Launch scene, Next / Previous scene, Stop all, Back to arrangement, each channel's Stop and Arm; Next / Previous channel, the focus channel's Input / Arm / Stop / Rec (into the last launched scene), All input / arm; Count-in.
- Track plugins: Record arm, Input / Monitor (Audio), Take snapshot and Recall snapshot (Snapshot).
There is one focus per song: a Matrix's Next channel takes it from a Timeline track, and the other way round.
Saving
Save the host's session as usual — it keeps each plugin's song and settings, and the Timeline's zoom and position. The song itself is saved continuously by Orrery.